86. Shift Solenoid Valve Assemble
Shift Solenoid Valve Assemble
Special Tools
* J-33163 - Valve Tray Set
* J-43773 - Valve Spring Compressor
For equivalent regional tools, refer to Special Tools (Allison - Automatic Transmission).

Caution: Refer to Transmission Control Valve Body Overhaul Caution (Transmission Control Valve Body Overhaul Caution).
Note: To help prevent confusing parts on assembly, J-33163 - tray has been used during the disassemble procedure in order to store the removed valves, springs, and stops.
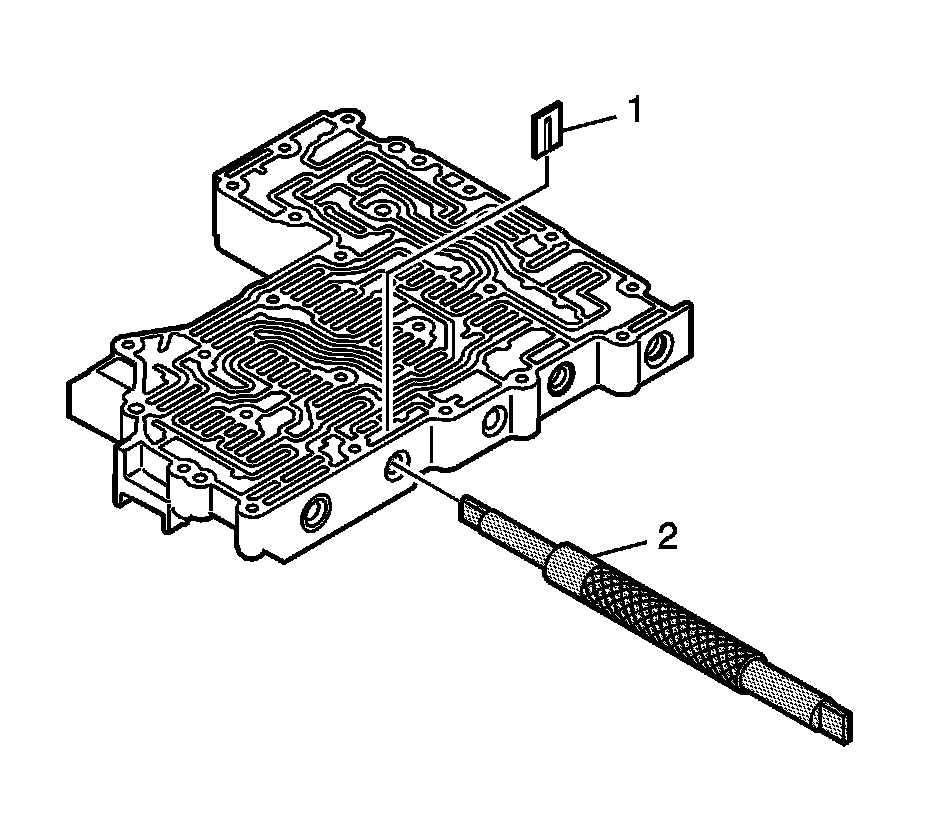
1. Install the shift solenoid screen (1).
2. Measure the screen installation depth at dimension A. The screen installed depth is 0.50-1.0 mm (0.020-0.039 in) below the shift valve body surface as shown.

3. Install the control main valve (1) and the control main spring (2).

4. Compress the spring with J-43773 - compressor (2).
5. Install the retaining clip (1).
6. Make sure the retaining clip is below the valve body surface.

7. Install shift valve 2 (SV2) (1), spring (2), and plug (3).
8. Compress the spring with J-43773 - compressor (2).
Install the retaining clip (1).
9. Make sure the retaining clip is below the valve body surface.

10. Install shift valve 3 (SV3) (1), the spring (2), and plug (3).

11. Compress the spring with J-43773 - compressor (2).
12. Install the retaining clip (1).
13. Make sure the retaining clip is below the valve body surface.

14. Install shift valve 1 (SV1) (1) and spring (2).

15. Compress the spring with J-43773 - compressor (2).
16. Install the retaining clip (1).
17. Make sure the retaining clip is below the valve body surface.