Vacuum Brake Booster: Service and Repair
Brake BoosterBrake Booster:
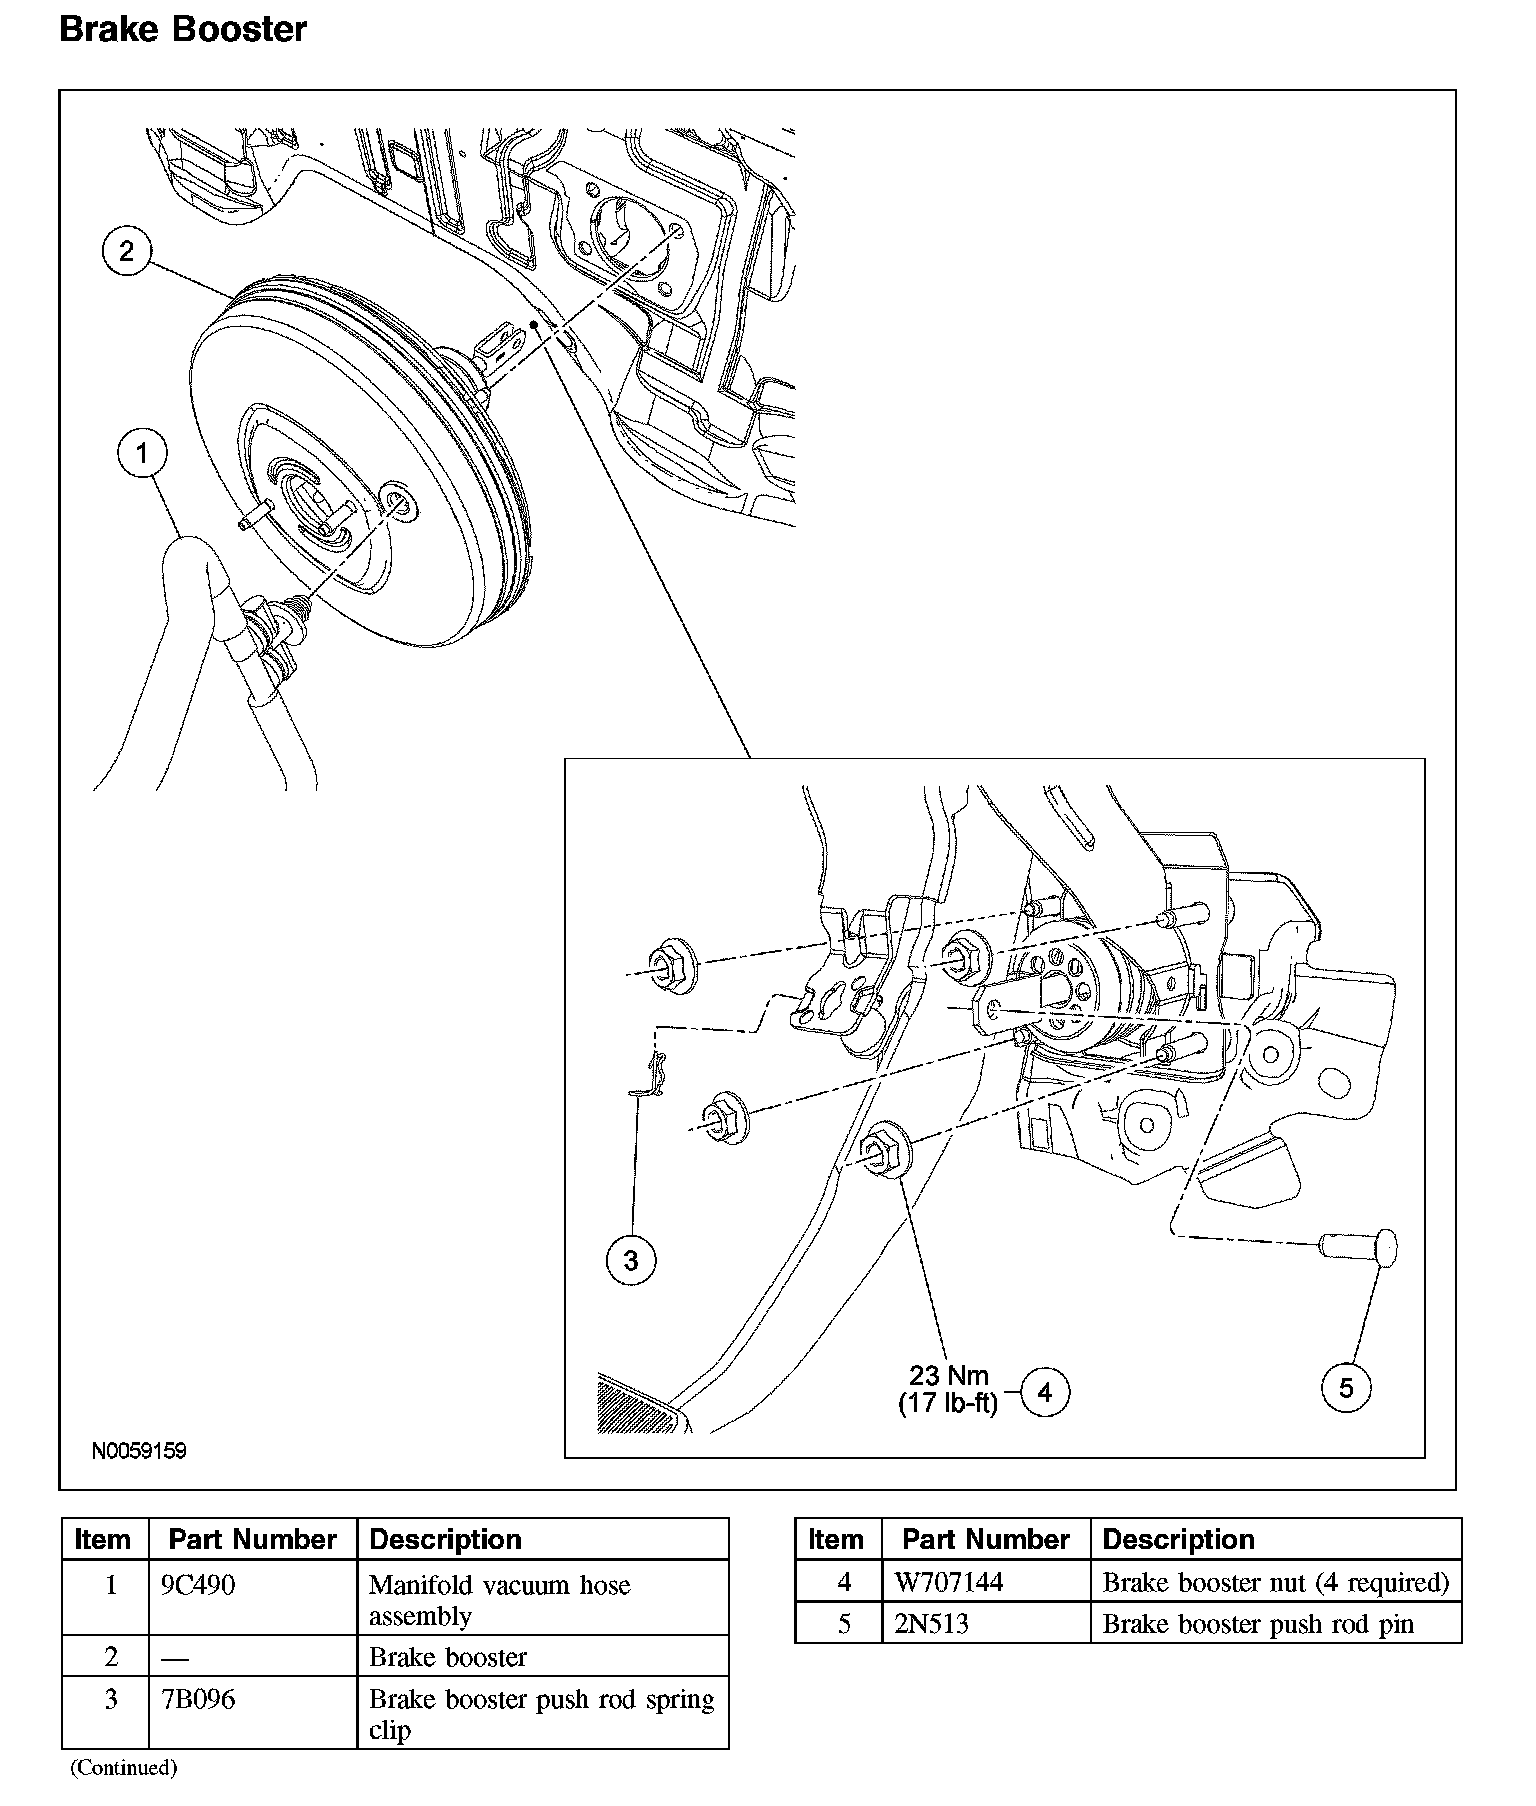
Removal and Installation
1. CAUTION: Always remove the stop lamp switch with the brake pedal secured to the brake booster push rod and with the brake pedal in the at-rest position. Do not press or pull on the brake pedal when removing the switch or damage to switch can occur.
CAUTION: The stop lamp switch must be removed prior to removing the brake pedal and bracket, brake booster and associated mounting fasteners or damage to the switch can occur.
Remove the stop lamp switch.
2. CAUTION: The brake booster check valve must be disconnected from the brake booster (prior to removing the master cylinder) or the master cylinder seal may be drawn into the brake booster.
Disconnect the brake booster check valve from the brake booster to deplete the residual vacuum in the brake booster.
3. Remove the brake master cylinder.
4. CAUTION: Make sure that the vacuum hose assembly is routed correctly so it does not make contact with surrounding components.
Disconnect the manifold vacuum hose assembly from the brake booster.
5. Disconnect the vacuum hose and wire harness from the studs and position aside.
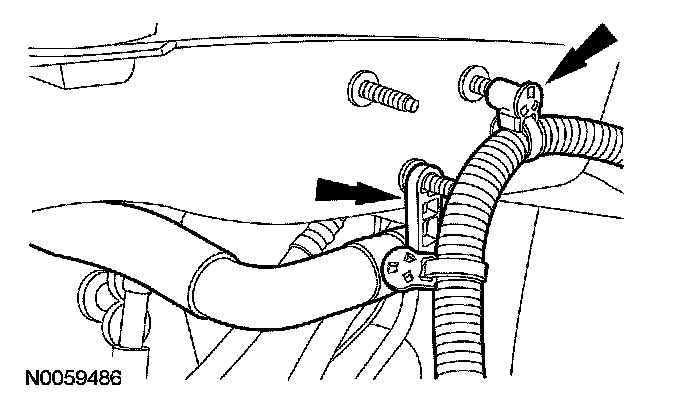
6. Remove the 2 pushpin fasteners and the lower instrument panel cover.
7. Remove the brake booster push rod pin and clip and disconnect the push rod from the brake pedal.
8. Remove the 4 brake booster nuts.
^ To install, tighten to 23 Nm (17 ft. lbs).
9. Remove the brake booster.
10. To install, reverse the removal procedure.
11. Check the brake booster for correct operation.