 |
bwl1ge00000178
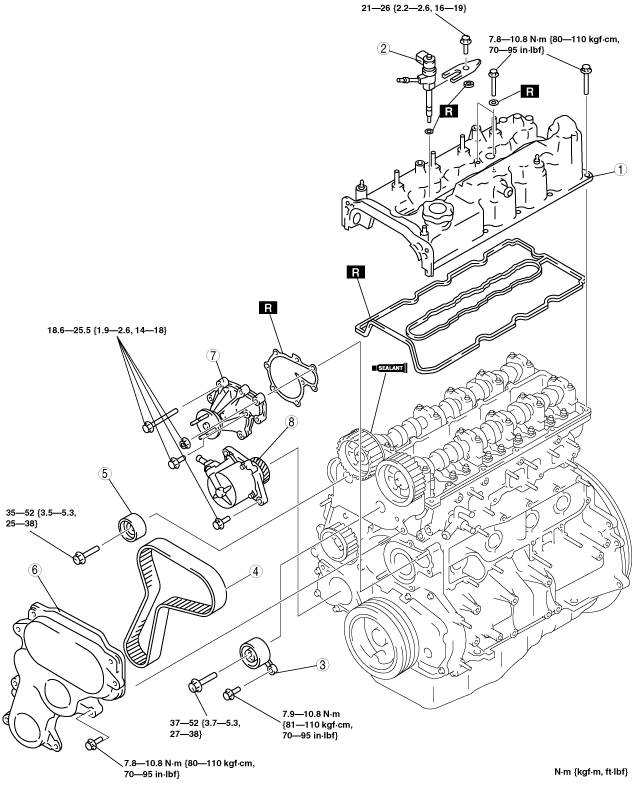
TIMING BELT ASSEMBLY [WL-C, WE-C]
id0110b6504500
1. Assemble in the order indicated in the table.
bwl1ge00000178
|
|
1
|
Cylinder head cover
|
|
2
|
Fuel injector
(See Fuel Injector Assembly Note.)
|
|
3
|
Auto tensioner
(See Timing Belt Assembly Note.)
|
|
4
|
Timing belt
(See Timing Belt Assembly Note.)
|
|
5
|
Idler
(See Timing Belt Assembly Note.)
|
|
6
|
Timing belt cover
|
|
7
|
Water pump
|
|
8
|
Vacuum pump
|
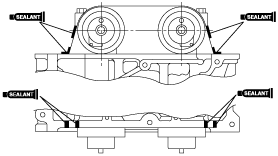
Cylinder Head Cover Assembly Note
1. Apply silicone sealant to the cylinder head as shown in the figure.
bwl1ge00000179
|
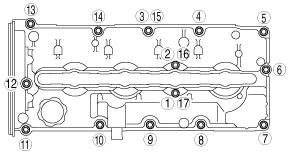
2. Tighten the cylinder head cover bolts in the order shown in the figure.
bwl1ge00000180
|
Fuel Injector Assembly Note
1. Using tweezers of 200 mm {7.87 in} or more, soak absorbent cotton with cleaning fluid and remove the carbon on the copper packing seating surface on the fuel injector.
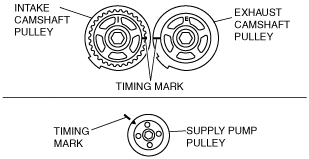
Timing Belt Assembly Note
1. Align the timing marks as shown in the figure.
bwl1ge00000181
|
2. Verify that the supply pump attaching bolts and nuts are tightened to the specified torque. This must be done to prevent over-tensioning of the timing belt after it has been installed.
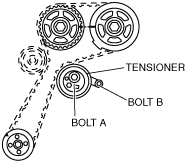
3. Install the tensioner and hand-tighten lock bolts A and B.
bwl1ge00000182
|
4. Install the timing belt.
5. Install the idler.
6. Tighten the lock bolt A.
7. Tighten the lock bolt B.
8. Remove the set pin from the tensioner.
9. Turn the crankshaft clockwise twice, and align the camshaft pully timing marks. If they are not aligned, remove the timing belt and repeat from Step 1.
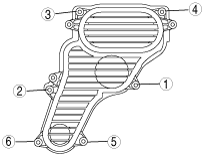
Timing Belt Cover Assembly Note
1. Tighten the timing belt cover bolts in the order shown in the figure.
bwl1ge00000183
|