 |
arnffw00000018
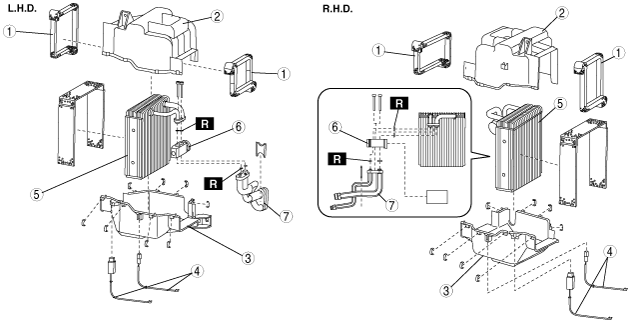
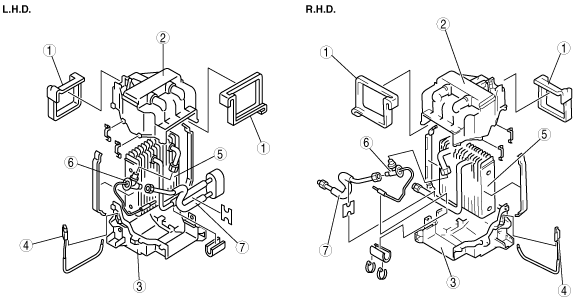
COOLING UNIT DISASSEMBLY/ASSEMBLY
id071100805300
1. Disassemble in the order indicated in the table.
2. Assemble in the reverse order of disassembly.
Type A
arnffw00000018
|
|
1
|
Polyurethane protector
|
|
2
|
Cooler case (1)
|
|
3
|
Cooler case (2)
|
|
4
|
Thermoswitch (With heater)
|
|
Thermistor (Without heater)
|
|
|
5
|
Evaporator
|
|
6
|
Expansion valve
|
|
7
|
High pressure pipe
|
Type B
absggw00002283
|
|
1
|
Polyurethane protector
|
|
2
|
Cooler case (1)
|
|
3
|
Cooler case (2)
|
|
4
|
Thermoswitch (With heater)
|
|
Thermistor (Without heater)
|
|
|
5
|
Evaporator
|
|
6
|
Expansion valve
|
|
7
|
Evaporator pipe
|
Expansion Valve assembly Note
absggw00001150
|
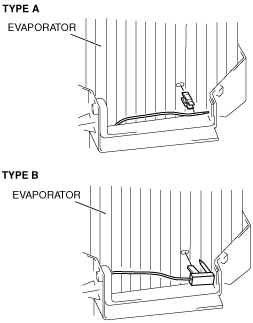
Thermoswitch and Thermistor Assembly Note
1. Assemble the thermoswitch or thermistor as shown in the figure.
absggw00002282
|
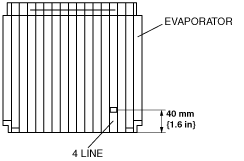
Evaporator size: 81 mm {3.2 in}
absggw00001152
|
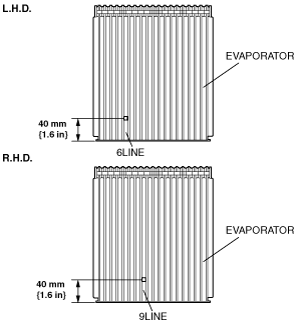
Evaporator size: 60 mm {2.4 in}
absggw00002023
|