1. Component views
Selector lever
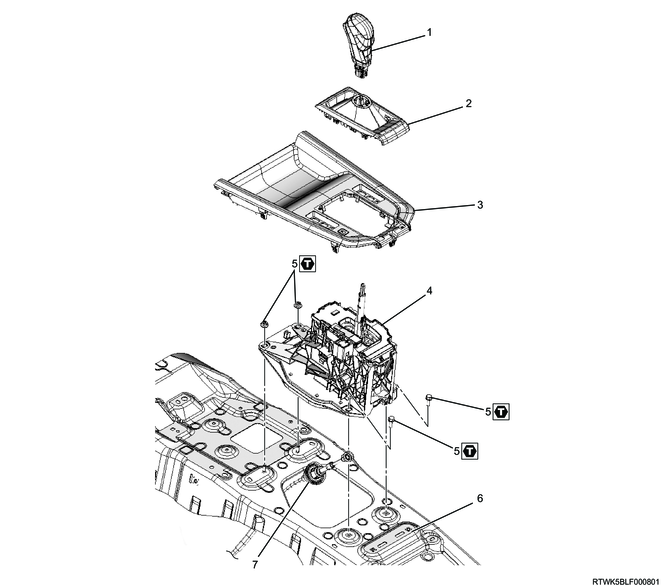
Part name
- Selector lever knob
- Selector boot
- Shift console cover
- Selector lever
- Bolt and nut
- Floor panel
- Automatic transmission control cable
Tightening torque
5: 7 N・m { 0.7 kgf・m / 62 lb・in }
2. Preliminary and post procedures
1. Preliminary procedures
1) Open the engine hood.
2) Disconnect the battery cable from the battery negative terminal.
Caution
- After turning OFF the ignition switch (power mode for models with passive entry and start system), do not disconnect the battery cable within 3 minutes.
- If the battery cable is disconnected within 3 minutes, the vehicle electronic control system may malfunction.
- If the battery cable is disconnected, perform the setting of the front door power window switch with AUTO UP/AUTO DOWN function after connecting the battery negative terminal.
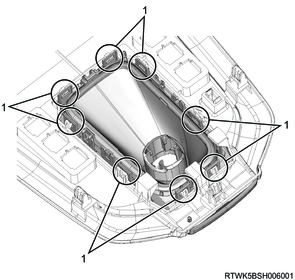
3. Console box removal
4. Shift console cover removal
1) Remove the selector boot from the shift console cover.
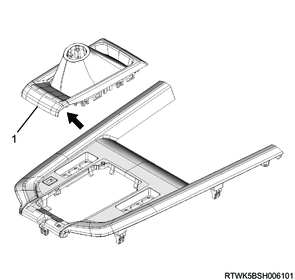
Legend
- Selector boot
Caution
- Remove the selector boot carefully in order to prevent the selector boot snap from cracking.
Legend
- Snap position
5. Rear ventilation duct removal
1) Remove the rear ventilation duct from the floor panel.
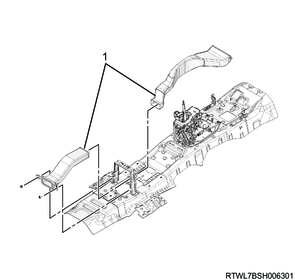
Legend
- Rear ventilation duct
6. Selector lever removal
1) Disconnect the harness connector from the selector lever.

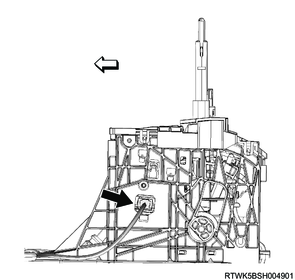
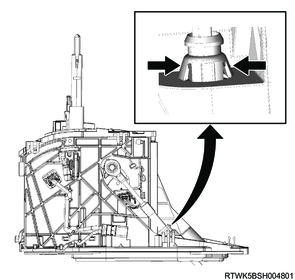
2) Disconnect the automatic transmission control cable from the selector lever.
Note
- Press the cap part of the automatic transmission control cable.
3) Remove the selector lever from the floor panel.
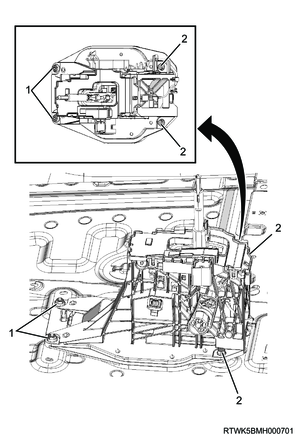
Legend
- Nuts
- Bolts