1. USB/AUX port installation
1) Install the external terminal (USB/AUX) to the center console.
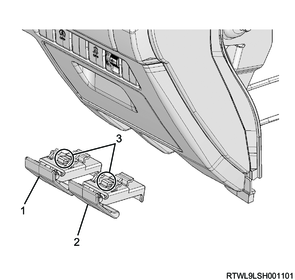
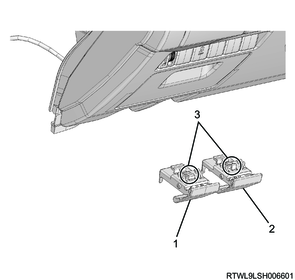
2. Center console installation
1) Connect the connector to the center console.
2) Install the center console to the instrument panel.
Models with console boxes

Legend
- Center console
3. Control panel and control lever installation
1. Models with manual A/C
1) Connect the connector to the control panel.
2) Install the control lever to the instrument panel.
Tightening torque: 2.3 N・m { 0.23 kgf・m / 20.4 lb・in }
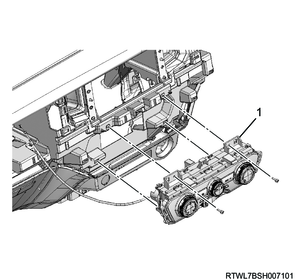
Legend
- Control lever
3) Set the intake lever and air source select lever to the RECIRC position.
RHD

Legend
- RECIRC position
- FRESH position
- Intake lever
- Air source select lever
LHD
Legend
- Air source select lever
- FRESH position
- RECIRC position
- Intake lever
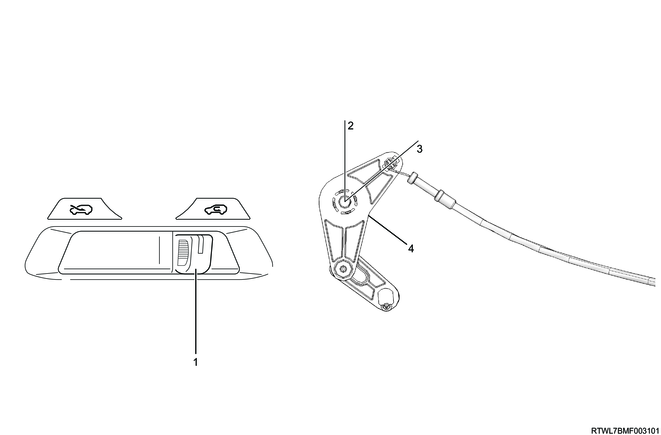
4) Connect the control cable to the intake lever.
5) Secure the control cable to the lock clamp section.
6) Inspect whether the control lever operates properly.
7) Install the instrument panel (middle side) to the instrument panel (lower side).
RHD
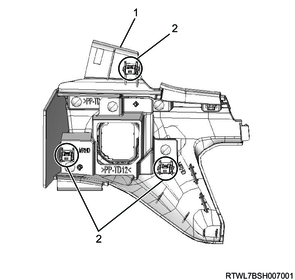
Legend
- Instrument panel (Middle side)
- Clip
LHD

Legend
- Instrument panel (Middle side)
- Clip
2. Models with auto A/C
1) Connect the connector to the control panel.
2) Install the control panel to the instrument panel.
Tightening torque: 2.3 N・m { 0.23 kgf・m / 20.4 lb・in }
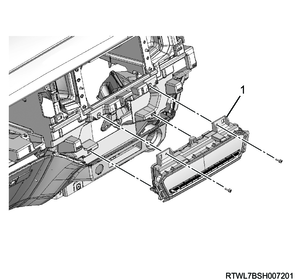
Legend
- Control panel
3) Install the instrument panel (middle side) to the instrument panel (lower side).
RHD
Legend
- Instrument panel (Middle side)
- Clip
LHD
Legend
- Instrument panel (Middle side)
- Clip
4. Meter cluster installation
1) Install the meter cluster to the instrument panel.
RHD
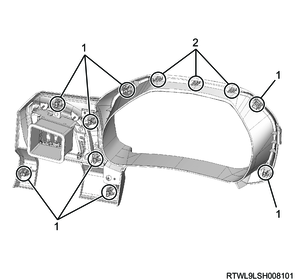
Legend
- Clip
- Claw section
LHD
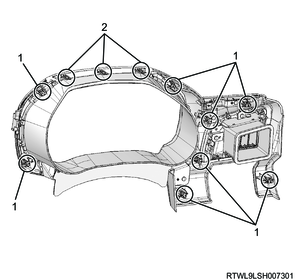
Legend
- Clip
- Claw section
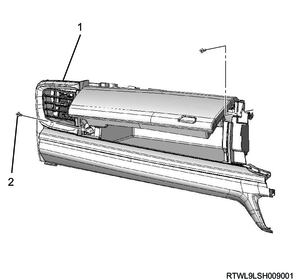
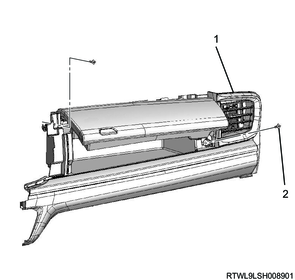
5. Instrument panel passenger-side upper cover installation
1) Install the instrument panel passenger-side upper cover to the instrument panel.
Tightening torque: 2.5 N・m { 0.25 kgf・m / 22.1 lb・in } High grade type
High grade type (RHD)
Legend
- Instrument panel passenger-side upper cover
- Screw
High grade type (LHD)
Legend
- Instrument panel passenger-side upper cover
- Screw
6. Audio and navigation system installation
1. Models equipped with display units
1) Connect the connector to the audio center unit.
2) Install the audio center unit to the instrument panel.
Tightening torque: 2.6 N・m { 0.27 kgf・m / 23.0 lb・in }
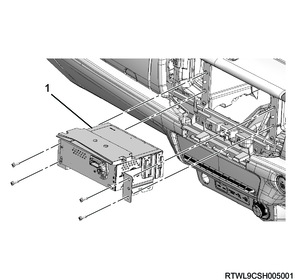
Legend
- Audio center unit
3) Connect the connector to the display unit.
4) Install the display unit as a set with the bezel to the instrument panel.
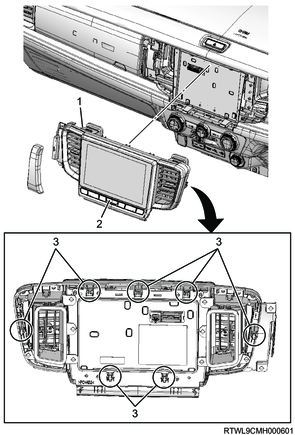
Legend
- Bezel
- Display unit
- Clip
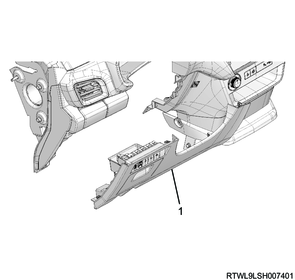
7. Instrument panel driver-side lower cover installation
1. Models with knee airbags
1) Connect the connector to the instrument panel driver-side lower cover.
2) Install the instrument panel driver-side lower cover to the instrument panel.
RHD
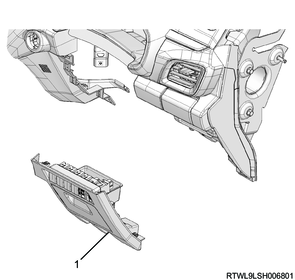
Legend
- Instrument panel driver-side lower cover
LHD
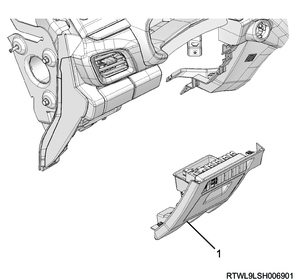
Legend
- Instrument panel driver-side lower cover
3) Install the hood lock control lever and fuel filler lid opener lever to the instrument panel driver-side lower cover.
RHD
Legend
- Hood lock control lever
- Fuel filler lid opener lever
- Claw section
LHD
Legend
- Fuel filler lid opener lever
- Hood lock control lever
- Claw section
4) Connect the wire to each lever.
2. Models without knee airbags
1) Connect the connector to the instrument panel driver-side lower cover.
2) Install the instrument panel driver-side lower cover to the instrument panel.
RHD

Legend
- Instrument panel driver-side lower cover
LHD
Legend
- Instrument panel driver-side lower cover
3) Install the hood lock control lever and fuel filler lid opener lever to the instrument panel driver-side lower cover.
RHD
Legend
- Hood lock control lever
- Fuel filler lid opener lever
- Claw section
LHD
Legend
- Fuel filler lid opener lever
- Hood lock control lever
- Claw section
4) Connect the wire to each lever.
8. Preliminary and post procedures
1. Post procedures
1) Connect the battery cable to the battery negative terminal.
2) Referring to the following, perform the setting of the front door power window switch with AUTO UP/AUTO DOWN function.
Refer to "9.Body, Cab, Accessories 9T.Glass, Windows, Mirrors front door power window switch setting".
3) Close the engine hood.