1. Vacuum switch installation
1) Apply a liquid gasket (ThreeBond 1104 or equivalent) to the threaded portion of the vacuum switch.
Note
- Referring to the diagram, apply liquid gasket.
Caution
- Do not apply liquid gasket to the switch hole.

Legend
- Apply liquid gasket
- Switch hole
Standard value
a: about 3 mm { about 0.1 in }
2) Install the vacuum switch to the bracket.
Tightening torque: 15 N・m { 1.5 kgf・m / 11 lb・ft }
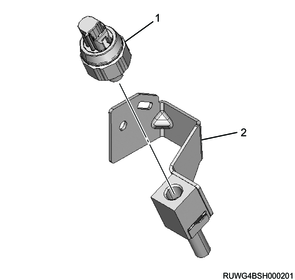
Legend
- Vacuum switch
- Bracket
3) Install the vacuum switch and bracket to the vehicle.
Tightening torque: 7 to 11 N・m { 0.7 to 1.1 kgf・m / 62 to 97 lb・in }
4) Connect the harness connector to the vacuum switch and bracket.
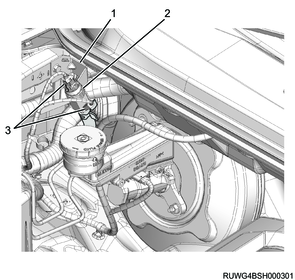
Legend
- Bracket
- Vacuum switch
- Harness connector
2. Preliminary and post procedures
1. Post procedures
1) Connect the battery cable to the battery negative terminal.
2) Referring to the following, perform the setting of the front door power window switch with AUTO UP/AUTO DOWN function.
Refer to "9.Body, Cab, Accessories 9T.Glass, Windows, Mirrors front door power window switch setting".
3) Close the engine hood.