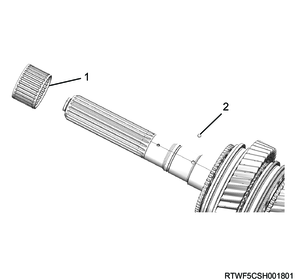
1. Component views
Main shaft
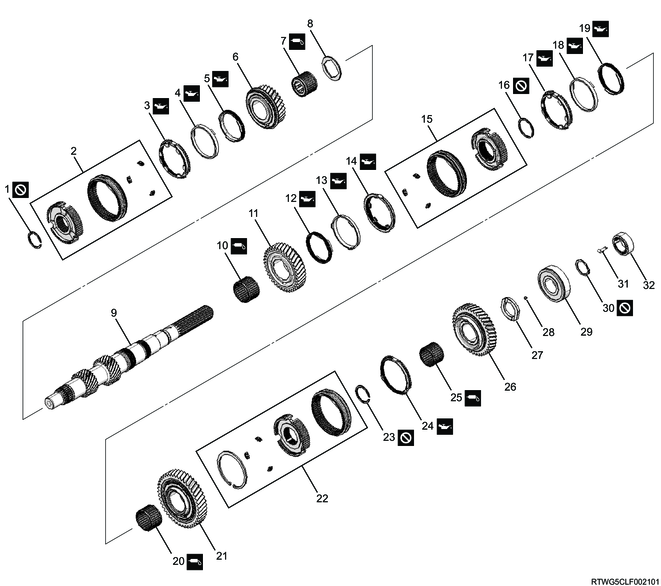
Part name
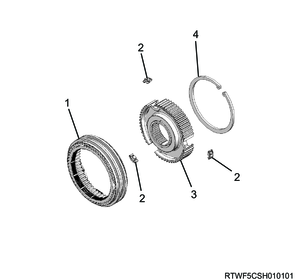
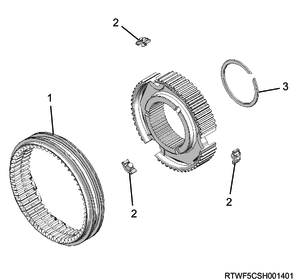
- Snap ring
- 3rd - 4th synchronizer
- 3rd block ring
- 3rd outside ring
- 3rd inside ring
- 3rd gear
- Needle bearing
- Thrust washer
- Main shaft
- Needle bearing
- 2nd gear
- 2nd inside ring
- 2nd outside ring
- 2nd block ring
- 1st - 2nd synchronizer
- Snap ring
- 1st block ring
- 1st outside ring
- 1st inside ring
- Needle bearing
- 1st gear
- Reverse synchronizer
- Snap ring
- Reverse block ring
- Needle bearing
- Reverse gear
- Thrust washer
- Ball
- Main shaft rear bearing
- Snap ring
- Gear set clip (2WD, models without ABS)
- Speedometer drive gear (2WD, models without ABS)
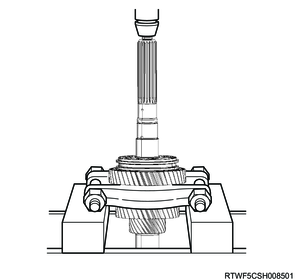
2. 3rd gear removal
1) Remove the snap ring from the main shaft using snap ring pliers.
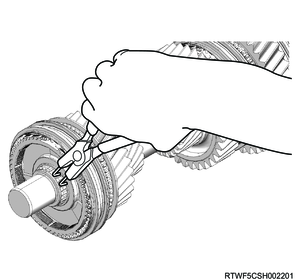
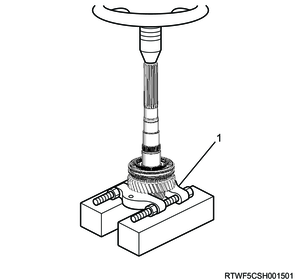
2) Remove the 3rd gear together with the 3rd - 4th synchronizer from the main shaft using a general-purpose bearing remover.
Legend
- General-purpose bearing remover
3) Remove the following parts from the 3rd gear.
- 3rd block ring
- 3rd outside ring
- 3rd inside ring
4) Remove the needle bearing from the main shaft.
5) Remove the thrust washer from the main shaft.
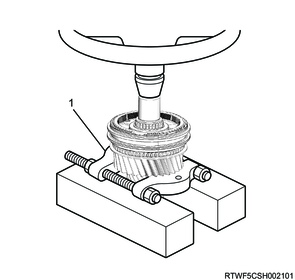
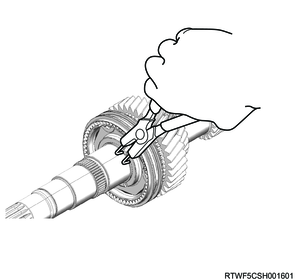
6) Disassemble the 3rd - 4th synchronizer.
Note
- Remove the sleeve and insert from the 3rd - 4th clutch hub.
Legend
- Clutch hub
- Sleeve
- Insert
3. Speedometer drive gear removal
1. 2WD models (Models without ABS)
1) Remove the gear set clip from the speedometer drive gear.
2) Remove the speedometer drive gear from the output shaft.
4. Reverse gear removal
1) Remove the snap ring from the main shaft using snap ring pliers.
2) Remove the reverse gear, main shaft rear bearing, and thrust washer as a set from the main shaft using a general-purpose bearing remover.

Legend
- General-purpose bearing remover
3) Remove the needle bearing from the main shaft.
4) Remove the ball from the main shaft.
Legend
- Needle bearing
- Ball
5. 1st gear removal
1) Remove the snap ring from the main shaft using snap ring pliers.
2) Remove the reverse block ring from the reverse synchronizer.
3) Remove the 1st gear and reverse synchronizer as a set from the main shaft.
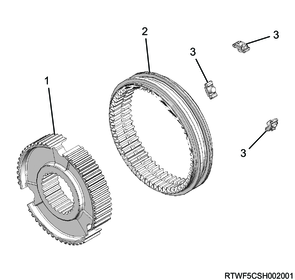
4) Disassemble the reverse synchronizer.
Note
- Remove the following parts from the reverse clutch hub.
- Snap ring
- Sleeve
- Insert
Legend
- Sleeve
- Insert
- Clutch hub
- Snap ring
5) Remove the needle bearing from the main shaft.
6) Remove the following parts from the 1st - 2nd clutch hub.
- 1st block ring
- 1st outside ring
- 1st inside ring
6. 2nd gear removal
1) Remove the snap ring from the main shaft using snap ring pliers.
2) Remove the 2nd gear together with the 1st - 2nd synchronizer from the main shaft using a general-purpose bearing remover.
Legend
- General-purpose bearing remover
3) Remove the following parts from the 2nd gear.
- 2nd block ring
- 2nd outside ring
- 2nd inside ring
4) Remove the needle bearing from the main shaft.
5) Disassemble the 1st - 2nd synchronizer.
Note
- Remove the sleeve and insert from the 1st - 2nd clutch hub.
Legend
- Sleeve
- Insert
- Snap ring