1. Component views
Clutch disc No. 1 and Clutch disc No. 2 assembly
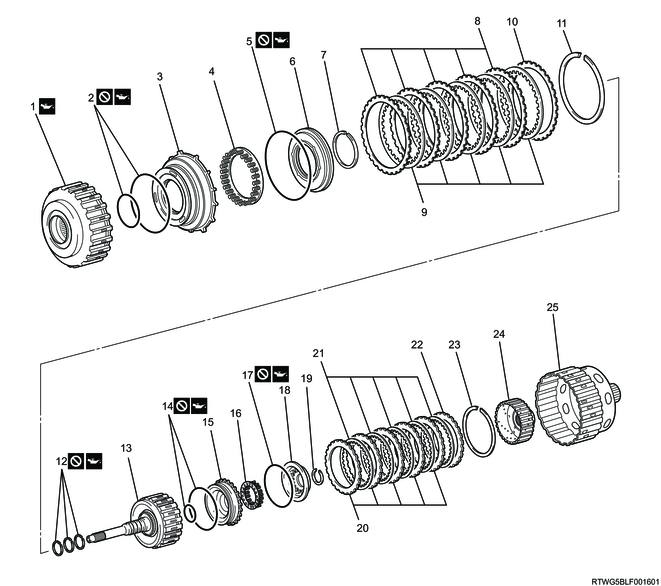
Part name
- No. 2 clutch drum sub-assembly
- O-ring
- Direct clutch piston
- Direct clutch return spring sub-assembly
- O-ring
- Clutch balancer No. 2
- Snap ring
- Clutch plate No. 2
- Clutch disc No. 2
- Clutch flange No. 2
- Snap ring
- Seal ring
- Forward clutch drum sub-assembly
- O-ring
- Forward clutch piston
- Forward clutch return spring sub-assembly
- O-ring
- Clutch balancer No. 1
- Snap ring
- Clutch plate No. 1
- Clutch disc No.1
- Clutch flange No. 1
- Snap ring
- Forward clutch hub
- Clutch hub sub-assembly
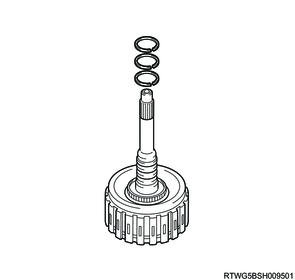
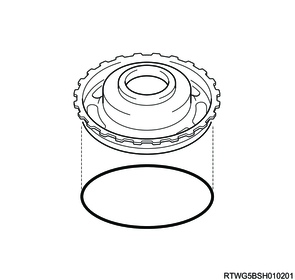
2. Seal ring removal
1) Remove the 3 seal rings from the forward clutch drum sub-assembly.
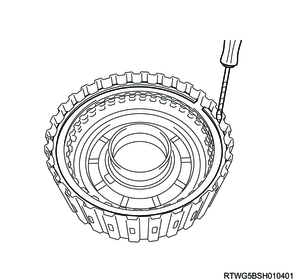
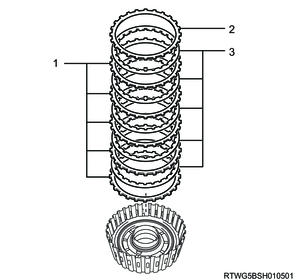
3. Clutch disc No.1 removal
1) Using a screwdriver, remove the snap ring from the forward clutch drum sub-assembly.
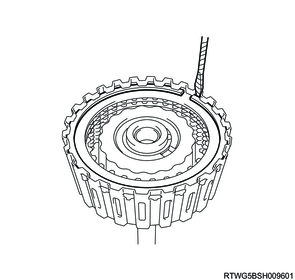
2) Remove the flange, 5 discs and the 5 plates from the forward clutch drum sub-assembly.
Note
- Check the number of discs and plates.

Legend
- Plate
- Flange
- Disc
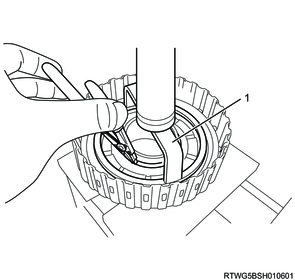
4. Forward clutch return spring sub-assembly removal
1) Place the special tool on clutch balancer No. 1, and compress the forward clutch return spring sub-assembly with a shop press.
Caution
- Be careful not to shorten the return spring too much.
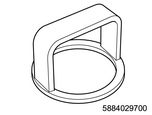
SST: 5-8840-2970-0 - spring compressor
2) Using snap ring pliers, remove the snap ring from the forward clutch drum sub-assembly.
Caution
- Be careful not to expand the snap ring too much.
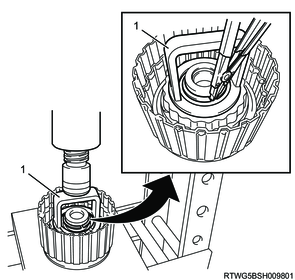
Legend
- 5-8840-2970-0
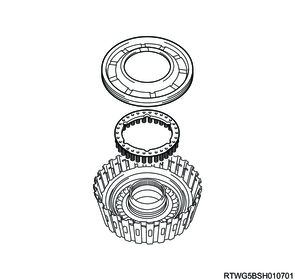
3) Remove clutch balancer No. 1 and the forward clutch return spring sub-assembly from the forward clutch drum sub-assembly.
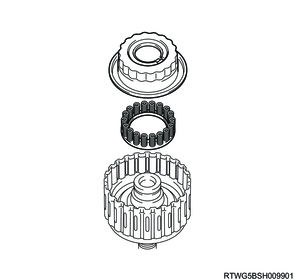
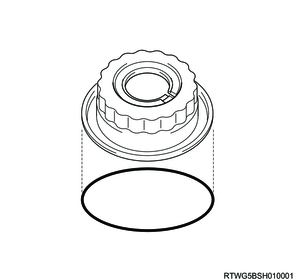
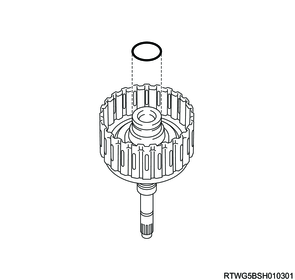
4) Remove the O-rings from clutch balancer No. 1.
5. Forward clutch piston removal
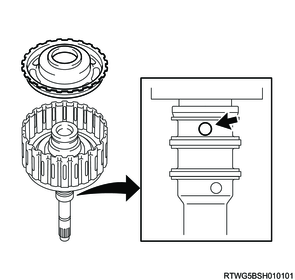
1) While pushing the forward clutch piston by hand, apply compressed air into the oil passage as shown in the figure and remove the forward clutch piston from the forward clutch drum sub-assembly.
392 kPa { 4 kgf/cm2 / 57 psi } Compressed air
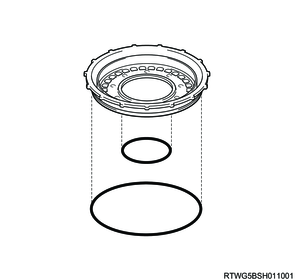
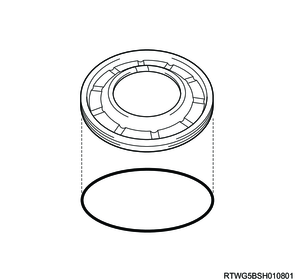
2) Remove the O-ring from the forward clutch piston.
3) Remove the O-ring from the forward clutch drum sub-assembly.
6. Clutch disc No.2 removal
1) Using a screwdriver, remove the snap ring from the No. 2 clutch drum sub-assembly.
2) Remove the flange, 5 discs and the 5 plates from the No. 2 clutch drum sub-assembly.
Note
- Check the number of discs and plates.
Legend
- Plate
- Flange
- Disc
7. Direct clutch return spring sub-assembly removal
1) Place the special tool on clutch balancer No. 2, and compress the direct clutch return spring sub-assembly with a shop press.
Caution
- Be careful not to shorten the return spring too much.
2) Using the special tool, remove the snap ring from the No. 2 clutch drum sub-assembly.
Caution
- Be careful not to expand the snap ring too much.

SST: 5-8840-2972-0 - spring compressor
Legend
- 5-8840-2972-0
3) Remove clutch balancer No. 2 and the direct clutch return spring sub-assembly from the No. 2 clutch drum sub-assembly.
4) Remove the O-ring from clutch balancer No. 2.
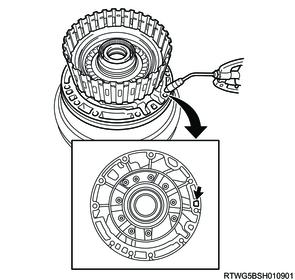
8. Direct clutch piston removal
1) Place the oil pump assembly onto the torque converter assembly, and then place the No. 2 clutch drum sub-assembly onto the oil pump assembly.
2) While pushing the direct clutch piston by hand, apply compressed air into the oil passage as shown in the figure and remove the direct clutch piston from the No. 2 clutch drum sub-assembly.
392 kPa { 4 kgf/cm2 / 57 psi } Compressed air
3) Remove the 2 O-rings from the direct clutch piston.