1. Component views
Brake booster
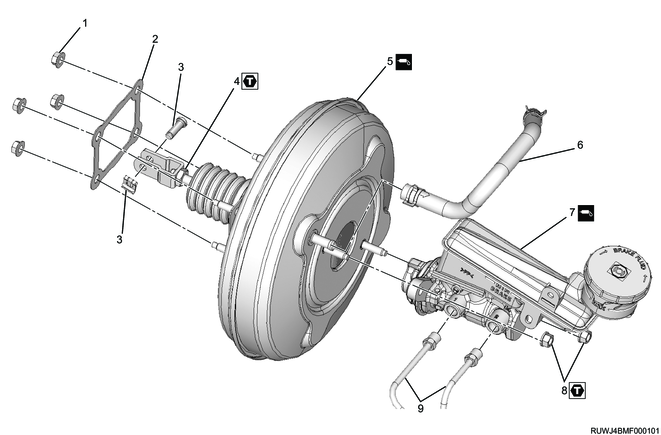
Part name
- Brake booster fixing nut
- Gasket
- Push rod pin
- Nut
- Brake booster
- Vacuum hose
- Master cylinder
- Master cylinder fixing nut
- Brake pipe
Tightening torque
4: 15 to 25 N・m { 1.5 to 2.5 kgf・m / 11 to 18 lb・ft }
8: 10 to 16 N・m { 1.0 to 1.6 kgf・m / 7 to 12 lb・ft }
2. Preliminary and post procedures
1. Preliminary procedures
1) Open the engine hood.
2) Disconnect the battery cable from the battery negative terminal.
Caution
- After turning OFF the ignition switch (power mode for models with passive entry and start system), do not disconnect the battery cable within 3 minutes.
- If the battery cable is disconnected within 3 minutes, the vehicle electronic control system may malfunction.
- If the battery cable is disconnected, perform the setting of the front door power window switch with AUTO UP/AUTO DOWN function after connecting the battery negative terminal.
3. Brake master cylinder removal
1) Disconnect the brake pipe from the brake master cylinder.
Caution
- When removing the brake master cylinder, the vacuum in the brake booster should be released by removing the vacuum hose, etc.
If there is even a little vacuum, the piston may shoot out when the master cylinder is removed, and cause the brake fluid to flow out.
Caution
- Do not hold the piston when removing the master cylinder because the piston easily comes out.
- Do not spill the brake fluid on the painted surface.
The painted surface will be damaged.
2) Disconnect the harness connector from the brake fluid switch.
3) Remove the brake master cylinder from the brake booster.
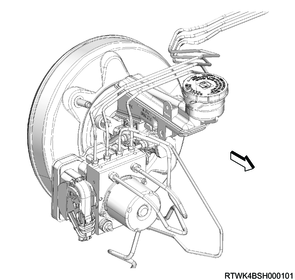
4. Brake booster removal
1) Remove the vacuum hose from the brake booster.
2) Remove the snap pin from the clevis.
3) Remove the brake booster from the brake pedal bracket.
4) Remove the gasket from the brake booster assembly.
Caution
- If the brake booster is broken, replace with a new one that has a pre-adjusted push rod.