1. USB charge port installation
1) Install the external terminal (USB charge) to the console bezel.

Legend
- External terminal (USB charge)
- Console bezel
2) Install the console bezel to the console box.
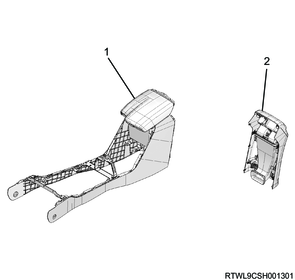
Legend
- Console box
- Console bezel
2. Console box installation
1) Connect the connector to the console box.
2) Install the console box to the floor.
3) Install the console cover to the console box.
4) Install the cup holder to the console cover.
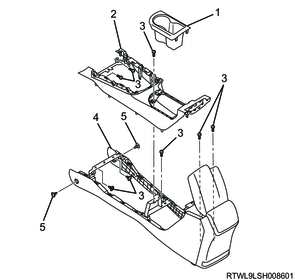
Legend
- Cup holder
- Console cover
- Screw
- Console box
- Clip
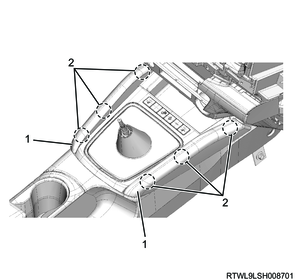
3. Shift console cover installation
1. A/T models
1) Connect the connector to the shift console cover.
2) Install the shift console cover to the console box.
3) Install the pads to the console box.
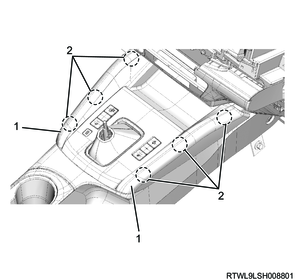
Legend
- Pad
- Clip position
4) Install the selector lever knob to the selector lever.
Caution
- Do not forget to install the clip.
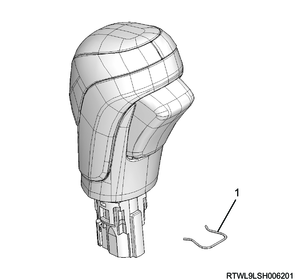
Legend
- Clip
2. M/T models
1) Connect the connector to the shift console cover.
2) Install the shift console cover to the console box.
3) Install the pads to the console box.
Legend
- Pad
- Clip position
4) Install the shift knob to the shift lever.
Tightening torque: 4.0 N・m or more { 0.41 kgf・m or more / 35.4 lb・in or more }
Note
- After tightening to the specified torque, retighten so that the shift pattern direction is correct.
4. Preliminary and post procedures
1. Post procedures
1) Connect the battery cable to the battery negative terminal.
2) Referring to the following, perform the setting of the front door power window switch with AUTO UP/AUTO DOWN function.
Refer to "9.Body, Cab, Accessories 9T.Glass, Windows, Mirrors front door power window switch setting".
3) Close the engine hood.