1. Component views
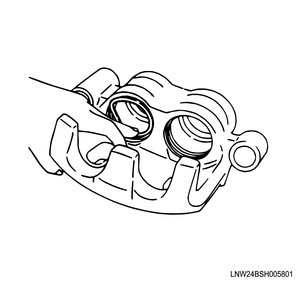
Front brake caliper
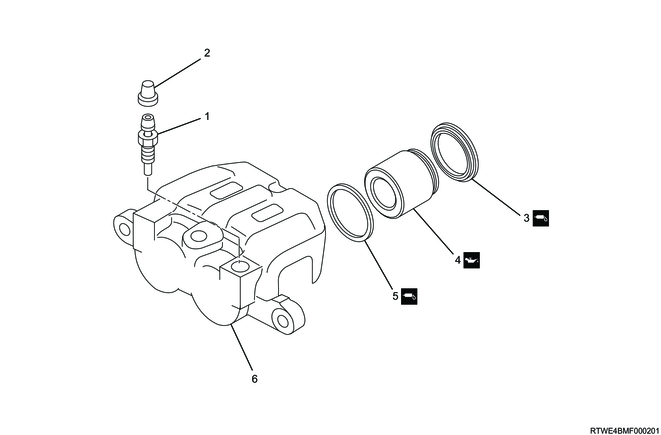
Part name
- Bleeder screw
- Cap
- Dust boot
- Piston
- Ring seal
- Caliper body
2. Front hub reassembly
1. 2WD (Except high ride suspension specifications)
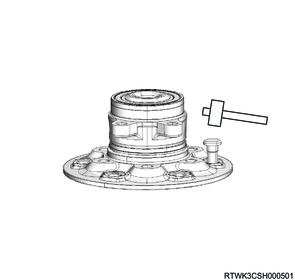
1) Place the front hub on a wooden working table or approx. 15 x 15 mm {6 x 6 in} wooden block.
To protect the wheel pin end and threads
2) Install the wheel pin to the front hub using a hammer.
3) Secure the brake rotor using a vise and protective pad.
4) Install the front hub to the brake rotor.
Tightening torque: 93 to 113 N・m { 9.5 to 11.5 kgf・m / 69 to 83 lb・ft }
Note
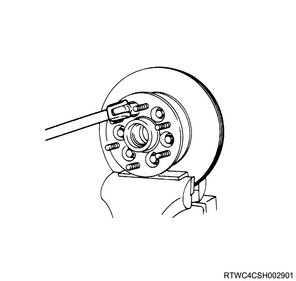
- When reusing the front hub and brake rotor, install them according to the alignment marks that were made before disassembling.
Note
- When replacing the front hub or brake rotor with a new one, install it according to the markings as shown in the diagram.
- Install so that the markings are as close to each other as possible.
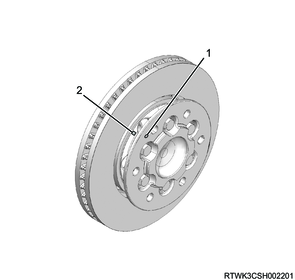
Legend
- Brake rotor side marking
- Front hub side marking
2. 2WD (High ride suspension specifications)
1) Place the front hub on a wooden working table or approx. 15 x 15 mm {6 x 6 in} wooden block.
To protect the wheel pin end and threads
2) Install the wheel pin to the front hub using a hammer.
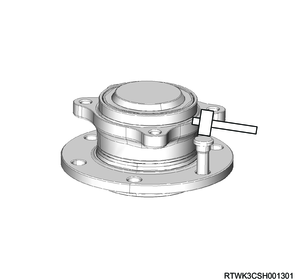
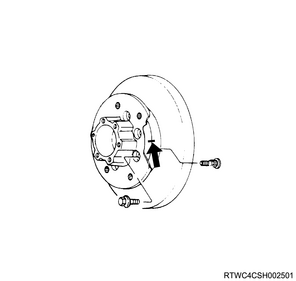
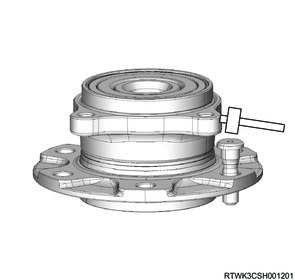
3) Install the front hub to the brake rotor.
Legend
- Screw bolt
3. 4WD
1) Place the front hub on a wooden working table or approx. 15 x 15 mm {6 x 6 in} wooden block.
To protect the wheel pin end and threads
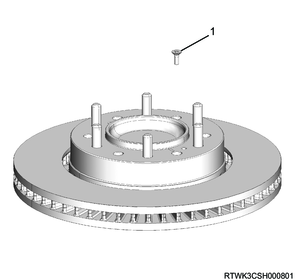
2) Install the front hub to the brake rotor.
Legend
- Screw bolt
3. Brake caliper reassembly
1) Apply rubber grease or equivalent to the ring seal.
2) Install the ring seal to the caliper body.
Caution
- Do not twist the ring seal.
- Do not reuse the ring seal.

3) Lightly apply NIGLUBE RX-2 rubber grease or equivalent to the inside of the dust boot and outside lip section.
4) Install the dust boot to the piston.
Caution
- Do not mix-up the top and bottom of the dust boot.
- Do not reuse the dust boot.
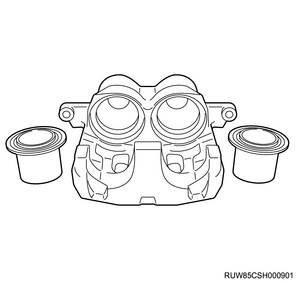
5) Apply clean brake fluid to the piston.
6) Install the piston to the brake caliper.
Note
- Insert the piston into the brake caliper cylinder using only finger pressure.
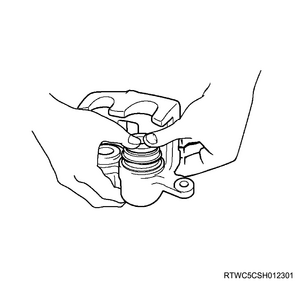
Caution
- Do not use tools such as mallet and impact wrenches.
The cylinder wall or the ring seal may be damaged.
Note
- If the piston cannot be inserted using finger pressure, place a scrapped brake pad or a piece of wood, etc., on top of the piston and use 2 large-sized C-clamps to insert the piston into the brake caliper cylinder.
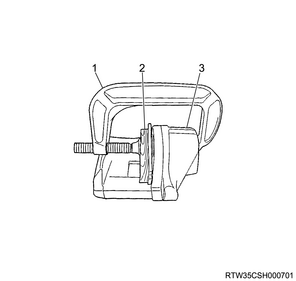
Legend
- Large-sized C-clamp
- Brake pad or piece of wood
- Brake caliper
Caution
- Insert it slowly and evenly.
- Do not hit the piston with a hammer, or pry the piston surface with pliers, etc.
7) Make sure that the piston moves smoothly in the brake caliper cylinder.
Note
- If the piston does not move or hardly moves, overhaul or replace the brake caliper.
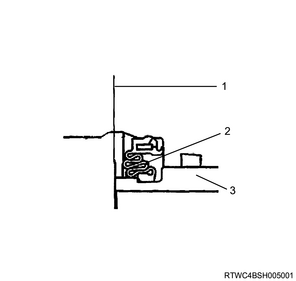
8) Assemble by pushing the circumference of the dust boot into the caliper body side.
Caution
- Securely push the protruding section of the dust boot into the caliper body groove.

Legend
- Dust boot protruding section
- Caliper body groove
9) Make sure that the pleated portion of the dust boot has not protruded from the piston end of the brake caliper.
10) Slightly pull out the piston to make sure that the dust boot is securely installed to the caliper body groove.
Legend
- Piston end
- Dust boot pleated section
- Piston

11) Install the bleeder screw to the brake caliper.
Tightening torque: 9 to 13 N・m { 0.9 to 1.3 kgf・m / 80 to 115 lb・in }

12) Install the cap to the bleeder screw.