1. Audio and navigation system safety information
1. Models equipped with display units
When replacing the audio center unit, make sure to write vehicle information into the new audio center unit.
When replacing the audio center unit, upload the old audio center unit data to a scan tool before removing.
The scan tool used for the replacement procedure must be the same from start to finish. If the scan tool is changed midway, information cannot be written correctly.
2. Audio and navigation system upload
1. Precautions
1) If communication with the old control panel cannot be established, do not perform the vehicle information upload.
2. Vehicle information upload
1) Turn ON the ignition switch.
2) Select "Upload Vehicle Configuration Data" on the scan tool.
- Diagnostics > Information > CENTER UNIT(NAVI) > Programming > Upload Vehicle Configuration Data
3) Upload the vehicle data to a scan tool by following the on-screen instructions.
4) After completing the upload, turn off the scan tool.
5) Turn OFF the ignition switch.
3. Preliminary and post procedures
1. Preliminary procedures
1) Open the engine hood.
2) Disconnect the battery cable from the battery negative terminal.
Caution
- After turning OFF the ignition switch (power mode for models with passive entry and start system), do not disconnect the battery cable within 3 minutes.
- If the battery cable is disconnected within 3 minutes, the vehicle electronic control system may malfunction.
- If the battery cable is disconnected, perform the setting of the front door power window switch with AUTO UP/AUTO DOWN function after connecting the battery negative terminal.
4. Audio and navigation system removal
1. Models equipped with display units
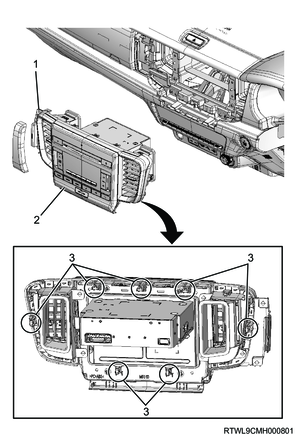
1) Remove the display unit as a set with the bezel from the instrument panel.
Caution
- When removing the display unit, place a cloth to the instrument panel.
- If a cloth is not used, the surface of the instrument panel may be damaged.
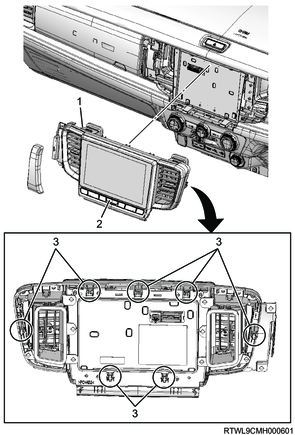
Legend
- Bezel
- Display unit
- Clip
2) Disconnect the connector from the display unit.
3) Remove the display unit from the bezel.
Caution
- Do not scratch the display unit surface.
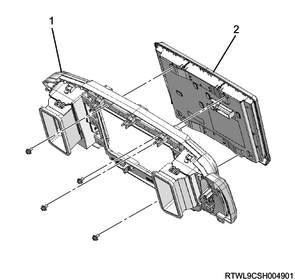
Legend
- Bezel
- Display unit
4) Remove the audio center unit from the instrument panel.
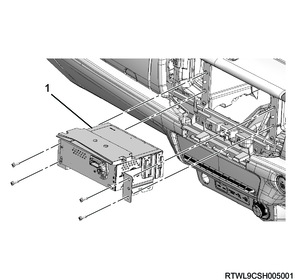
Legend
- Audio center unit
5) Disconnect the connector from the audio center unit.
6) Remove the bracket from the audio center unit.
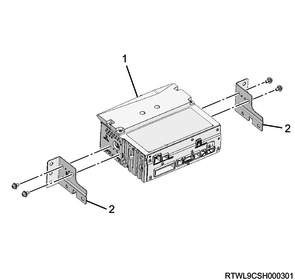
Legend
- Audio center unit
- Bracket
2. Models equipped with 2DIN audio
1) Remove the 2DIN audio as a set with the bezel from the instrument panel.
Caution
- When removing the 2DIN audio, place a cloth to the instrument panel.
- If a cloth is not used, the surface of the instrument panel may be damaged.
Legend
- Bezel
- 2DIN audio
- Clip
2) Disconnect the connector from the 2DIN audio.
3) Remove the 2DIN audio from the bezel.

Legend
- Bezel
- 2DIN audio
4) Remove the bracket from the instrument panel.
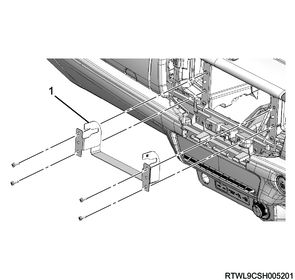
Legend
- Bracket