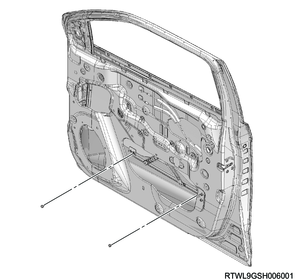
1. Component views
Front door (Models with power windows)
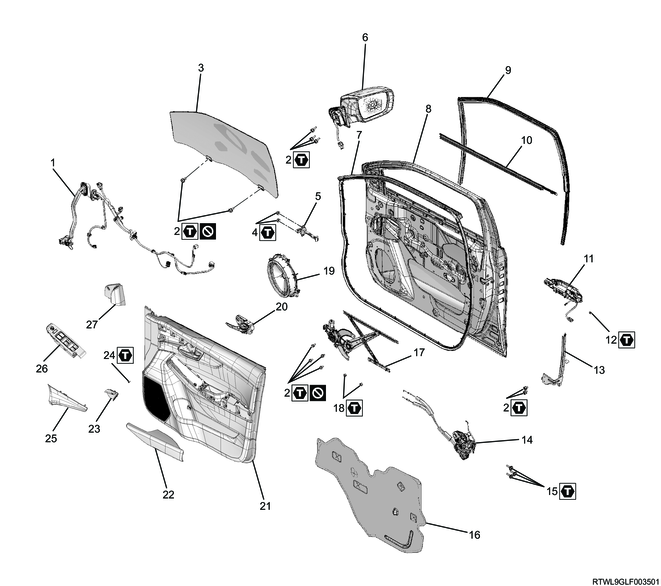
Part name
- Door harness
- Bolt
- Front door glass
- Nut
- Check arm
- Outside rearview mirror
- Weather strip
- Front door panel
- Glass-run
- Outer waist seal
- Outside handle
- Torx screw
- Glass-run rear channel
- Door lock
- Torx screw
- Waterproof sheet
- Window regulator
- Nut
- Speaker
- Inside lever
- Front door trim pad
- Armrest
- Cover
- Screw
- Garnish
- Power window switch
- Door mirror cover
Tightening torque
2: 9.0 N・m { 0.9 kgf・m / 80 lb・in }
4: 7.0 N・m { 0.7 kgf・m / 62 lb・in }
12: 6.0 N・m { 0.6 kgf・m / 53 lb・in }
15: 7.0 N・m { 0.7 kgf・m / 62 lb・in }
18: 9.0 N・m { 0.9 kgf・m / 80 lb・in }
24: 2.0 N・m { 0.20 kgf・m / 17.7 lb・in }
Front door (Models without power windows)
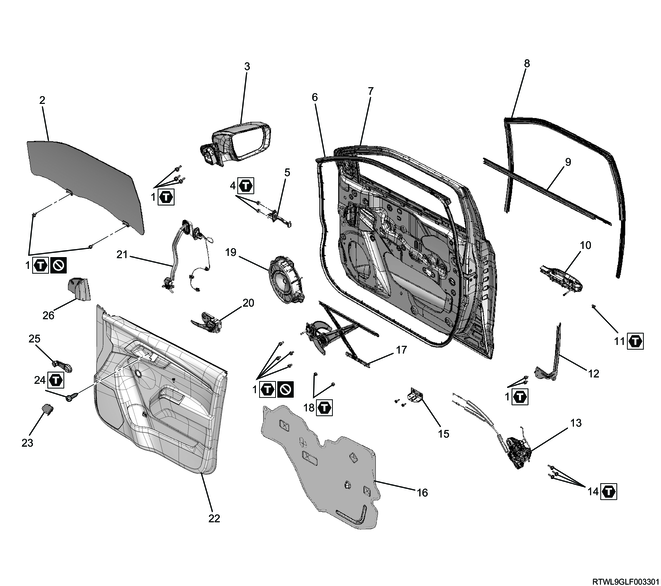
Part name
- Bolt
- Front door glass
- Outside rearview mirror
- Nut
- Check arm
- Weather strip
- Front door panel
- Glass-run
- Outer waist seal
- Outside handle
- Torx screw
- Glass-run rear channel
- Door lock
- Torx screw
- Bracket
- Waterproof sheet
- Window regulator
- Nut
- Speaker
- Inside lever
- Door harness
- Front door trim pad
- Cover
- Screw
- Window regulator handle
- Door mirror cover
Tightening torque
1: 9.0 N・m { 0.9 kgf・m / 80 lb・in }
4: 7.0 N・m { 0.7 kgf・m / 62 lb・in }
11: 6.0 N・m { 0.6 kgf・m / 53 lb・in }
14: 7.0 N・m { 0.7 kgf・m / 62 lb・in }
18: 9.0 N・m { 0.9 kgf・m / 80 lb・in }
24: 2.0 N・m { 0.2 kgf・m / 18 lb・in }
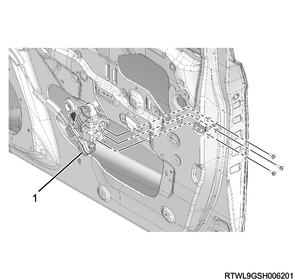
2. Door harness installation
1) Install the door harness to the front door.
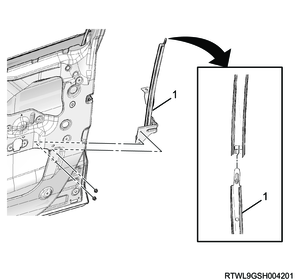
3. Weather strip installation
1) Install the weather strip to the front door.
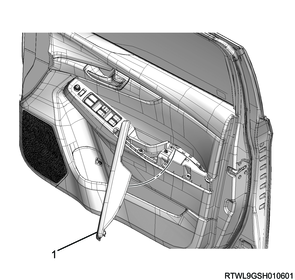
4. Front door check arm installation
1) Install the front door check arm to the front door.
Caution
- Install with the surface marked FL facing upward for the left side and the surface marked FR facing upward for the right side.
Tightening torque: 7.0 N・m { 0.7 kgf・m / 62 lb・in }
5. Front door outside handle installation
1. Models with the passive entry and start system
1) Install the outside handle bracket to the front door.
2) Install the sheet to the front door.
3) Install the outside handle to the front door.
4) Connect the clip to the outside handle bracket.
Legend
- Outside handle bracket
- Sheet
- Outside handle
- Clip
5) Connect the connector to the outside handle.
2. Models without the passive entry and start system
1) Install the outside handle bracket to the front door.
2) Install the sheet to the front door.
3) Install the outside handle to the front door.
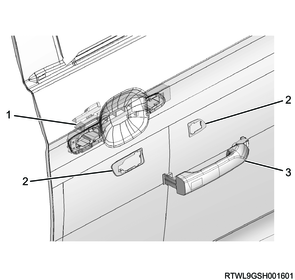
Legend
- Outside handle bracket
- Sheet
- Outside handle
6. Key cylinder installation
1) Install the key cylinder to the handle cap.
2) Install the handle cap to the front door.
Legend
- Handle cap
3) Tighten the handle cap screw.
Tightening torque: 6.0 N・m { 0.6 kgf・m / 53 lb・in }
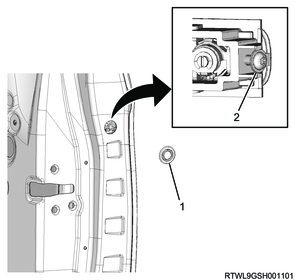
Legend
- Cover
- Screw
4) Install the cover to the front door.
7. Door lock installation
1) Install the door lock to the front door .
Tightening torque: 7.0 N・m { 0.7 kgf・m / 62 lb・in }
Legend
- Door lock
2) Connect the rod to the outside handle bracket and key cylinder.
3) Connect the connector to the door lock.
8. Window regulator installation
1) Temporarily install the bolts to the window regulator and use them as guide bolts to install the window regulator to the front door.

Legend
- Window regulator
- Bolt
Caution
- Do not reuse the bolt.
2) Tighten the bolts and nuts in the following order.
Tightening torque: 9.0 N・m { 0.9 kgf・m / 80 lb・in }
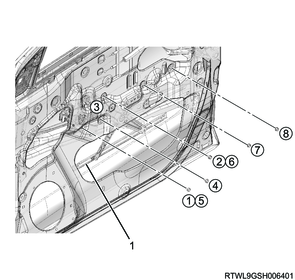
Legend
- Window regulator
3) For models with power windows, connect the connector to the power window motor.
9. Glass-run installation
1) Install the glass-run to the front door.
10. Front door glass installation
1) Install the front door glass to the front door.
Caution
- Do not reuse the bolt.
Tightening torque: 9.0 N・m { 0.9 kgf・m / 80 lb・in }
11. Glass-run rear channel installation
1) Install the glass-run rear channel to the front door.
Tightening torque: 9.0 N・m { 0.9 kgf・m / 80 lb・in }
Legend
- Glass-run rear channel
12. Waterproof sheet installation
1) Install the waterproof sheet to the front door.
13. Door speaker installation
1) Install the front door speaker to the front door.
Tightening torque: 0.8 N・m { 0.08 kgf・m / 7.1 lb・in }
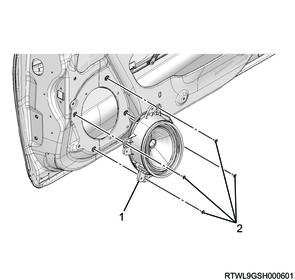
Legend
- Front door speaker
- Screw
2) Connect the connector to the front door speaker.
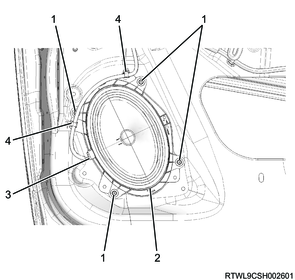
Legend
- Screw
- Front door speaker
- Connector
- Harness clip
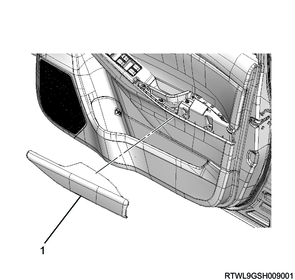
14. Bracket installation
1) Install the bracket to the front door.
15. Outer waist seal installation
1) Install the outer waist seal to the front door.
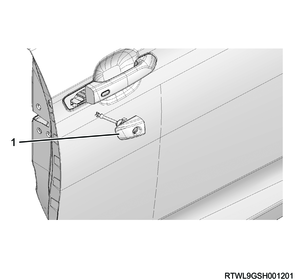
16. Outside rearview mirror installation
1) Install the outside rearview mirror to the front door.
Tightening torque: 9.0 N・m { 0.9 kgf・m / 80 lb・in }
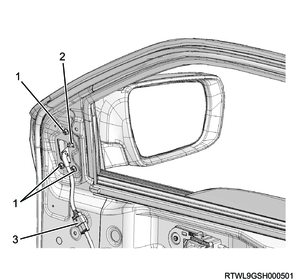
Legend
- Bolt
- Claw
- Connector
2) Connect the connector to the outside rearview mirror.
17. Inside lever installation
1) Install the inside lever to the front door trim pad.
18. Front door trim pad installation
1) Connect the door lock cable to the inside lever.
2) Install the front door trim pad to the front door.
3) Tighten the screws, and install the cover and garnish.
Tightening torque: 2.0 N・m { 0.2 kgf・m / 18 lb・in }
Models with power windows
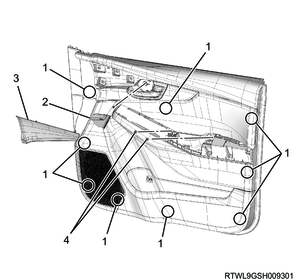
Legend
- Clip position
- Cover
- Garnish
- Screw
Models without power windows
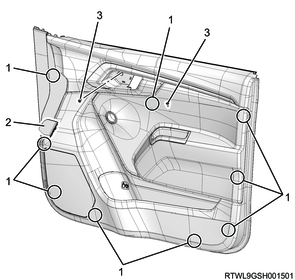
Legend
- Clip position
- Cover
- Screw
19. Door mirror cover installation
1) Install the door mirror cover to the front door.
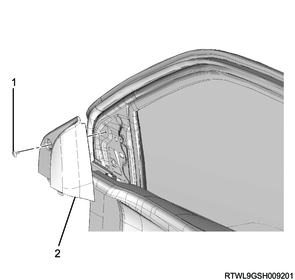
Legend
- Clip
- Door mirror cover
20. Front door power window switch installation
1. Models with power windows
1) Connect the connector to the front door power window switch.
2) Install the front door power window switch to the front door trim pad.
3) Install the armrest to the front door trim pad.
For Australia
Legend
- Armrest
Except for Australia
Legend
- Armrest
21. Window regulator handle installation
1. Models without power windows
1) Install the locking pin and washer to the window regulator handle.
Legend
- Window regulator handle
- Locking pin
- Washer
2) Install the window regulator handle to the front door.
Caution
- The regulator handle should be installed at an installation angle of 45° against the horizontal direction when the door glass is completely closed.
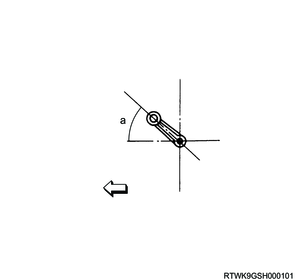
Dimensions
a. 45°