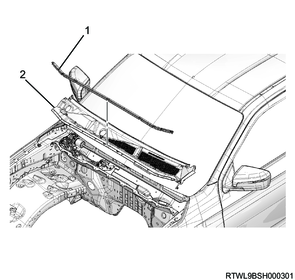
1. Component views
Front wiper (Flat blade Type)
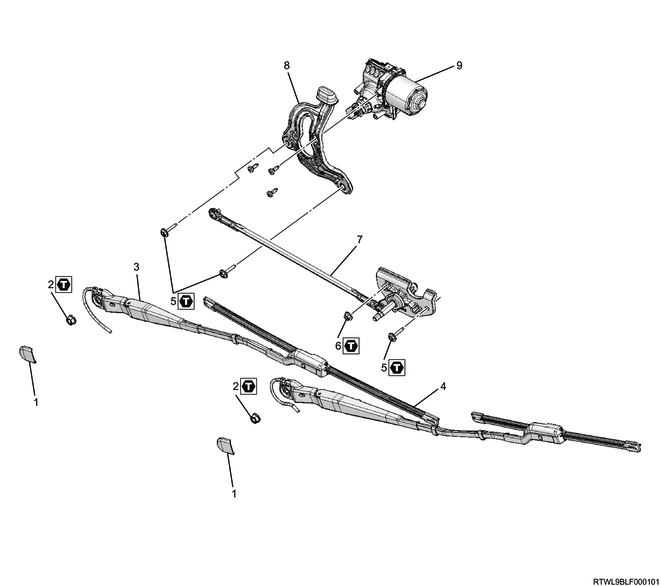
Part name
- Wiper arm cover
- Nut
- Wiper arm
- Wiper blade
- Bolt
- Nut
- Wiper linkage
- Wiper motor bracket
- Wiper motor
Tightening torque
2: 31 N・m { 3.2 kgf・m / 23 lb・ft }
5: 10 N・m { 1.0 kgf・m / 89 lb・in }
6: 10 N・m { 1.0 kgf・m / 89 lb・in }
Front wiper (Design blade type)
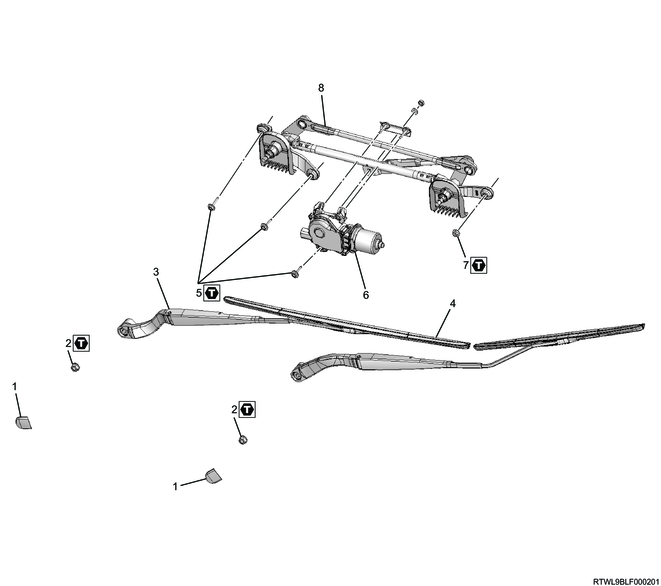
Part name
- Wiper arm cover
- Nut
- Wiper arm
- Wiper blade
- Bolt
- Wiper motor
- Nut
- Wiper linkage
Tightening torque
2: 31 N・m { 3.2 kgf・m / 23 lb・ft }
5: 5.3 N・m { 0.5 kgf・m / 47 lb・in }
7: 5.3 N・m { 0.5 kgf・m / 47 lb・in }
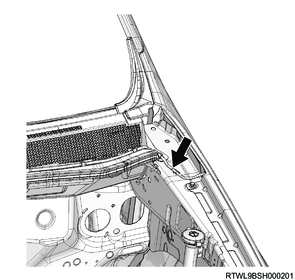
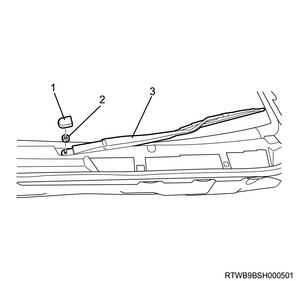
2. Wiper linkage installation
1) Install the wiper linkage to the cowl panel.
Tightening torque: 10 N・m { 1.0 kgf・m / 89 lb・in } Flat blade type
Tightening torque: 5.3 N・m { 0.5 kgf・m / 47 lb・in } Design blade type
Flat blade type
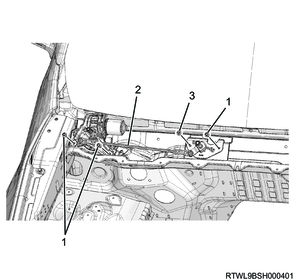
Legend
- Bolt
- Wiper linkage
- Nut
Design blade type
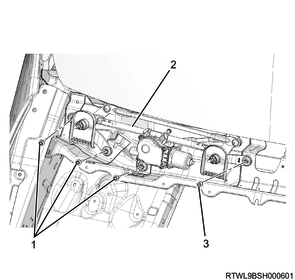
Legend
- Bolt
- Wiper linkage
- Nut
2) Connect the connector to the wiper motor.
3. Cowl cover installation
1) Install the cowl cover to the cowl panel.
2) Install the engine hood rear seal to the cowl cover.
Legend
- Engine hood rear seal
- Cowl cover
3) Connect the washer hose at the location shown in the following diagram.
4) Install the side cowl cover to the cowl cover.

Legend
- Side cowl cover
4. Wiper arm installation
1) Install to the vehicle so that the wiper blades comes to the positions away from the upper edge of the front window molding as shown in the diagram.
Tightening torque: 31 N・m { 3.2 kgf・m / 23 lb・ft }
Design blade type (RHD)
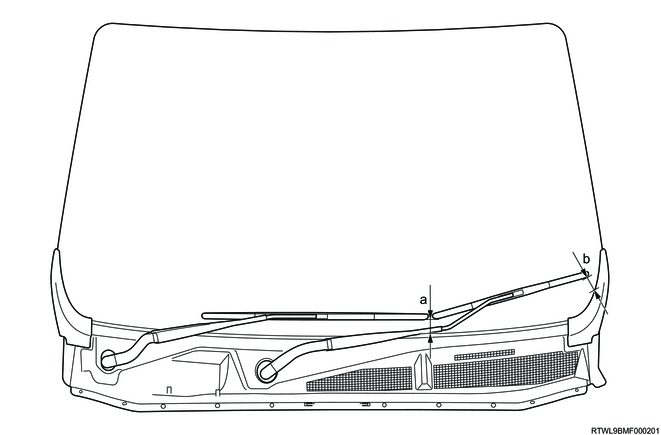
Standard value
a: 43.3 mm { 1.70 in }
b: 53.5 mm { 2.11 in }
Design blade type (LHD)
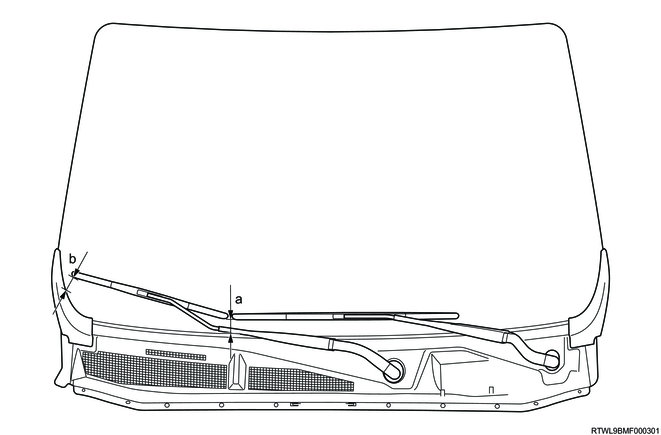
Standard value
a: 43.3 mm { 1.70 in }
b: 53.5 mm { 2.11 in }
Flat blade type (RHD)
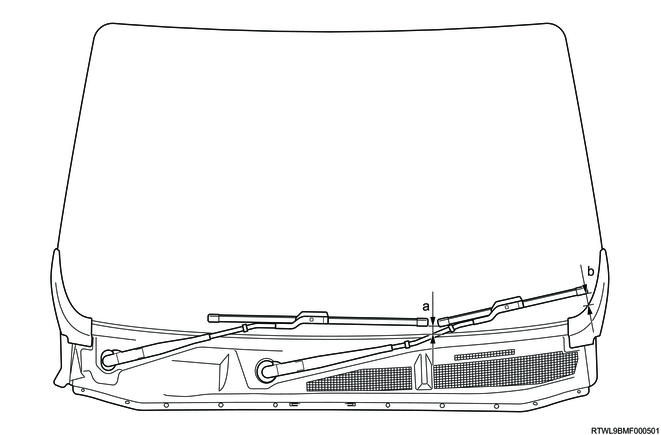
Standard value
a: 21.0 mm { 0.83 in }
b: 25.0 mm { 0.98 in }
Flat blade type (LHD)

Standard value
a: 21.0 mm { 0.83 in }
b: 25.0 mm { 0.98 in }
2) Install the wiper arm cover to the wiper arm.
Legend
- Wiper arm cover
- Nut
- Wiper arm, blade
5. Preliminary and post procedures
1. Post procedures
1) Connect the battery cable to the battery negative terminal.
2) Referring to the following, perform the setting of the front door power window switch with AUTO UP/AUTO DOWN function.
Refer to "9.Body, Cab, Accessories 9T.Glass, Windows, Mirrors front door power window switch setting".
3) Close the engine hood.