1. Component views
Regular cab
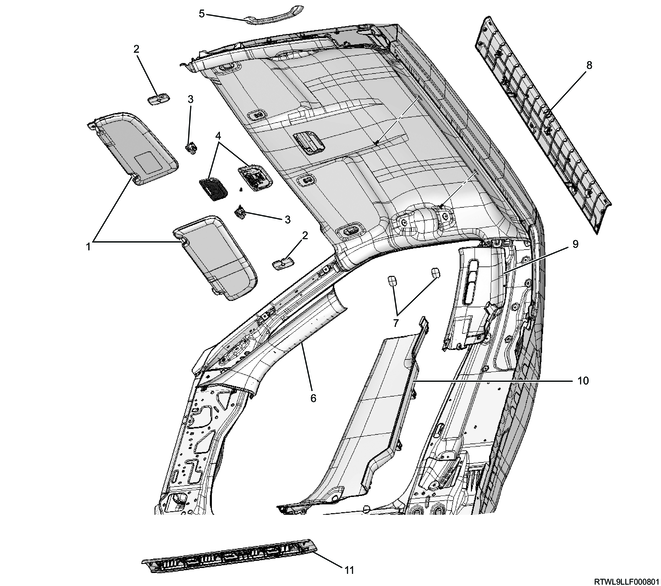
Part name
- Sun visor
- Sun visor cover
- Sun visor holder
- Dome light
- Assist grip
- Front pillar trim cover
- Hole cover
- Rear end upper trim cover
- Rear pillar upper trim cover
- Rear pillar lower trim cover
- Front sill plate
2. Head lining installation
1) Connect the connector to the head lining.
2) Install the head lining to vehicle.
3) Install the sun visor holder to the head lining.
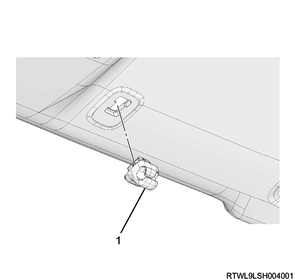
Legend
- Sun visor holder
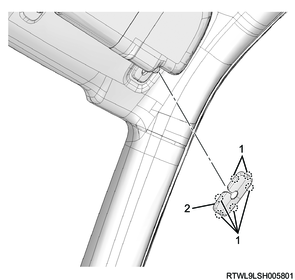
4) Install the clips to the head lining.
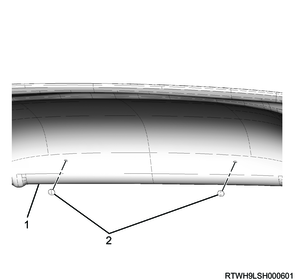
Legend
- Head lining
- Clip
3. Sun visor installation
1) Install the sun visor to the head lining.
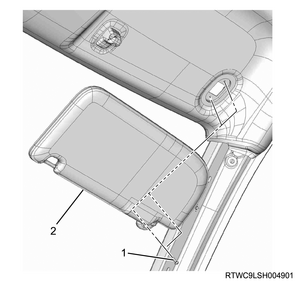
Legend
- Screw
- Sun visor
2) Install the sun visor cover to the sun visor bracket.
Legend
- Claw section
- Sun visor cover
4. Dome light installation
1) Connect the connector to the dome light.
2) Install the dome light to the head lining.
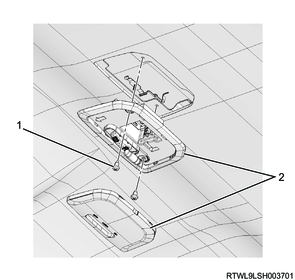
Legend
- Screw
- Dome light
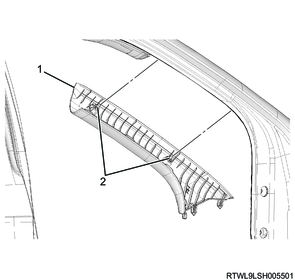
5. Rear pillar trim cover installation
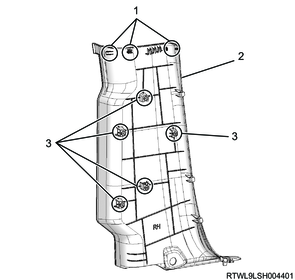
1) Install the rear pillar upper trim cover to the rear pillar.

Legend
- Hook
- Rear pillar upper trim cover
- Clip
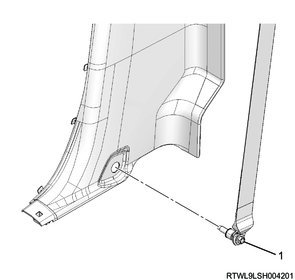
2) Install the seat belt upper anchor bolt to the rear pillar.
Tightening torque: 46 N・m { 4.7 kgf・m / 34 lb・ft }
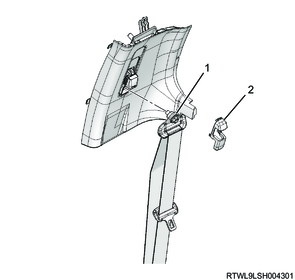
Legend
- Seat belt upper anchor bolt
- Adjuster cover
3) Install the adjuster cover to the seat belt upper anchor bolt.
4) Install the rear pillar lower trim cover to the rear pillar.
Legend
- Claw section
- Rear pillar lower trim cover
- Clip
5) Install the seat belt lower anchor bolt to the rear pillar.
Tightening torque: 46 N・m { 4.7 kgf・m / 34 lb・ft }
Legend
- Seat belt lower anchor bolt
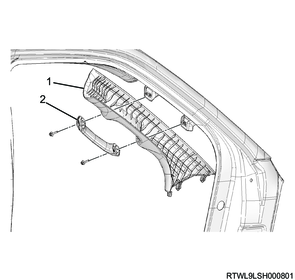
6. Rear end upper trim cover installation
1) Install the rear end upper trim cover to the body panel.

Legend
- Claw section
- Rear end upper trim cover
- Clip
- Hook
7. Front pillar trim cover installation
1. Models with assist grips
1) Install the front pillar trim cover to the front pillar.
2) Install the assist grip to the front pillar trim cover.
Tightening torque: 3.8 N・m { 0.4 kgf・m / 34 lb・in }
Legend
- Front pillar trim cover
- Assist grip
2. Models without assist grips
1) Install the assist grip to the front pillar trim cover.
Legend
- Front pillar trim cover
- Clip
8. Front door finisher installation
1) Install the front door finisher to the body.
9. Front sill plate installation
1) Install the front sill plate to the floor.
Regular cab, crew cab

Legend
- Front sill plate
- Clip
- Claw section
10. Hole cover installation
1. Models without assist grips
1) Install the hole cover to the head lining.
Legend
- Hole cover
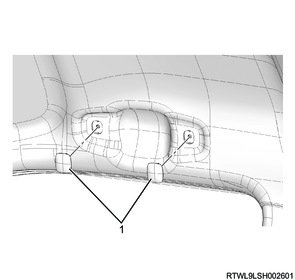
11. Assist grip installation
1. Models with assist grips
1) Install the assist grip to the head lining.
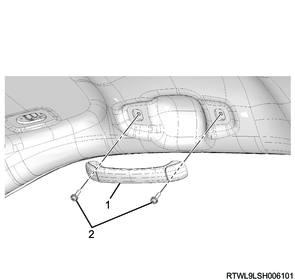
Legend
- Assist grip
- Screw
12. Preliminary and post procedures
1. Post procedures
1) Connect the battery cable to the battery negative terminal.
2) Referring to the following, perform the setting of the front door power window switch with AUTO UP/AUTO DOWN function.
Refer to "9.Body, Cab, Accessories 9T.Glass, Windows, Mirrors front door power window switch setting".
3) Close the engine hood.