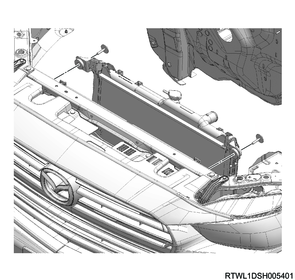
1. Component views
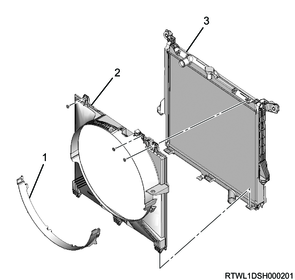
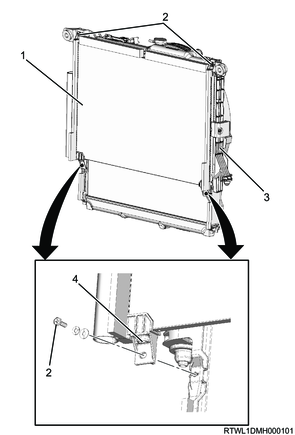
Radiator
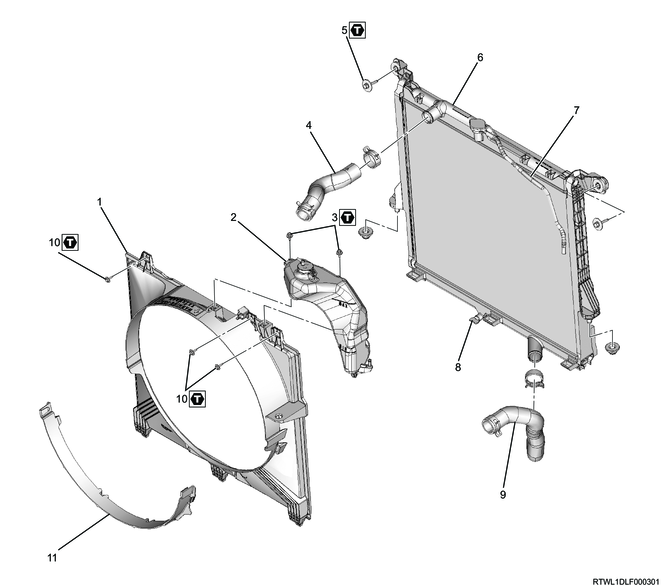
Part name
- Fan guide
- Radiator reserve tank
- Bolt
- Radiator upper hose
- Bolt
- Radiator
- Radiator reserve tank hose
- Drain plug
- Radiator lower hose
- Bolt
- Fan shroud
Tightening torque
3: 8.4 N・m { 0.9 kgf・m / 74 lb・in }
5: 24.7 N・m { 2.5 kgf・m / 18 lb・ft }
10: 6.5 N・m { 0.7 kgf・m / 58 lb・in }
2. Preliminary and post procedures
1. Preliminary procedures
1) Open the engine hood.
2) Disconnect the battery cable from the battery negative terminal.
Caution
- After turning OFF the ignition switch (power mode for models with passive entry and start system), do not disconnect the battery cable within 3 minutes.
- If the battery cable is disconnected within 3 minutes, the vehicle electronic control system may malfunction.
- If the battery cable is disconnected, perform the setting of the front door power window switch with AUTO UP/AUTO DOWN function after connecting the battery negative terminal.
3) Raise the vehicle.
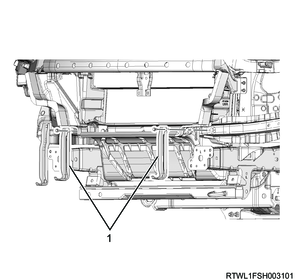
3. Underguard removal
4. Coolant drain
Warning
- Do not loosen the radiator cap or reserve tank cap when coolant is hot, as doing so may result in burns caused by the release of steam or hot water.
- When opening the radiator cap, cover the cap with a thick cloth once the engine coolant has cooled and slowly turn to release pressure.
1) Remove the radiator cap from the radiator.
2) Loosen the radiator drain plug, and drain the coolant into a pan.

3) Loosen the drain plug on the cylinder block, and drain the coolant to a pan.

Legend
- Drain plug
4) Apply LOCTITE 262 or equivalent to the threaded portion of the cylinder block side drain plug.
5) Tighten the drain plug on the cylinder block.
Tightening torque: 21.6 N・m { 2.2 kgf・m / 16 lb・ft }
6) Tighten the radiator drain plug.
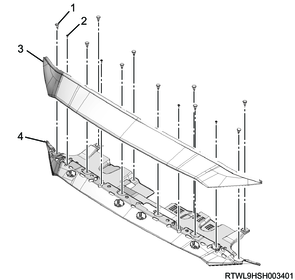
5. Inner liner removal
1) Remove the inner liner from the front fender panel.
6. Front bumper removal
1) Remove the intake air duct from the air cleaner box and radiator core support.
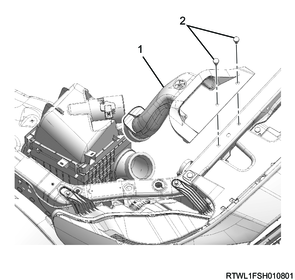
Legend
- Intake air duct
- Clip
2) Remove the soft nose from the front bumper support.
3) Remove the front bumper support from vehicle.
Legend
- Clip
- Screw
- Soft nose
- Front bumper support
4) Remove the front bumper from the vehicle.
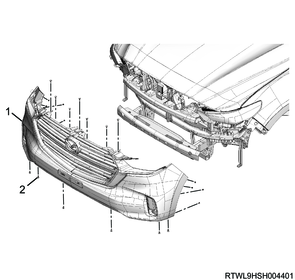
Legend
- Front bumper
- Clip
5) Disconnect the connector from the front bumper.
7. Intercooler preparation
1) Prepare a shop cloth for the lower part of the drain plug.
2) Remove the drain plug from the intercooler and drain the engine oil to a pan.
3) Install the drain plug to the intercooler.
Caution
- Check that the engine oil is discharged.
Tightening torque: 1.2 N・m { 0.12 kgf・m / 10.6 lb・in }
Legend
- Intercooler
- Drain plug
8. Front bumper impact bar removal
1) Remove the air guide from the front bumper impact support.
Legend
- Air guide
2) Remove the front bumper impact bar from the frame.
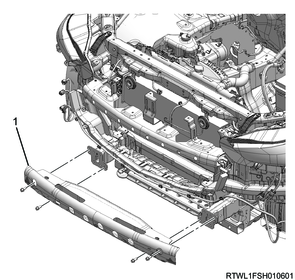
Legend
- Front bumper impact bar
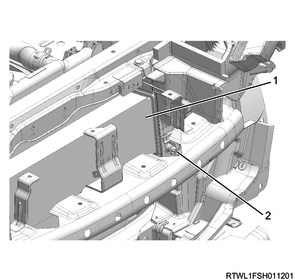
3) Remove the support bracket from the frame.
Legend
- Support bracket
4) Remove the air guide from the radiator lower support.
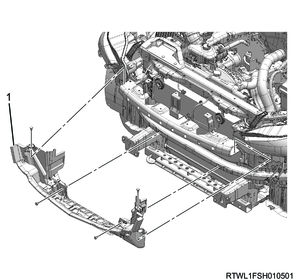
Legend
- Air guide
9. Front bumper impact support removal
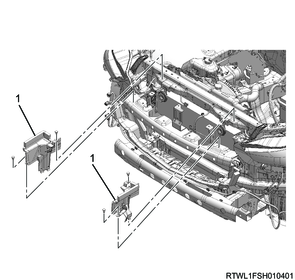
1) Remove the headlight fixing bolt from the front bumper impact support.
2) Remove the front bumper impact support from the vehicle.

Legend
- Front bumper impact support
3) Remove the front end engine hood stay from the frame.
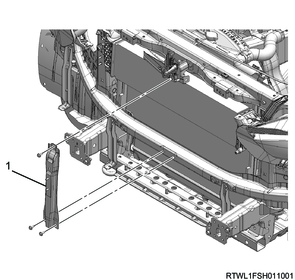
Legend
- front end engine hood stay
10. Engine cover removal
1) Remove the engine cover from the engine.

Legend
- Engine cover
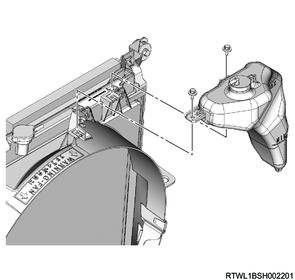
11. Radiator reserve tank removal
1) Disconnect the radiator reserve tank hose from the radiator.
2) Remove the radiator reserve tank from the fan guide.
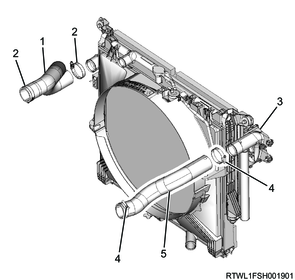
12. Radiator upper hose removal
1) Remove the radiator upper hose from the thermostat and radiator.
Legend
- Radiator upper hose
13. Fan guide removal
1) Remove the fan shroud from the fan guide.
2) Remove the fan guide from the radiator.
Legend
- Fan shroud
- Fan guide
- Radiator
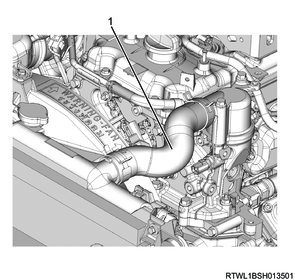
14. Radiator lower hose disconnect
1) Disconnect the radiator lower hose from the water intake pipe.
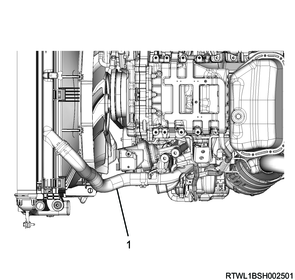
Legend
- Radiator lower hose
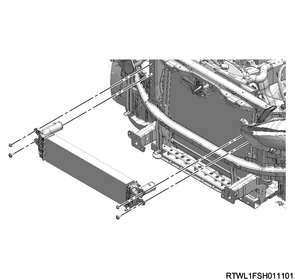
15. Intercooler removal
1) Disconnect the air intake hose from the intercooler.
2) Disconnect the intake hose from the intercooler.
Legend
- Air intake hose
- Clamp
- Intercooler
- Clamp
- Intake hose
3) Remove the intercooler from the frame.
16. Radiator removal
1) Secure the condenser to the vehicle side using a wire.
Note
- Secure the condenser to prevent it from moving when removing the radiator.
2) Disconnect the condenser from the radiator.
Caution
- Do not disconnect the condenser from the pin section.
- Do not apply a load on the A/C pipe and hose.
Legend
- Condenser
- Mounting bolt
- Radiator
- Pin section
3) Remove the radiator from vehicle.
Caution
- Do not damage the radiator core with the fan blade.