1. Component views
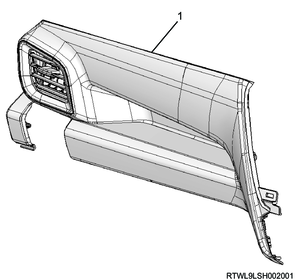
Vent grille (RHD)
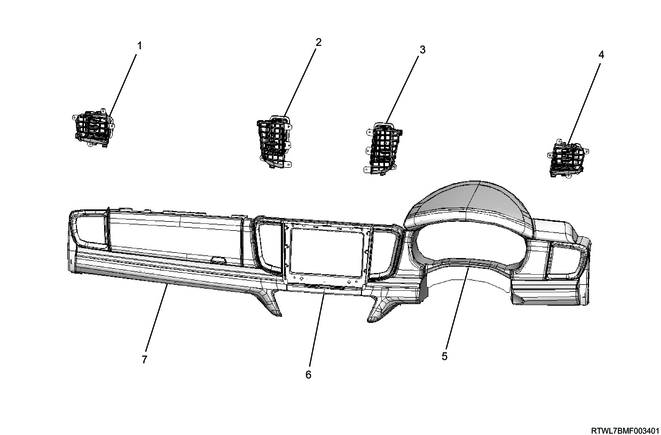
Part name
- Vent grille (LH)
- Center vent grille (LH)
- Center vent grille (RH)
- Vent grille (RH)
- Meter cluster
- Bezel
- Instrument panel passenger-side upper cover
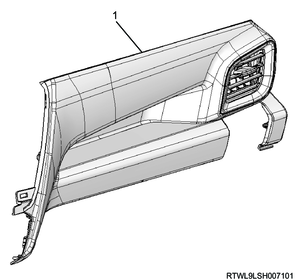
Vent grille (LHD)
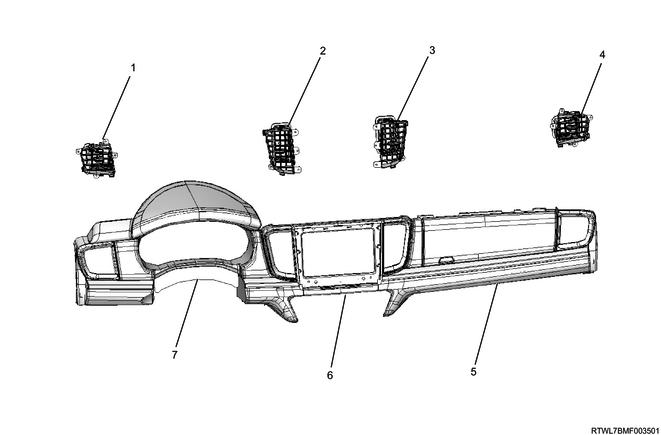
Part name
- Vent grille (LH)
- Center vent grille (LH)
- Center vent grille (RH)
- Vent grille (RH)
- Instrument panel passenger-side upper cover
- Bezel
- Meter cluster
2. Vent grille installation
1) Install the vent grille to the meter cluster and instrument panel passenger-side upper cover.
Legend
- Vent grille (LH)
- Vent grille (RH)
2) Install the center vent grille to the bezel.
Legend
- Center vent grille (LH)
- Bezel
- Center vent grille (RH)
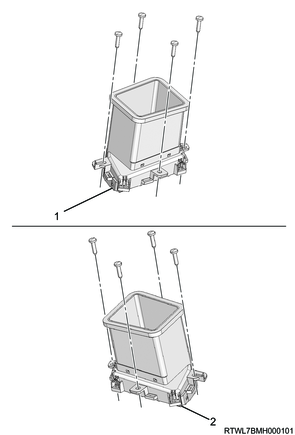
3. Meter cluster installation
1) Install the meter cluster to the instrument panel.
RHD
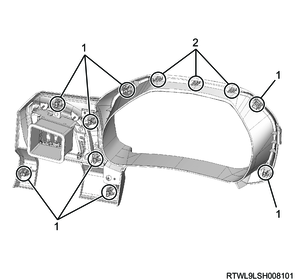
Legend
- Clip
- Claw section
LHD
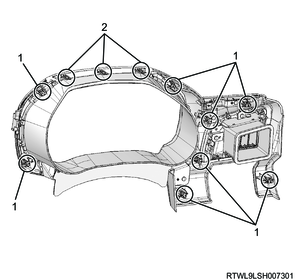
Legend
- Clip
- Claw section
4. Instrument panel passenger-side upper cover installation
1) Install the instrument panel passenger-side upper cover to the instrument panel.
Tightening torque: 2.5 N・m { 0.25 kgf・m / 22.1 lb・in } High grade type
High grade type (RHD)
Legend
- Instrument panel passenger-side upper cover
- Screw
High grade type (LHD)
Legend
- Instrument panel passenger-side upper cover
- Screw
Low grade type (RHD)
Legend
- Instrument panel passenger-side upper cover
Low grade type (LHD)
Legend
- Instrument panel passenger-side upper cover
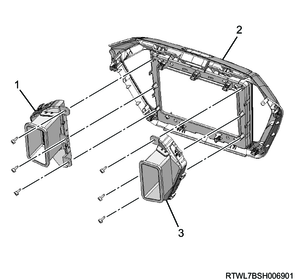
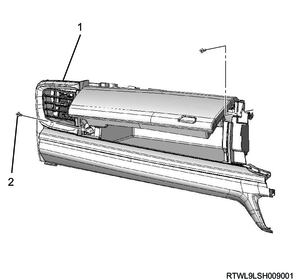
5. Audio and navigation system installation
1. Models equipped with display units
1) Connect the connector to the display unit.
2) Install the display unit as a set with the bezel to the instrument panel.
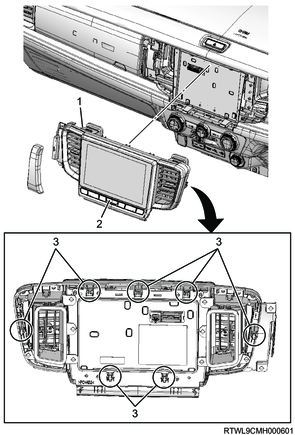
Legend
- Bezel
- Display unit
- Clip
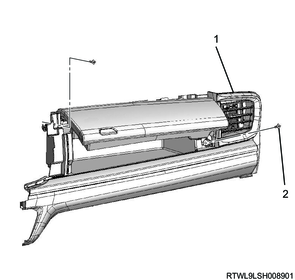
2. Models equipped with 2DIN audio
1) Connect the connector to the 2DIN audio.
2) Install the 2DIN audio as a set with the bezel to the instrument panel.
Note
- Align the pin position with the bracket to install.
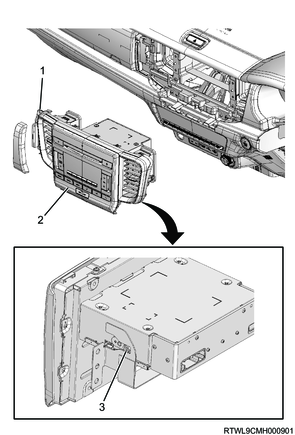
Legend
- Bezel
- 2DIN audio
- Pin
6. Preliminary and post procedures
1. Post procedures
1) Connect the battery cable to the battery negative terminal.
2) Referring to the following, perform the setting of the front door power window switch with AUTO UP/AUTO DOWN function.
Refer to "9.Body, Cab, Accessories 9T.Glass, Windows, Mirrors front door power window switch setting".
3) Close the engine hood.