1. Component views
Fuel tank (Without protector)
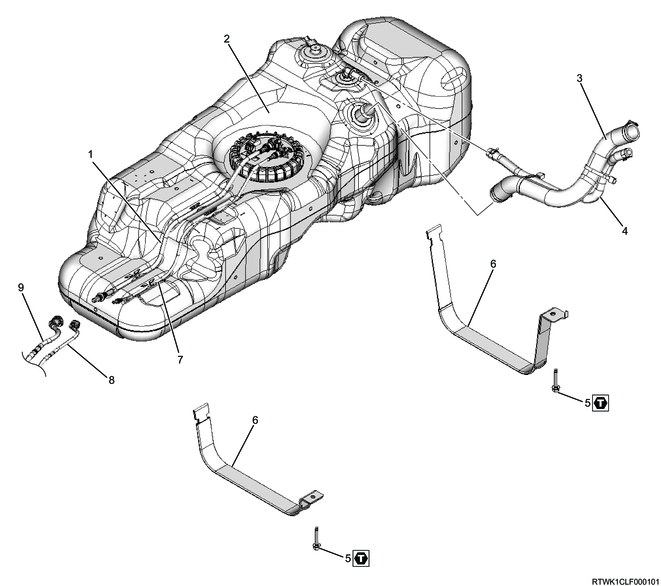
Part name
- Fuel feed tube
- Fuel tank
- Fuel filler hose
- Breather hose
- Bolt
- Fuel tank band
- Fuel return tube
- Fuel return pipe
- Fuel feed pipe
Tightening torque
5: 68 N・m { 6.9 kgf・m / 50 lb・ft }
Fuel tank (With protector)
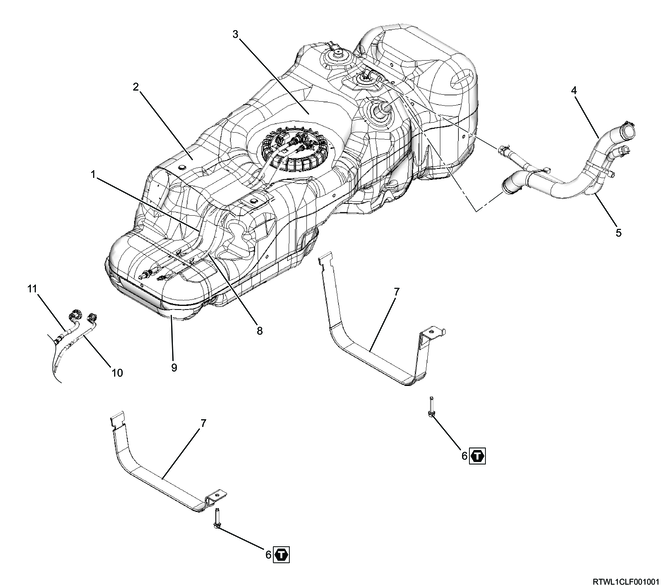
Part name
- Fuel feed tube
- Fuel tank
- Rubber pad
- Fuel filler hose
- Breather hose
- Bolt
- Fuel tank band
- Fuel return tube
- Protector
- Fuel return pipe
- Fuel feed pipe
Tightening torque
6: 68 N・m { 6.9 kgf・m / 50 lb・ft }
2. Fuel tank installation
1) Support the fuel tank using the lifter.
2) Install the fuel tank to the vehicle by raising the lifter.
Caution
- Do not let the fuel pipe and fuel tube interfere with other components.
3) Connect the connector to the fuel tank unit.
Caution
- Securely connect the connector to the stopper.
4) Referring to the following, align the cushion rubber position with the fuel tank band.
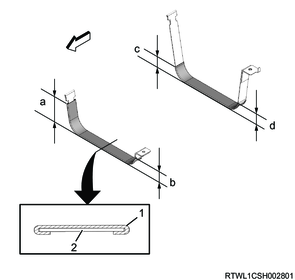
Legend
- Cushion rubber
- Fuel tank band
Dimensions
a: 112 mm { 4.41 in }
b: 20 mm { 0.79 in }
c: 50 mm { 1.97 in }
d: 40 mm { 1.57 in }
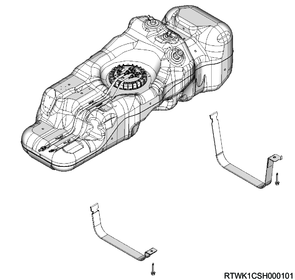
5) Install the fuel tank band to the frame.
Tightening torque: 68 N・m { 6.9 kgf・m / 50 lb・ft }
Caution
- Securely install the tank band anchor to the guide hole of the frame.
- Check that the cushion rubber is not broken.
6) Remove the lifter from the fuel tank.
3. Fuel tube connect
1) Connect the fuel return pipe to the fuel return tube.
2) Connect the fuel feed pipe to the fuel feed tube.
Note
- Applying engine oil or diesel oil to the pipe makes port installation easy.
Caution
- Insert the quick connector straight in until it clicks.
- Pull it out with the standard force and make sure that it is securely locked.
Standard: 49 N { 5.0 kg / 11 lb }
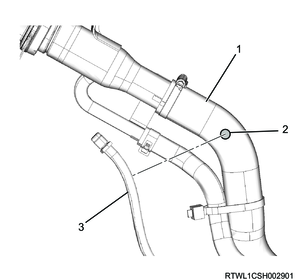
Legend
- Fuel return pipe
- Fuel feed pipe
4. Fuel filler hose connect
1) Connect the breather hose to the filler neck.
Caution
- Install to the original position by aligning the marks applied before removing.
2) Connect the fuel filler hose to the filler neck.
Caution
- Install to the original position by aligning the marks applied before removing.
Tightening torque: 3.0 N・m { 0.3 kgf・m / 27 lb・in }

Legend
- Breather hose
- Fuel filler hose
- Rear axle breather hose (2WD (High ride suspension specifications) and 4WD)
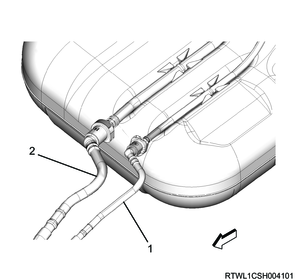
3) Referring to the following, install the band clip to the rear axle breather hose.

Legend
- Rear axle breather hose (2WD (High ride suspension specifications) and 4WD)
- Fuel filler hose
- Band clip
Caution
- Align the rear axle breather hose end with the fuel filler hose marking to secure.
Legend
- Fuel filler hose
- Marking
- Rear axle breather hose (2WD (High ride suspension specifications) and 4WD)
Caution
- Align the band clip with the center of the filler hose and rear axle breather hose to install.
- Cut the band clip end to fit the dimension.
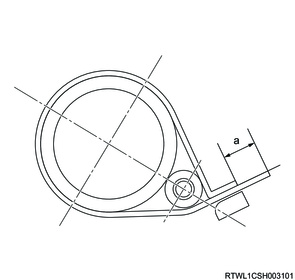
Dimensions
a: 10 mm { 0.39 in }
Caution
- After securing with the band clip, place the rear axle breather hose on the filler hose clip.
- Do not let the rear axle breather hose interfere with other components.
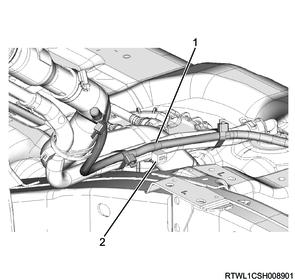
Legend
- Rear axle breather hose (2WD (High ride suspension specifications) and 4WD)
- Filler hose clip
5. Rear mudguard installation
6. Preliminary and post procedures
1. Post procedures
1) Lower the vehicle.
2) Connect the battery cable to the battery negative terminal.
3) Referring to the following, perform the setting of the front door power window switch with AUTO UP/AUTO DOWN function.
Refer to "9.Body, Cab, Accessories 9T.Glass, Windows, Mirrors front door power window switch setting".
4) Close the engine hood.
7. Fuel air bleed
1) Press the priming pump until it becomes hard.
Caution
- Completely bleed air, as insufficient air bleeding may lead to engine malfunctions.
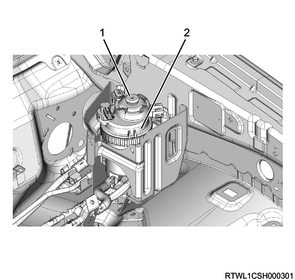
Legend
- Priming pump
- Fuel filter with sedimenter
8. Fuel vehicle inspection
1) Start the engine.
2) Inspect the fuel system for loose connections.
Note
- Inspect for fuel leakage.