 |
ac5wzw00002545
POWER OUTER MIRROR REMOVAL/INSTALLATION
id091200002400
1. Disconnect the negative battery cable. (See NEGATIVE BATTERY CABLE DISCONNECTION/CONNECTION [SKYACTIV-G 2.0, SKYACTIV-G 2.5].) (See NEGATIVE BATTERY CABLE DISCONNECTION/CONNECTION [SKYACTIV-G 2.0, SKYACTIV-G 2.5 (WITHOUT i-stop)].) (See NEGATIVE BATTERY CABLE DISCONNECTION/CONNECTION [SKYACTIV-D 2.2].)
2. Remove the inner garnish. (See INNER GARNISH REMOVAL/INSTALLATION.)
3. Remove the front door trim. (See FRONT DOOR TRIM REMOVAL/INSTALLATION.)
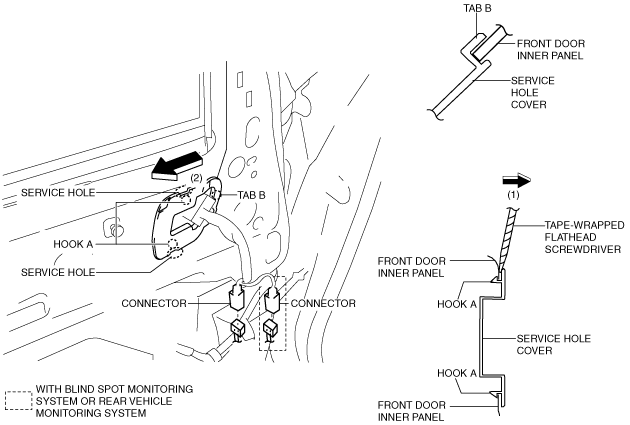
4. Insert a tape-wrapped flathead screwdriver into the service hole and remove hooks A in the direction of arrow (1).
ac5wzw00002545
|
5. Slide the service hole cover in the direction of the arrow (2) shown in the figure and remove tabs B.
6. Disconnect the connector.
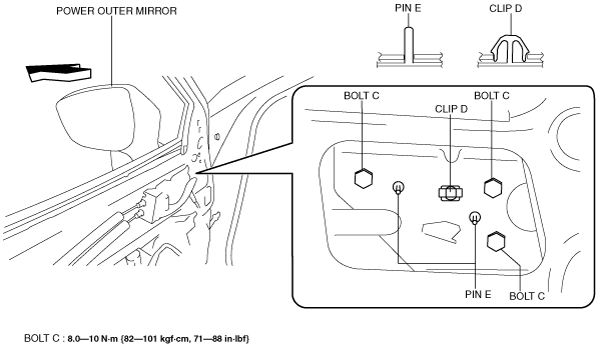
7. Remove nuts C or bolts C.
Nut installation type
ac5wzw00003273
|
Bolt installation type
ac5wzw00006637
|
8. Pull the power outer mirror in the direction of the arrow while remove clips D, pin E.
9. Install in the reverse order of removal.