REAR SPOILER REMOVAL/INSTALLATION
id091600801600
Removal
-
Warning
-
• Always wear gloves when using a utility knife. Using a utility knife with bare hands can cause injury.
-
Note
-
• Remove the rear spoiler and the garnish as a single unit.
1. Remove the liftgate upper trim (See LIFTGATE UPPER TRIM REMOVAL/INSTALLATION.)
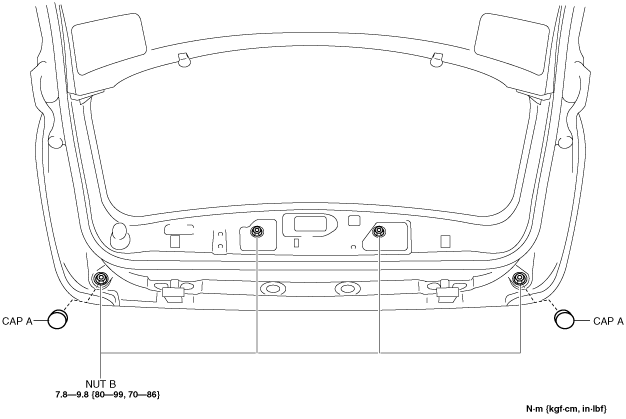
2. Remove caps A.
3. Remove nuts B.
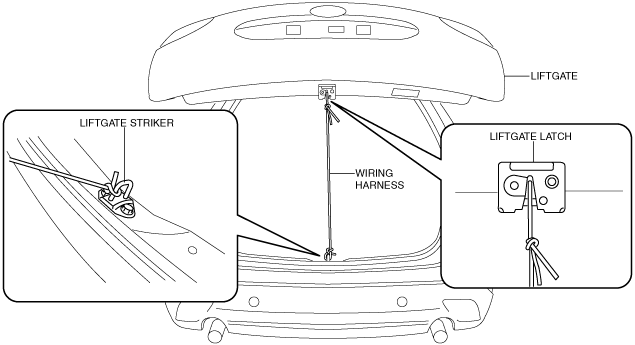
4. Attach a piece of wire between the liftgate striker and liftgate latch to hold the liftgate in the half-opened position as shown below.
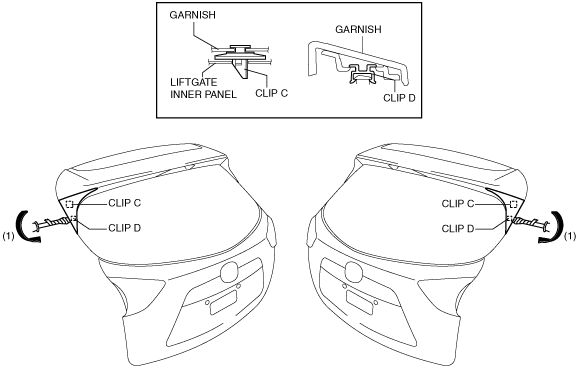
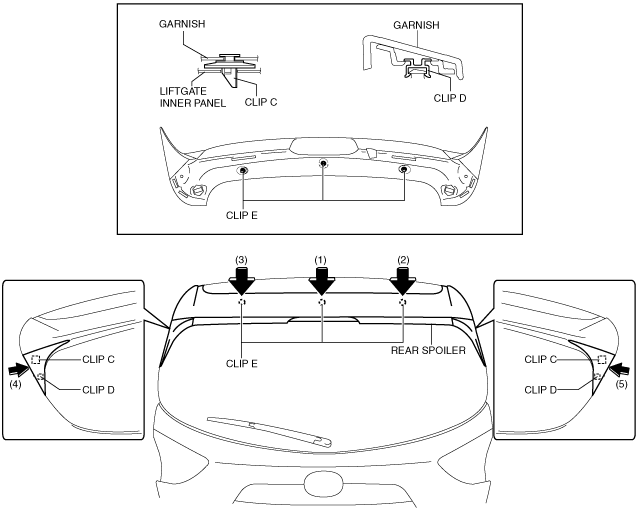
5. Insert a tape-wrapped flathead screwdriver in the locations shown below to remove clips C and D in the direction of the arrow (1).
6. Using a utility knife, carefully remove the double-sided adhesive tape in the locations shown below.
-
Caution
-
• Be careful not the damage the vehicle's paint during tape removal.
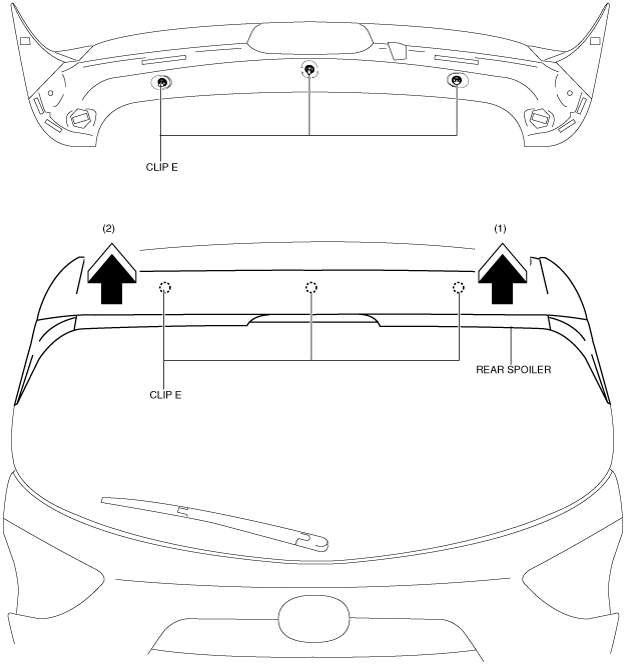
7. Pull the rear spoiler in the direction of the arrows in the order of (1), (2) and remove it while detaching clips E.
-
Caution
-
• When removing the rear spoiler clips E, the rear spoiler may fall and be damaged. Perform the rear spoiler clip removal using two people.
-
Note
-
• Install the rear spoiler and the garnish as a single unit.
Installation
-
Note
-
• To facilitate the procedure after rear spoiler installation, peel the protective tape adhered during removal before installing the rear spoiler.
1. When a rear spoiler is to be reused, perform the following procedure:
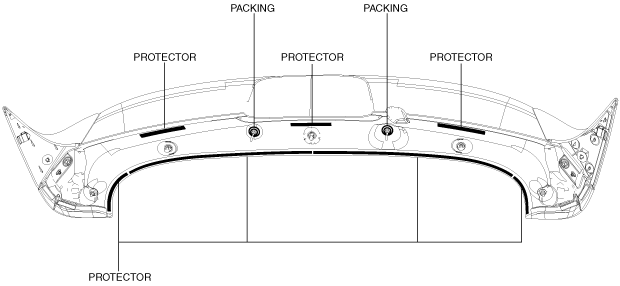
- (1) Remove the packing and protector remaining on the rear spoiler after removal.
- (2) Remove any grease and dirt from the packing and protector affixing area.
- (3) Affix packing and protector to the position shown in the figure.
- (4) If the protector is damaged, replace the part that is damaged with a new protector.
-
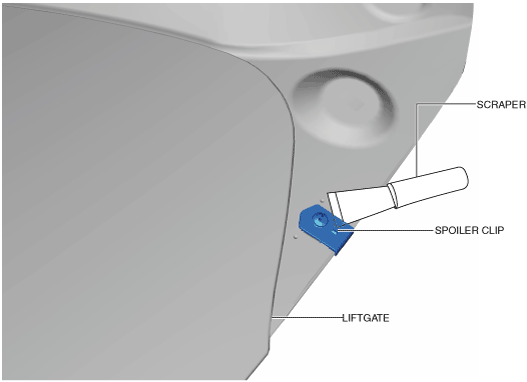
2. If a liftgate spoiler clip has been damaged, perform the following procedure.
- (1) Using a scraper, peel off the spoiler clip from the liftgate.
-
-
Note
-
• If double-adhesive tape remains on the liftgate, warm the tape using a drier and then remove it using a resin spatula.
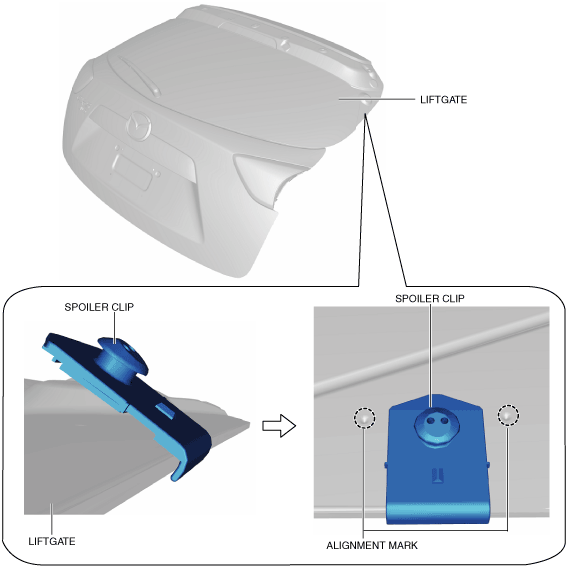
- (2) Remove any grease and dirt from the spoiler clip affixing area on the liftgate.
- (3) Peel off the tape backing from the double-sided adhesive tape.
- (4) While holding the spoiler clip flange against the hem of the liftgate, affix it between the alignment marks shown in the figure.
-
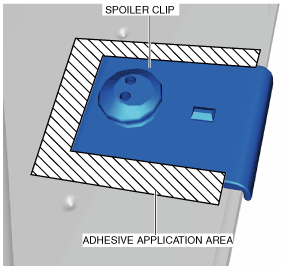
- (5) Press the contact point using fingers and apply pressure to the spoiler clip to affix it to the liftgate.
- (6) Apply adhesive to the area shown in the figure.
-
-
• Follow the instructions for the product being used to determine the adhesive drying time.
3. Push the rear spoiler in the direction of the arrows in the order of (1), (2), (3), (4), (5) and install the rear spoiler while install clips C, D and E.
4. Install nuts B.
5. Install caps A.
6. Install the following parts:
- (1) Liftgate upper trim (See LIFTGATE UPPER TRIM REMOVAL/INSTALLATION.)
- (2) Liftgate side trim (See LIFTGATE SIDE TRIM REMOVAL/INSTALLATION.)