 |
ac5uuw00003308
SHIFT PANEL REMOVAL/INSTALLATION
id091700898400
ATX
1. Disconnect the negative battery cable. (See NEGATIVE BATTERY CABLE DISCONNECTION/CONNECTION [SKYACTIV-G 2.0, SKYACTIV-G 2.5].) (See NEGATIVE BATTERY CABLE DISCONNECTION/CONNECTION [SKYACTIV-G 2.0, SKYACTIV-G 2.5 (WITHOUT i-stop)].) (See NEGATIVE BATTERY CABLE DISCONNECTION/CONNECTION [SKYACTIV-D 2.2].)
2. Remove the shift lever knob. (See AUTOMATIC TRANSAXLE SHIFT MECHANISM REMOVAL/INSTALLATION.)
3. Take the shaded area, and pull up the shift panel in the direction of the arrow (1) shown in the figure.
4. Detaching clips, hook.
ac5uuw00003308
|
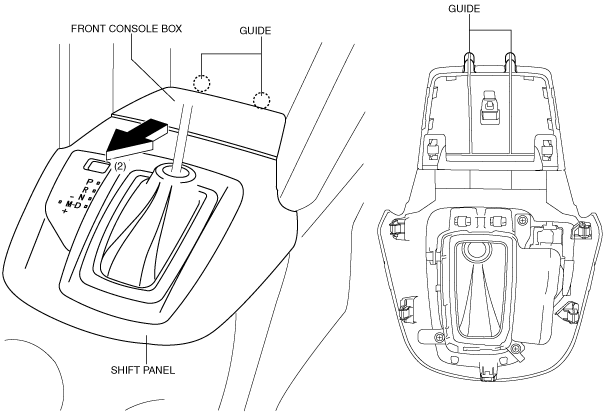
5. Pull the shift panel in the direction of the arrow (2) shown in the figure, while remove guides.
ac5uuw00003309
|
6. Remove the shift panel and front console box as a single unit.
7. Disconnect the connector.
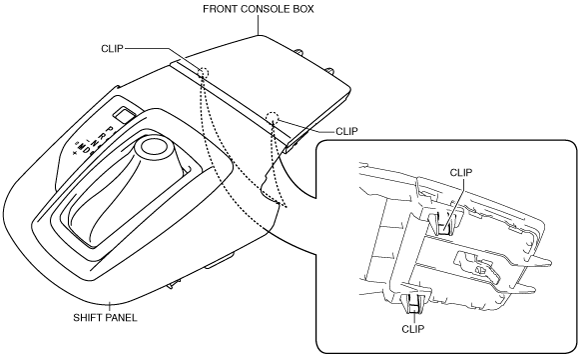
8. Detaching clips.
ac5uuw00003310
|
9. Remove the front console box from shift panel.
10. Install in the reverse order of removal.
MTX
1. Remove the shift lever knob. (See MANUAL TRANSAXLE SHIFT MECHANISM REMOVAL/INSTALLATION [C66M-R, C66MX-R].) (See MANUAL TRANSAXLE SHIFT MECHANISM REMOVAL/INSTALLATION [D66M-R, D66MX-R].)
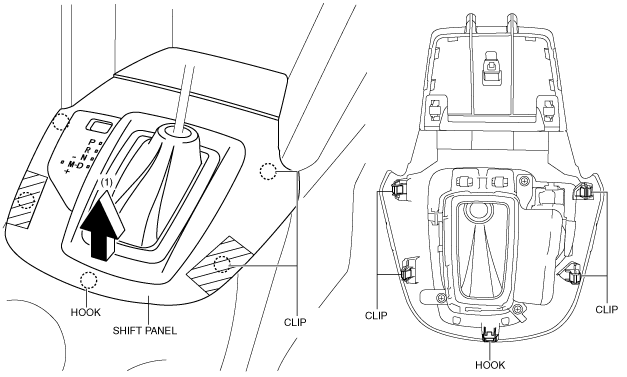
2. Take the shaded area, and pull up the shift panel in the direction of the arrow (1) shown in the figure.
3. Detaching clips, pin, and hook
ac5uuw00003311
|
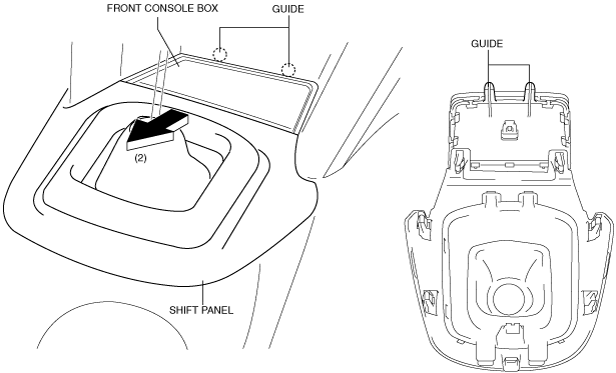
4. Pull the shift panel in the direction of the arrow (2) shown in the figure, while remove guides.
ac5uuw00003312
|
5. Remove the shift panel and front console box as a single unit.
6. Detaching clips.
ac5uuw00003313
|
7. Remove the front console box from shift panel.
8. Install in the reverse order of removal.