 |
ac5wzw00000455
DISCHARGE HEADLIGHT CONTROL MODULE REMOVAL/INSTALLATION
id091800805300
1. Disconnect the negative battery cable. (See NEGATIVE BATTERY CABLE DISCONNECTION/CONNECTION [SKYACTIV-G 2.0, SKYACTIV-G 2.5].) (See NEGATIVE BATTERY CABLE DISCONNECTION/CONNECTION [SKYACTIV-G 2.0, SKYACTIV-G 2.5 (WITHOUT i-stop)].) (See NEGATIVE BATTERY CABLE DISCONNECTION/CONNECTION [SKYACTIV-D 2.2].)
2. Remove the front bumper. (See FRONT BUMPER REMOVAL/INSTALLATION.)
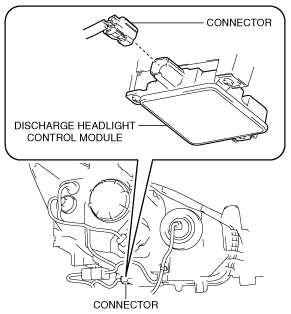
3. Disconnect the connector.
ac5wzw00000455
|
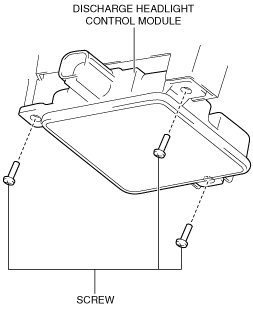
4. Remove the screws.
ac5wzw00000456
|
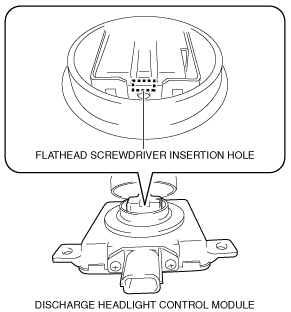
5. Insert a tape-wrapped flathead screwdriver into the clearance between the discharge headlight control module and connector shown in the figure.
ac5wzw00001195
|
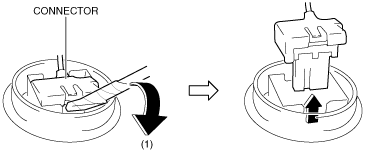
6. Move the flathead screwdriver in the direction of the arrow (1) shown in the figure, lift up the connector, and disconnect it.
ac5wzw00000458
|
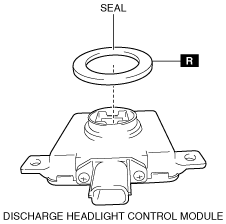
7. Remove the seal.
ac5wzw00003029
|
8. Remove the discharge headlight control module.
9. Install in the reverse order of removal.