 |
ac5jjw00000519
FRONT ULTRASONIC SENSOR SHORT-CORD REMOVAL/INSTALLATION
id092200031000
1. Disconnect the negative battery cable. (See NEGATIVE BATTERY CABLE DISCONNECTION/CONNECTION [SKYACTIV-G 2.0, SKYACTIV-G 2.5].)(See NEGATIVE BATTERY CABLE DISCONNECTION/CONNECTION [SKYACTIV-G 2.0, SKYACTIV-G 2.5 (WITHOUT i-stop)].)(See NEGATIVE BATTERY CABLE DISCONNECTION/CONNECTION [SKYACTIV-D 2.2].)
2. Remove the front bumper. (See FRONT BUMPER REMOVAL/INSTALLATION.)
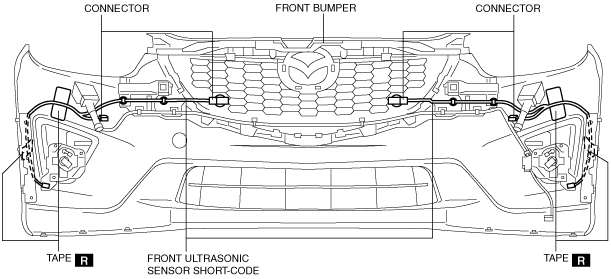
3. Peel off the tape securing the front ultrasonic sensor short-cord from the front bumper.
ac5jjw00000519
|
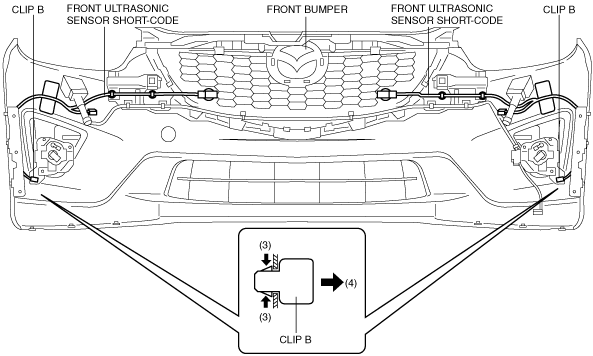
4. Disconnect the connector from the front ultrasonic sensor.
5. Pull clip A in the direction of the arrow (2) shown in the figure while pressing the tab of clip A in the direction of the arrow (1) shown in the figure, and detach the tab of clip A and front bumper.
ac5jjw00000660
|
6. Pull clip B in the direction of the arrow (4) shown in the figure while pressing the tab of clip B in the direction of the arrow (3) shown in the figure, detach the tab of clip B and front bumper, and remove the front ultrasonic sensor short-cord.
ac5jjw00000645
|
7. Install in the reverse order of removal. (See Front Ultrasonic Sensor Short Cord Installation Note.)
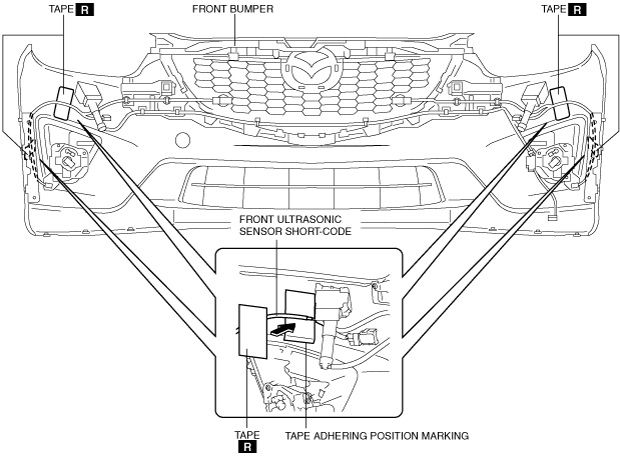
Front Ultrasonic Sensor Short Cord Installation Note
1. Align the height of the front ultrasonic sensor short-cord with the center of the tape adhering position marking on the front bumper.
ac5wzw00000889
|
2. Align the tape with the tape adhering position marking and adhere the front ultrasonic sensor short-cord and front bumper.