CYLINDER HEAD DISASSEMBLY (I)
id011000500400
-
Caution
-
• If the camshaft is rotated with the timing chain removed and the piston at the top dead center position, the valve may contact the piston and the engine could be damaged. When rotating the camshaft with the timing chain removed, rotate it after lowering the piston from the top dead center position.
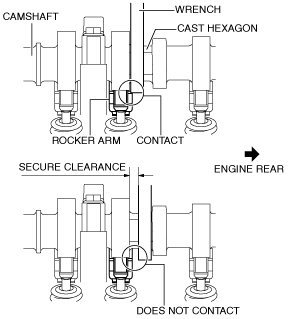
• When rotating the camshaft using a wrench on the cast hexagon, the wrench may contact the rocker arm and damage the rocker arm. To prevent damage to the rocker arm when holding the camshaft on the cast hexagon, use a wrench on the rear side of the engine as shown in the figure to secure a clearance between the cam.
• Carefully assemble the HLA because the specification is different between the intake side and the exhaust side.
-
Note
-
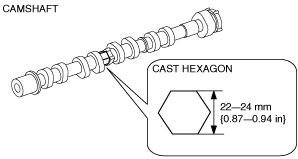
• Width at the cast hexagon of the camshaft is 22—24 mm {0.87—0.94 in}.
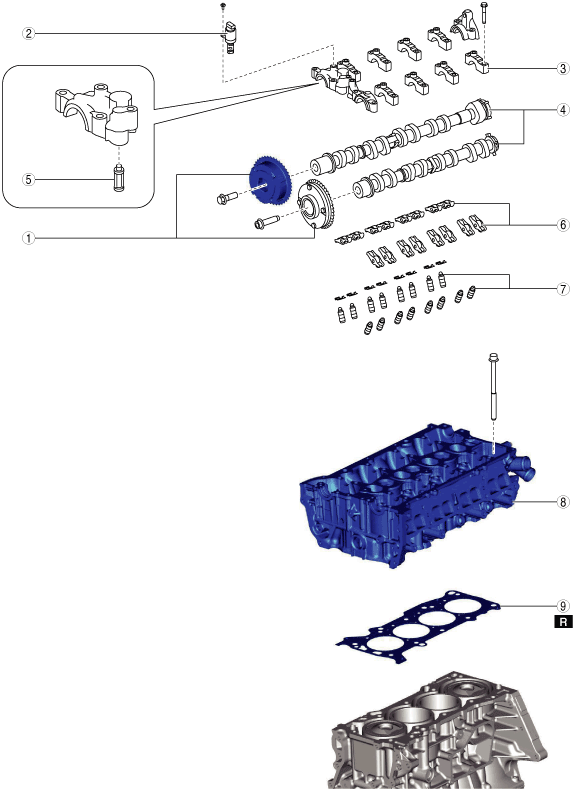
1. Disassemble in the order indicated in the table.
|
1
|
Electric variable valve timing actuator, hydraulic variable valve timing actuator
|
|
2
|
OCV
|
|
3
|
Camshaft cap
|
|
4
|
Camshaft
|
|
5
|
OCV oil filter
|
|
6
|
Rocker arm
|
|
7
|
HLA
|
|
8
|
Cylinder head
|
|
9
|
Cylinder head gasket
|
Electric Variable Valve Timing Actuator, Hydraulic Variable Valve Timing Actuator Disassembly Note
1. Hold the camshaft using a wrench on the cast hexagon and loosen the actuator installation bolt.
Camshaft Cap Disassembly Note
1. Before removing the camshaft cap, Inspect the camshaft end play. (See CAMSHAFT INSPECTION.)
2. Loosen the camshaft cap installation bolts in two or three passes in the order shown in the figure and remove the camshaft caps.
Rocker Arm Disassembly Note
1. Remove the rocker arms, clips and HLAs as a single unit. (only when removing rocker arms on exhaust side)
-
Note
-
• If the rocker arm is not replaced, it is not necessary to perform Step 2.
2. Press the clip in the direction of the arrow to remove it, and then remove the rocker arm. (only when removing rocker arms on exhaust side)
-
Note
-
• The HLA is also removed under this condition.
3. Keep the rocker arms in the order of removal to enable reassembly in their original positions.
HLA Disassembly Note
1. Remove the HLA with the rocker arm, clip, and HLA as a single unit by pulling it in the direction of the arrow shown in the figure. (only when removing HLA on exhaust side)
2. Keep the HLAs in the order of removal to enable reassembly in their original positions.
Cylinder Head Disassembly Note
1. Loosen the cylinder head installation bolts in two or three passes in the order shown in the figure and remove them.