 |
ac5wzw00003427
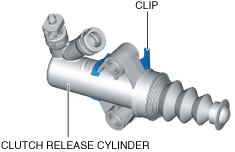
CLUTCH RELEASE CYLINDER REMOVAL/INSTALLATION [D66M-R, D66MX-R]
id0510mf157100
1. Remove the front under cover No.2. (See FRONT UNDER COVER No.2 REMOVAL/INSTALLATION.)
2. Disconnect the clutch pipe No.2 from clutch release cylinder, and plug it to avoid clutch fluid leakage. (See CLUTCH PIPE AND HOSE REMOVAL/INSTALLATION [D66M-R, D66MX-R].)
3. Remove the clutch release cylinder.
ac5wzw00003427
|
4. Install in the reverse order of removal. (See Clutch Release Cylinder Installation Note.)
5. Bleed the air from the clutch system. (See CLUTCH FLUID REPLACEMENT/AIR BLEEDING [D66M-R, D66MX-R].)
Clutch Release Cylinder Installation Note
1. Verify that the clip is attached to the clutch release cylinder.
ac5wzw00009098
|
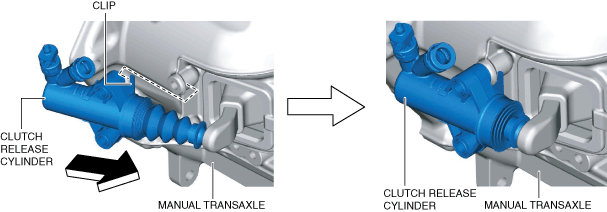
2. Install the clip to the manual transaxle while pressing the clutch release cylinder in the direction of the arrow shown in the figure.
ac5wzw00009099
|
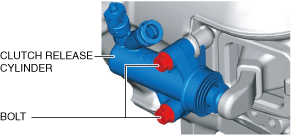
3. Temporarily tighten the bolts.
ac5wzw00009100
|
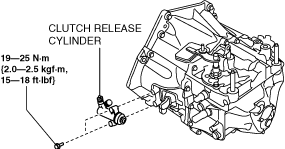
4. Completely tighten the bolts.