|
ac5uuw00007273
LIFTGATE GARNISH REMOVAL/INSTALLATION
id091600445800
Replace parts
|
Double-sided adhesive tape
Number of parts: 2
Used place: Liftgate garnish
|
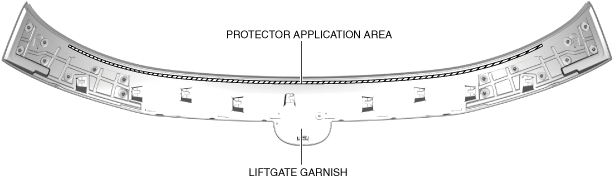
1. Affix protective tape to the position shown in the figure.
ac5uuw00007273
|
2. Remove the double-sided adhesive tape in the position shown in the figure using the utility knife.
ac5uuw00007270
|
3. Insert a tape-wrapped flathead screwdriver in the position shown in the figure, move it in the direction of the arrow to remove the clip.
ac5uuw00007271
|
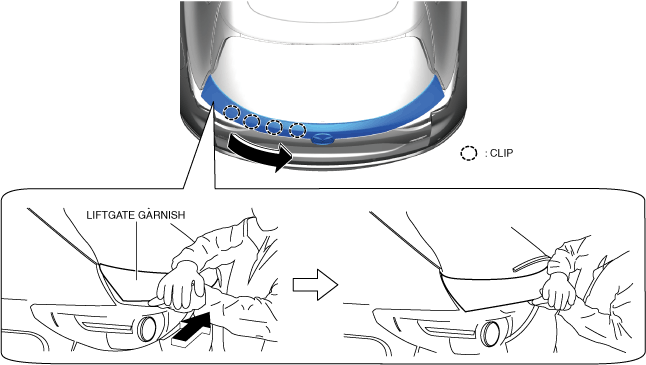
4. Put on gloves.
5. Insert a gloved hand into the position shown in the figure.
ac5uuw00009237
|
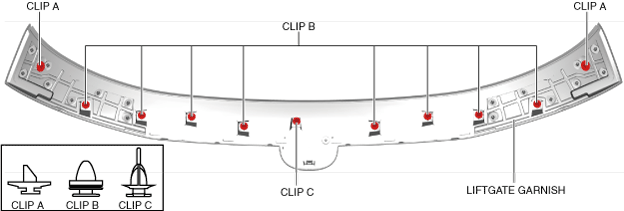
6. Slide a gloved hand in the direction of the arrow shown in the figure and remove the clips.
7. Perform the same procedure from Steps 1 to 6 for the opposite side of the vehicle.
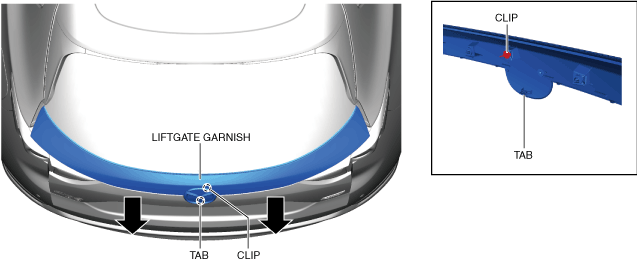
8. Move the liftgate garnish in the direction of the arrows shown in the figure and remove the tab and clip.
ac5uuw00008349
|
9. Remove the liftgate garnish.
10. Remove the mascot. (when removing the mascot)
ac5wzw00013837
|
11. Install in the reverse order of removal. (See Liftgate Garnish Installation Note.)
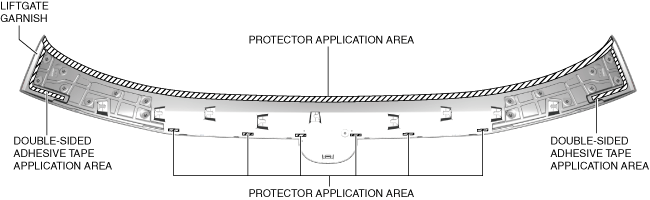
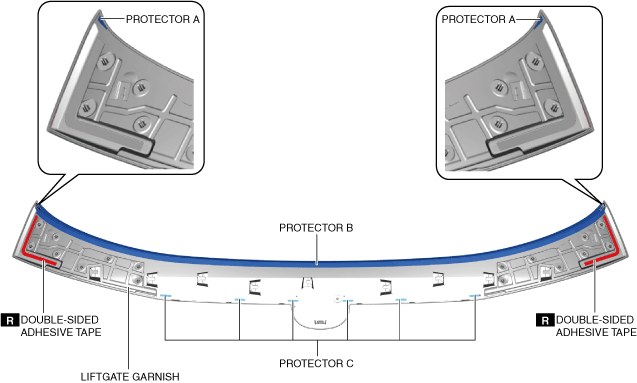
Liftgate Garnish Installation Note
1. When a liftgate garnish is to be reused, affix new double-sided adhesive tape.
2. When replacing the liftgate garnish, perform the following procedure:
ac5uuw00009238
|
ac5wzw00013838
|
ac5wzw00013839
|
ac5wzw00013840
|
ac5wzw00013841
|
ac5wzw00013837
|