 |
ac5uuw00001894
REAR SEAT REMOVAL/INSTALLATION
id091300800400
1. Remove the trunk board. (See TRUNK BOARD REMOVAL/INSTALLATION.)
2. Disconnect the remote cable on the remote handle lever side from the remote cable on the rear seat side. (See REMOTE HANDLE LEVER REMOVAL/INSTALLATION.)
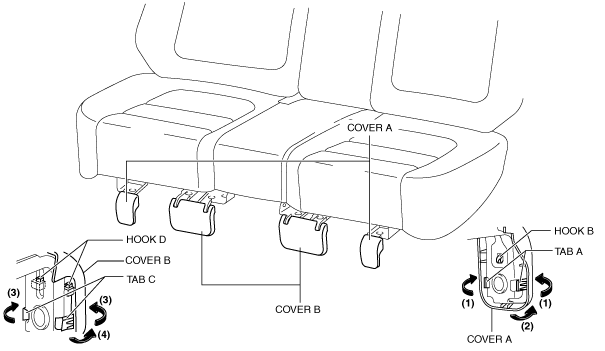
3. Detach tabs A in the direction of the arrow (1) shown in the figure while lifting cover A in the direction of the arrow (2), detach hook B, and then remove cover A.
ac5uuw00001894
|
4. Detach tabs C in the direction of the arrow (3) shown in the figure while lifting cover B in the direction of the arrow (4), detach hook D, and then remove cover B.(See Cover B Installation Note.)
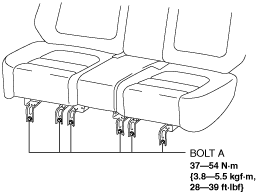
5. Remove bolts A.
ac5uuw00001895
|
6. Press the push knob to fold the rear seat back.
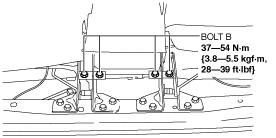
7. Remove bolts B.
ac5uuw00001896
|
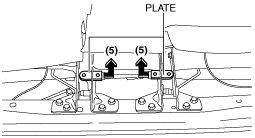
8. Remove the plate in the direction of the arrow (5) shown in the figure.
ac5uuw00001897
|
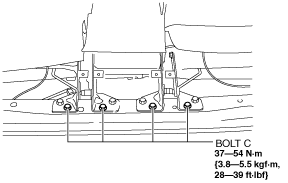
9. Remove bolts C.
ac5uuw00001898
|
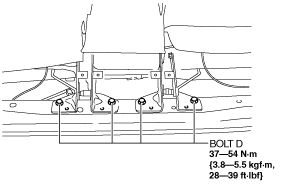
10. Hold up the rear seat back.
11. Remove bolts D. (See Rear Hinge Removal Note.)
ac5uuw00001899
|
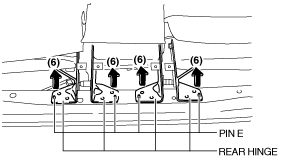
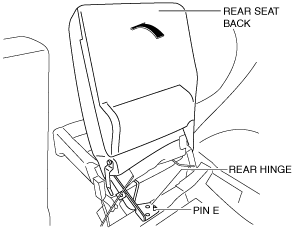
12. Move the rear hinge in the direction of the arrow (6) shown in the figure and disconnect pins E. (See Rear Hinge Installation Note.)
ac5uuw00001900
|
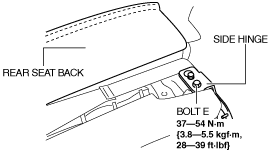
13. Remove bolt E.
ac5uuw00001901
|
14. After moving the rear seat in the direction of the arrow (7) shown in the figure, remove pin F while moving the side hinge in the direction of the arrow (8).
ac5uuw00001902
|
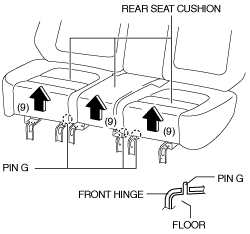
15. Lift up the rear seat cushion in the direction of the arrow (9) shown in the figure and set pins G aside from the front hinge.
ac5wzw00003193
|
16. Remove the rear seat. (See Rear Seat Carry Into Vehicle Note.)
17. Install in the reverse order of removal. (See Rear Seat Installation Note.)
18. Pull the remote handle levers and verify that the rear seat backs are unlocked.
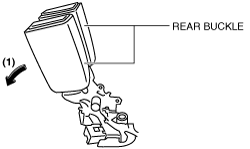
Rear Seat Carry Into Vehicle Note
1. Before carrying the rear seat into the vehicle, shift the rear buckle in the direction of the arrow (1).
ac5uuw00002040
|
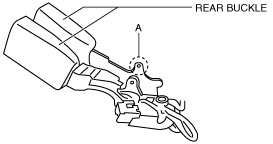
2. Insert a needle into area A shown in the figure and fix the rear buckle in the down condition
ac5uuw00002041
|
3. Carry the rear seat into the vehicle.
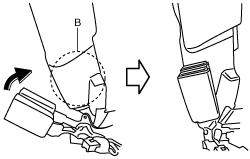
4. Remove the needle fixing the rear buckle tilted frontward, and fold the rear buckle to area B shown in the figure.
ac5jjw00002379
|
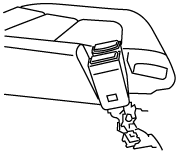
5. Fold the rear seat cushion, and verify that the rear buckle is folded into the rear seat cushion.
ac5jjw00002380
|
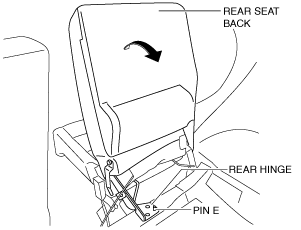
Rear Hinge Removal Note
1. While moving the rear seat back in the direction of arrow shown in the figure, remove the rear hinge to pin E.
ac5wzw00003123
|
Rear Hinge Installation Note
1. While moving the rear seat back in the direction of arrow shown in the figure, install the rear hinge to pin E.
ac5jjw00002381
|
Rear Seat Installation Note
1. When installing the rear seat, temporarily tighten all of the tightening bolts.
2. After temporarily tightening all of the tightening bolts, shake the entire rear seat forward and back/left and right with the rear seat back folded to improve the installation fit of the entire seat.
3. Completely tighten the bolts in the reverse order of removal.
Remote Cable Adjustment Procedure
1. Press the push knob and fold the rear seat back.
2. Remove the trunk mat. (See TRUNK COVERING REMOVAL/INSTALLATION.)
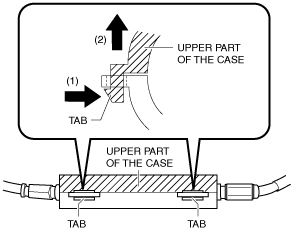
3. Press the tab in the direction of the arrow (1) shown in the figure to disengage it, and open the upper part of the case in the direction of the arrow (2).
ac5wzw00005621
|
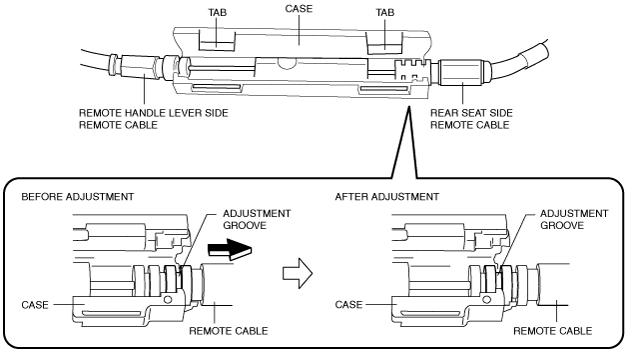
4. Move the position of the remote cable adjustment groove on the rear seat back side one step in the direction of the arrow shown in the figure.
ac5wzw00005619
|
5. Close the case to engage the tab.
6. Move the rear seat back to its upright position and verify that the red indication cannot be seen on the push knob.
ac5wzw00005654
|
7. Pull the remote handle lever and verify that the rear seat back is unlocked.
8. Install the remote cable. (See REMOTE HANDLE LEVER REMOVAL/INSTALLATION.)
9. Install the trunk mat. (See TRUNK COVERING REMOVAL/INSTALLATION.)
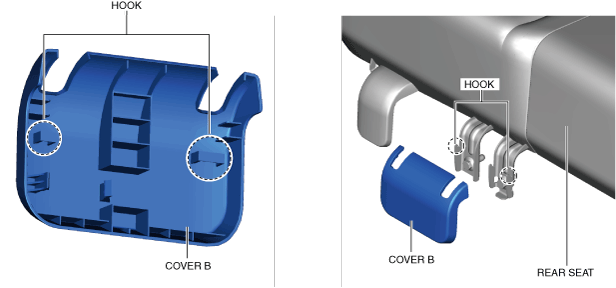
Cover B Installation Note
1. Hook the cover B on the rear seat.
ac5wzw00009856
|
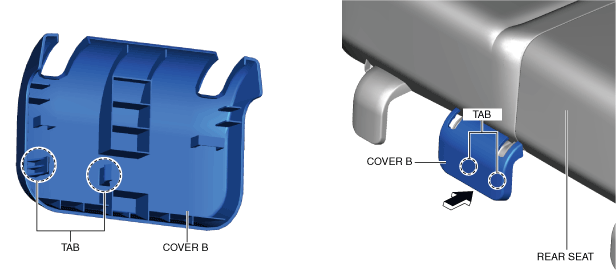
2. move the cover B in the direction of the arrow shown in the figure and install the tabs to rear seat.
ac5wzw00009857
|
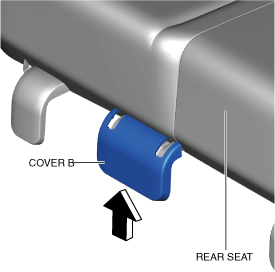
3. Push the cover B in the direction of the arrow shown in the figure and verify that the cover B tabs are engaged with the rear seat.
ac5wzw00009858
|