|
ac5uuw00004434
FRONT DOOR TRIM REMOVAL/INSTALLATION
id091700802500
1. Disconnect the negative battery cable. (See NEGATIVE BATTERY CABLE DISCONNECTION/CONNECTION [SKYACTIV-G 2.0, SKYACTIV-G 2.5].) (See NEGATIVE BATTERY CABLE DISCONNECTION/CONNECTION [SKYACTIV-G 2.0, SKYACTIV-G 2.5 (WITHOUT i-stop)].) (See NEGATIVE BATTERY CABLE DISCONNECTION/CONNECTION [SKYACTIV-D 2.2].)
2. Remove the inner garnish. (See INNER GARNISH REMOVAL/INSTALLATION.)
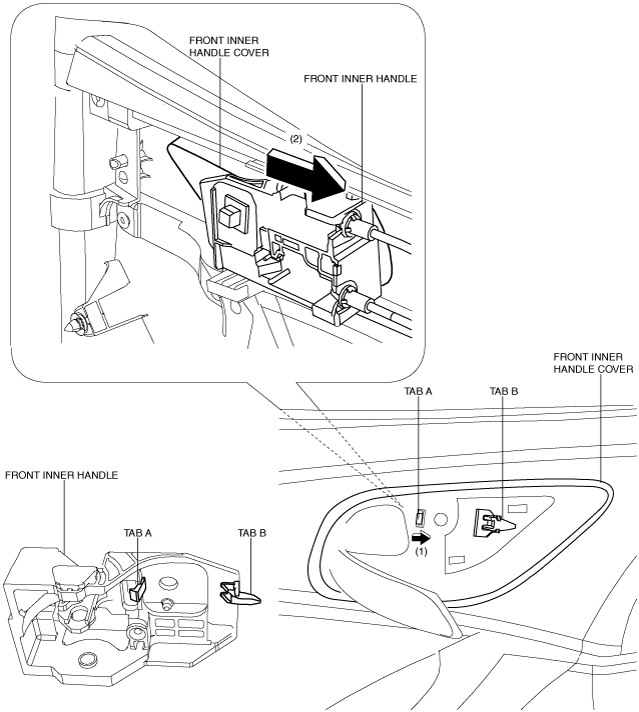
3. Insert a tape-wrapped flathead screwdriver in the position indicated by the arrow (1) in the figure and remove the inner handle cover while detach tabs, pin.
ac5uuw00004434
|
4. Remove the screw.
ac5uuw00004435
|
5. Remove the cover, then remove the screw.
ac5uuw00004436
|
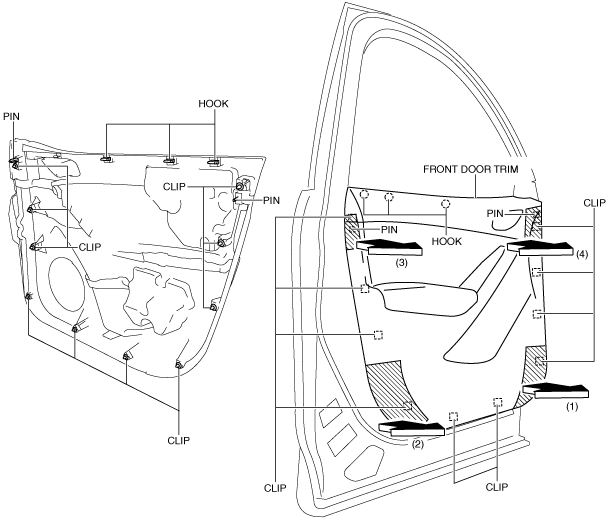
6. Take the shaded area shown in the figure, and pull the front door trim in the direction of the arrow in the order of (1), (2), (3), (4) while detaching clips, hooks and pins.
ac5uuw00004437
|
7. Remove the tab A in the direction of the arrow (1) shown in the figure.
ac5uuw00004438
|
8. Remove the front inner handle in the direction of the arrow (2) shown in the figure while detaching the tab B.
9. Disconnect the power window main switch connector (driver-side) or power window subswitch connector (passenger-side).
10. Install in the reverse order of removal.