REAR SEAT BACK REMOVAL/INSTALLATION
id091300912400
-
Caution
-
• When performing the procedure with a rear seat back removed from the vehicle, perform the procedure on a clean cloth so as not to damage or soil the seat.
-
Note
-
• When removing the rear seat back from the vehicle or putting it back in, it can be performed easier by removing the headrest.
1. Disconnect the negative battery terminal. (See NEGATIVE BATTERY TERMINAL DISCONNECTION/CONNECTION.)
2. Fold the rear seat back.
3. Remove the following parts.
-
When removing the rear seat back (LH)
-
1. Head restraint
-
When removing the rear seat back (RH)
-
1. Head restraint
-
When removing the rear seat back (CENTER)
-
1. Head restraint
4. Disconnect the remote handle cable. (With remote handle lever) (See REMOTE HANDLE LEVER REMOVAL/INSTALLATION.)
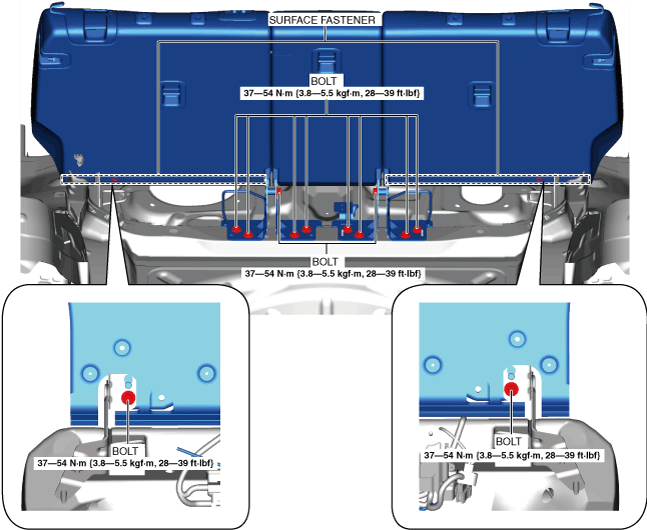
5. Open the surface fastener and partially peel back the rear seat back trim.
6. Remove the bolts.
7. Remove the rear seat back.
8. Install in the reverse order of removal. (See Rear Seat Back Installation Note.)
Rear Seat Back Installation Note
-
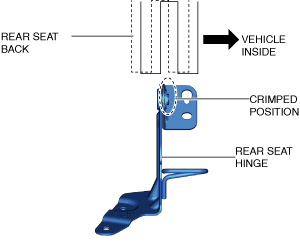
Caution
-
• When installing the rear seat back, move the rear seat back toward the inside of the vehicle so that the rear seat back trim does not interfere with the crimped part of the rear seat hinge. Otherwise, it could damage the rear seat back trim.