 |
ac5wzw00015296
WIRELESS CHARGER (Qi) REMOVAL/INSTALLATION
id092100050100
Replacement Part
|
Band
Quantity: 1
Location of use: Wireless charger (Qi)
|
L.H.D.
1. Disconnect the negative battery terminal. (See NEGATIVE BATTERY TERMINAL DISCONNECTION/CONNECTION.)
2. Remove the following parts:
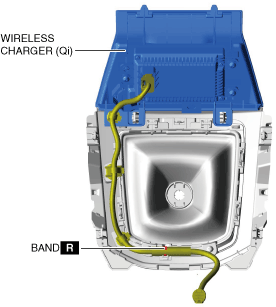
3. Cut the band.
ac5wzw00015296
|
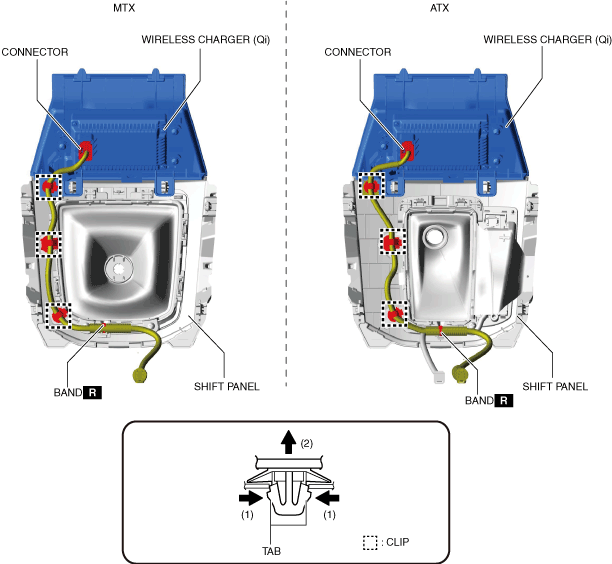
4. While pressing the tabs in the directions of arrows (1) shown in the figure, remove the clip in the direction of arrow (2).
5. Disconnect the connector.
6. Press the tabs in the order of arrows (1) and (2) shown in the figure and remove the wireless charger (Qi).
ac5wzw00015297
|
7. Install in the reverse order of removal.
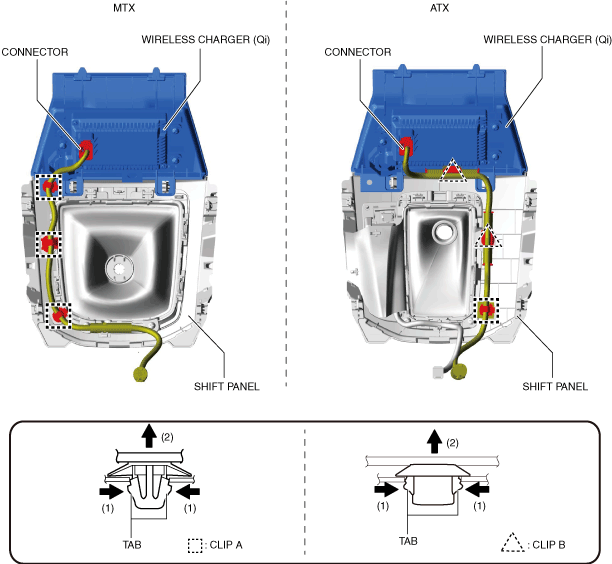
R.H.D.
1. Disconnect the negative battery terminal. (See NEGATIVE BATTERY TERMINAL DISCONNECTION/CONNECTION.)
2. Remove the following parts:
3. Cut the band. (MTX)
ac5wzw00015298
|
4. While pressing the tabs in the directions of arrows (1) shown in the figure, remove clips A and B in the direction of arrow (2).
ac5wzw00015299
|
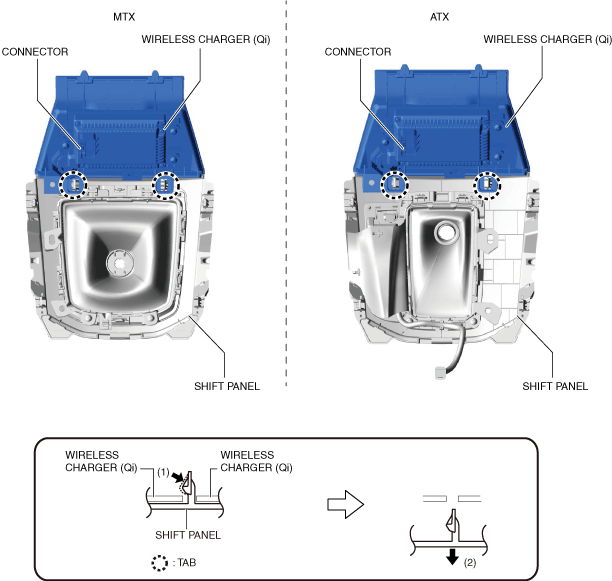
5. Disconnect the connector.
6. Press the tabs in the order of arrows (1) and (2) shown in the figure and remove the wireless charger (Qi).
ac5wzw00015300
|
7. Install in the reverse order of removal.