49 F043 002
Wrench

REAR BRAKE CALIPER DISASSEMBLY/ASSEMBLY
id041100001200
Special Service Tool (SST)
|
49 F043 002
Wrench
|
|
Replacement Part
|
Dust seal
Quantity: 1
Location of use: Caliper body
|
Piston seal
Quantity: 1
Location of use: Piston
|
Oil and Chemical Type
|
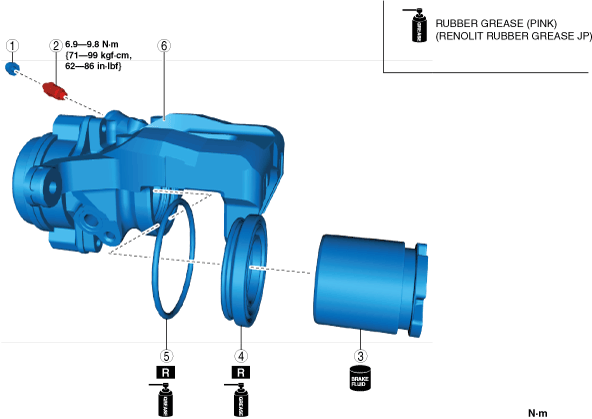
Brake fluid type
Type: SAE J1703 or FMVSS116 DOT-3
|
Rubber grease (Pink)
Type: RENOLIT RUBBER GREASE JP
|
1. Remove in the order indicated in the table.
ac8wzw00002294
|
|
1
|
Bleeder cap
|
|
2
|
Bleeder screw
|
|
3
|
Piston
(See Piston Disassembly Note.)
|
|
4
|
Dust seal
|
|
5
|
Piston seal
|
|
6
|
Caliper body
|
2. Install in the reverse order of removal.
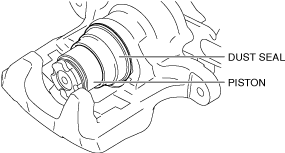
Piston Disassembly Note
1. Insert a piece of wood in the caliper as shown in the figure and blow compressed air through the hole to remove the piston from the caliper body.
ac5jjw00006613
|
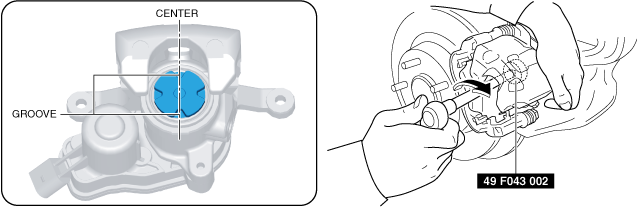
Dust Seal, Piston Assembly Note
1. Assemble the dust seal to the piston.
2. Assemble the lip of the dust seal to the groove of the caliper body with the dust seal is assembled to the piston as shown in the figure.
ac5uuw00003954
|
3. Align the head of the spindle nut with the inner shape of the piston and press the piston into the caliper body completely.
4. Verify that the dust seal is installed into the caliper body groove.
5. Verify that the piston grooves are at the positions shown in the figure.
ac8wzw00002295
|
ac8wzw00002296
|