 |
ac8ccw00000790
FRONT LOWER ARM REMOVAL/INSTALLATION
id021300800600
1. Remove the wheel and tire. (See WHEEL AND TIRE REMOVAL/INSTALLATION.)
2. Remove front under cover No.2. (See FRONT UNDER COVER No.2 REMOVAL/INSTALLATION.)
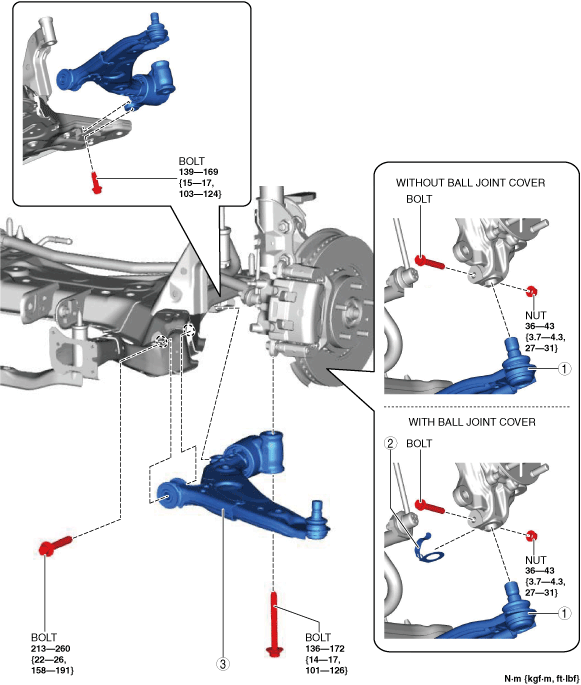
3. Remove in the order shown in the figure.
4. Install in the reverse order of removal. (See Suspension Links Installation Note.)
5. If the front lower arm is replaced, inspect the wheel alignment and adjust it if necessary. (See FRONT WHEEL ALIGNMENT.)
ac8ccw00000790
|
|
1
|
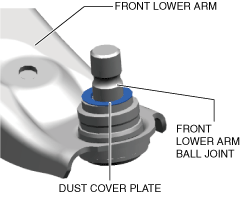
Front lower arm ball joint
|
|
2
|
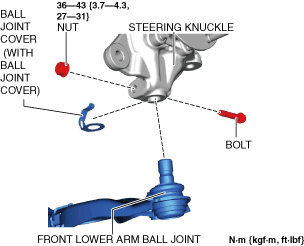
Ball joint cover (with ball joint cover)
|
|
3
|
Front lower arm
|
Suspension Links Installation Note
1. When installing the joint section with a rubber bushing, perform the following steps.
Front Lower Arm Ball Joint Installation Note
ac3wzw00006184
|
1. Insert the bolt from the front of the vehicle and tighten the nut to the specified torque.
Ball Joint Cover Installation Note (With Ball Joint Cover)
1. Install a ball joint cover to the steering knuckle before installing the front lower arm ball joint. (with ball joint cover)
ac3wzw00005994
|
2. Insert the bolt from the front of the vehicle and tighten the nut to the specified torque.