|
ac5wzb00000084
FLOOR SIDE PANEL REMOVAL [PANEL REPLACEMENT]
id098008618700
Symbol Mark
ac5wzb00000084
|
Removal Procedure
1. Remove the brace reinforcement. (See BRACE REINFORCEMENT REMOVAL [PANEL REPLACEMENT].)
2. Drill the 19 locations indicated by (A) shown in the figure, then open the end of rear side frame (upper).
ac9uub00000168
|
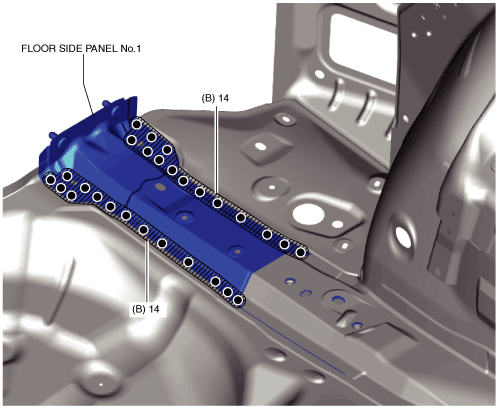
3. Drill the 28 locations indicated by (B) shown in the figure.
ac9uub00000306
|
4. After lifting floor side panel No.1 panel in the direction of arrow (1) shown in the figure, pull it out in the direction of arrow (2).
ac9uub00000170
|
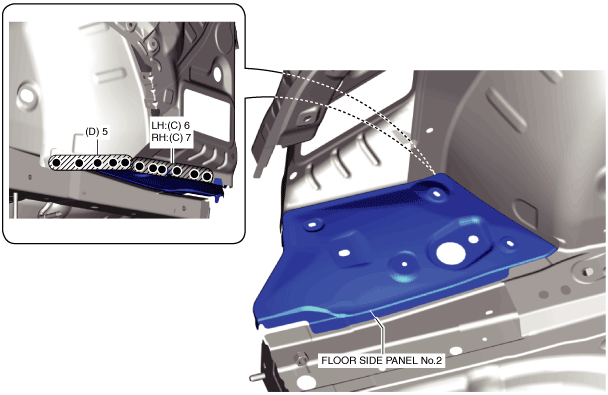
5. Drill the 6 locations (LH), 7 locations (RH) indicated by (C) shown in the figure.
6. Drill the 5 locations indicated by (D) from the rear wheel housing side shown in the figure.
ac9uub00000307
|
7. Remove the floor side panel No.2.
ac9uub00000172
|