|
ac9uuw00004077
DRIVE PLATE REMOVAL/INSTALLATION [AY6A-EL, AY6AX-EL]
id0517k3333100
1. Remove the transaxle. (See AUTOMATIC TRANSAXLE REMOVAL/INSTALLATION [AY6A-EL, AY6AX-EL].)
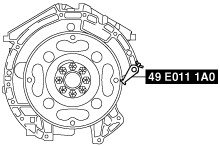
2. Remove in the order indicated in the figure.
3. Install in the reverse order of removal.
ac9uuw00004077
|
|
1
|
Drive plate installation bolts
|
|
2
|
Drive plate
|
Drive Plate Installation Bolts Removal Note
1. Set the SST against the drive plate.
ac9uuw00004078
|
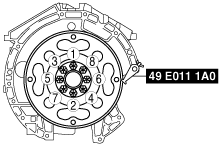
2. Loosen the drive plate installation bolts uniformly in two or three steps in the order shown in the figure, then remove the bolts and the drive plate.
ac9uuw00004079
|
Drive Plate Installation Bolts Installation Note
1. Remove the sealant from the bolt holes in the crankshaft and from the drive plate installation bolts.
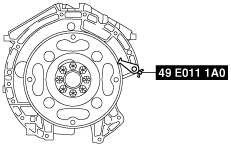
2. Set the SST against the drive plate.
ac9uuw00004080
|
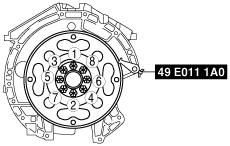
3. Tighten the new drive plate installation bolts uniformly in two or three steps in the order shown in the figure.
ac9uuw00004081
|