 |
a30zzw00006403
RELAY AND FUSE BLOCK REMOVAL
id092100702000
Replacement Part
|
Band
Quantity: 2
Location of use: Relay and fuse block lower cover
|
1. Disconnect the negative battery terminal. (See NEGATIVE BATTERY TERMINAL DISCONNECTION/CONNECTION.)
2. Remove the following parts.
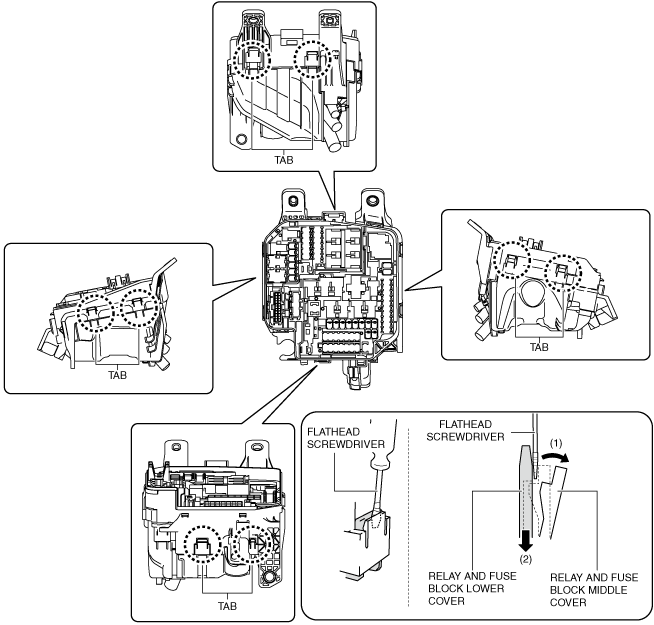
3. Remove the relay and fuse block lower cover.
a30zzw00006403
|
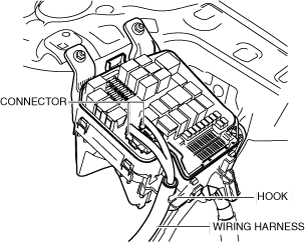
4. Remove the harness from the relay and fuse block hook.
a30zzw00006404
|
5. Disconnect the connector.
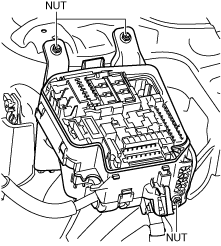
6. Remove all the relays and fuses.
7. Remove the nuts.
a30zzw00006405
|
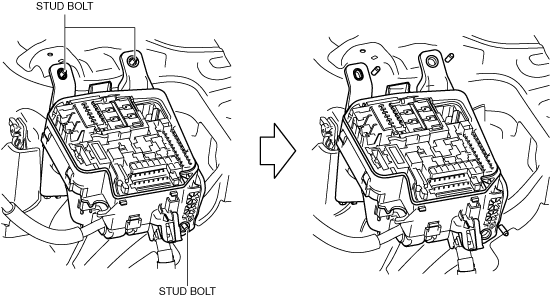
8. Pull out the relay and fuse block from the stud bolts and set it aside as shown in the figure.
a30zzw00006406
|
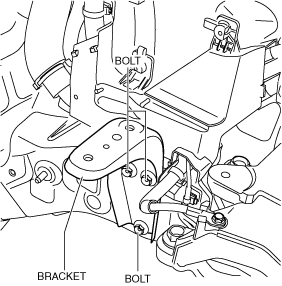
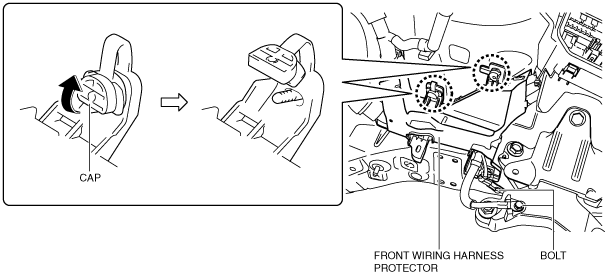
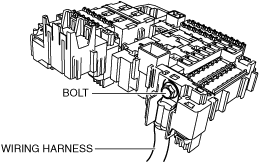
9. Remove the bolts.
a30zzw00006407
|
10. Remove the bracket.
11. Remove the bolts, then remove the body ground.
a30zzw00006408
|
12. Lift up the front wiring harness protector caps in the direction of the arrow shown in the figure.
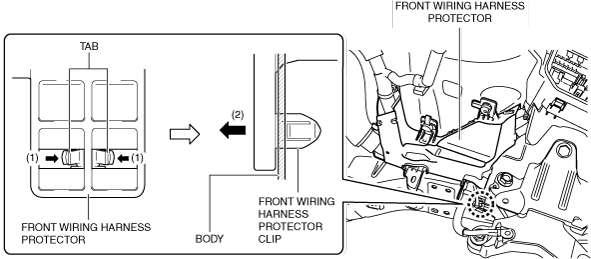
13. While pressing the clip tabs of front wiring harness protector in the direction of the arrows (1) shown in the figure, pull the clip of front wiring harness protector in the direction of the arrow (2) shown in the figure to detach the clip tabs of front wiring harness protector from the body.
a30zzw00006409
|
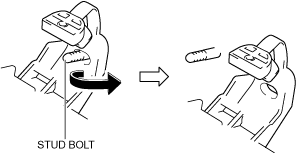
14. Pull out the front wiring harness protector clip.
15. Pull out the front wiring harness protector from the stud bolt and set it aside as shown in the figure.
a30zzw00006410
|
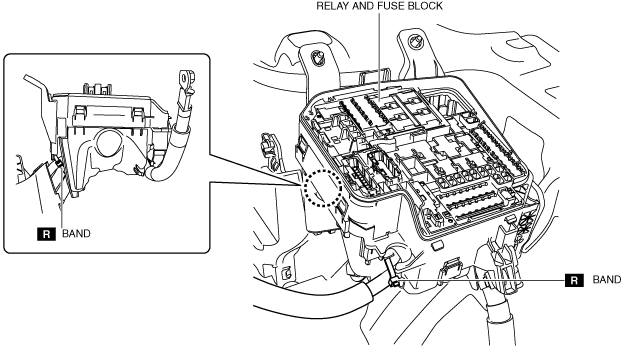
16. Cut the band shown in the figure.
a30zzw00006411
|
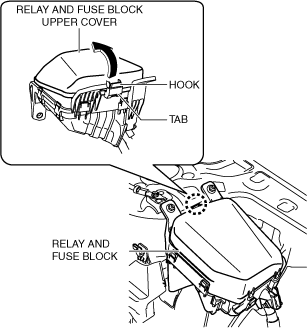
17. Insert a flathead screwdriver into the gap between the relay and fuse block middle cover tabs and the relay and fuse block lower cover as shown in the figure.
a30zzw00006414
|
18. Move the flathead screwdriver in the direction of the arrow (1) shown in the figure, and pull down the relay and fuse block lower cover in the direction of the arrow (2) shown in the figure to detach the relay and fuse block middle cover tab from the relay and fuse block lower cover.
19. Detach all of the relay and fuse block middle cover and the relay and fuse block lower cover.
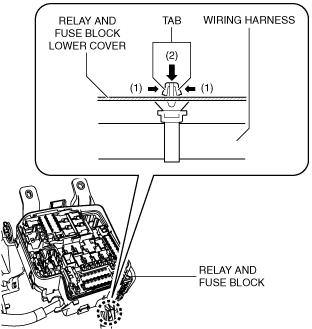
20. While pressing the wiring harness clip tabs in the direction of the arrows (1) shown in the figure, push out the wiring harness clip in the direction of the arrow (2) shown in the figure to detach the wiring harness clip tabs from the relay and fuse block lower cover.
a30zzw00006415
|
21. Pull out the wiring harness clip.
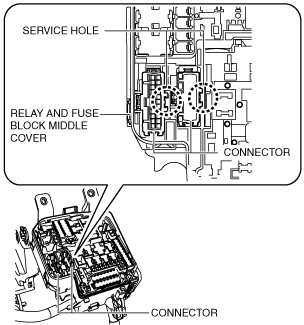
22. Remove the relay and fuse block lower cover.
23. Insert a flathead screwdriver into the service hole in the position shown in the figure.
a30zzw00006416
|
24. Remove the front wiring harness connectors.
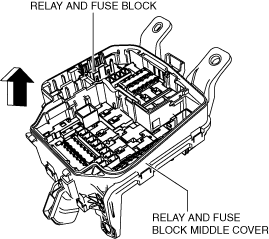
25. Remove the relay and fuse block middle cover in the direction of the arrow shown in the figure.
a30zzw00006417
|
26. Remove the bolt.
a30zzw00006418
|
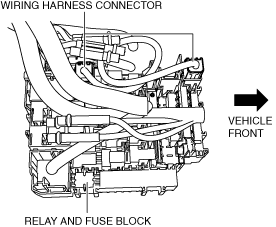
27. Disconnect the wiring harness.
28. Disconnect the connectors.
a30zzw00006419
|
29. Set the removed relay and fuse block aside so that it does not scratch the vehicle and parts.