REAR FLOOR PAN REMOVAL [PANEL REPLACEMENT]
id098008742700
Symbol Marks
Removal Procedure
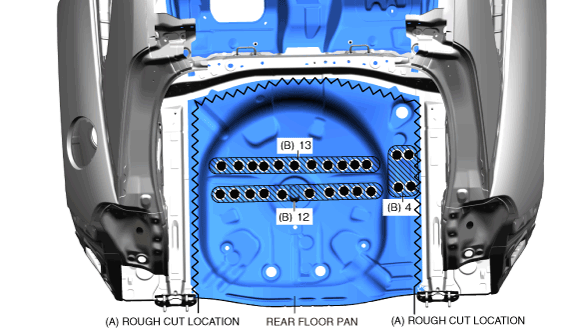
2WD
1. Rough cut the location in area A shown in the figure.
-
Caution
-
• Be careful not to damage crossmember No. 5 when rough cutting part A shown in the figure. Otherwise, the vehicle strength may become diminished.
2. Drill the spot welds in the 29 locations in area B shown in the figure.
-
Note
-
• When drilling the spot welds in the 29 locations in area B shown in the figure, do not drill through-holes in consideration of the workability when installing.
3. Remove the rear floor pan.
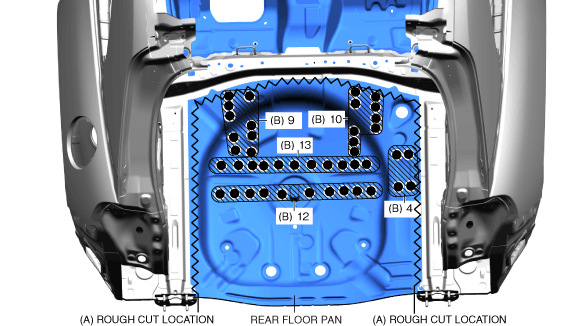
AWD
1. Rough cut the location in area A shown in the figure.
-
Caution
-
• Be careful not to damage crossmember No. 5 when rough cutting part A shown in the figure. Otherwise, the vehicle strength may become diminished.
2. Drill the spot welds in the 48 locations in area B shown in the figure.
-
Note
-
• When drilling the spot welds in the 48 locations in area B shown in the figure, do not drill through-holes in consideration of the workability when installing.
3. Remove the rear floor pan.