Note
• Check codes which are not listed may be indicated, but they cannot be inspected.
• The check codes are displayed in numerical order. (While performing the inspection, if you want to inspect a check code with a number smaller than the code number you are currently inspecting, terminate the check mode then repeat the inspection from the beginning.)
• If a speed signal is input to the instrument cluster (the wheels are rotated), the input/output check mode will be cancelled.
• The check codes can be fast-forwarded by pushing and holding the odometer/tripmeter switch for 1 s or more.
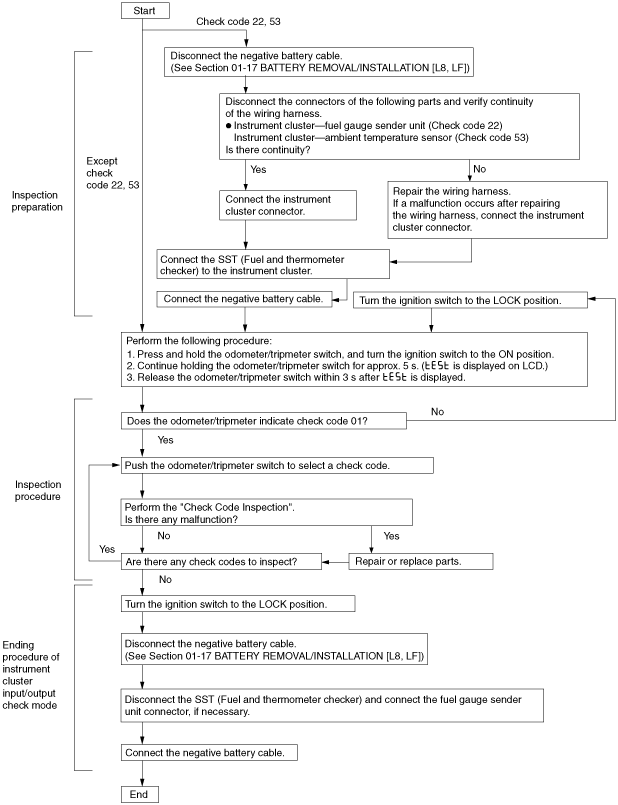
amxzzw00001707
|