 |
amxuuw00004849
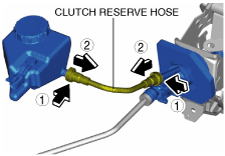
CLUTCH PIPE AND HOSE REMOVAL/INSTALLATION
id051000157000
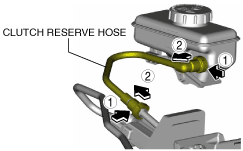
1. Remove the clutch reserve hose while pressing the point indicated by the arrow in the figure.
L.H.D.
amxuuw00004849
|
R.H.D.
amxzzw00003790
|
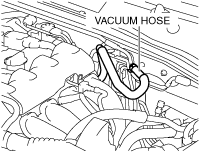
2. Disconnect the vacuum hose. (R.H.D.)
amxzzw00005059
|
3. Remove the plate. (With plate) (See PLATE REMOVAL/INSTALLATION.)
4. Remove the front crossmember under cover. (See FRONT CROSSMEMBER UNDER COVER REMOVAL/INSTALLATION.)
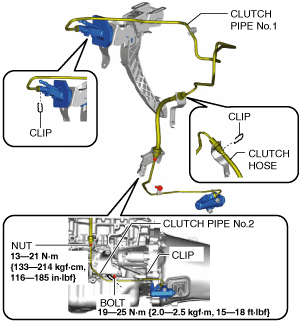
5. Remove the clutch pipes (No.1, No.2) and hose using the following procedure:
L.H.D.
amxzzw00005060
|
R.H.D.
amxzzw00004022
|
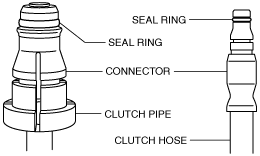
6. Verify that the seal rings are installed to the clutch pipes (No.1, No.2) and hose connector areas.
am2zzw00010001
|
7. Install clutch pipes (No.1, No.2) and the hoses.
8. Insert the clutch reserve hose connector straight.
9. Pull on the clutch receiver hose, clutch pipes (No.1, No.2) and hose connector area to verify that none are pulled out, and re-insert.
10. Install the front crossmember under cover. (See FRONT CROSSMEMBER UNDER COVER REMOVAL/INSTALLATION.)
11. Install the plate. (With plate) (See PLATE REMOVAL/INSTALLATION.)
12. Connect the vacuum hose. (R.H.D.)
amxzzw00005059
|
13. Bleed the air from the clutch system. (See CLUTCH FLUID REPLACEMENT/AIR BLEEDING.)