 |
amxzzw00003328
TCM REMOVAL/INSTALLATION [SJ6A-EL]
id051311250800
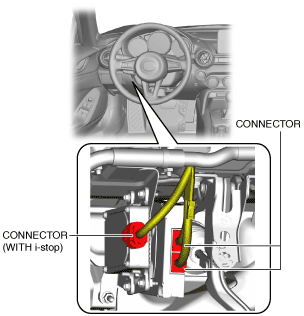
L.H.D.
1. Disconnect the negative battery terminal. (See NEGATIVE BATTERY TERMINAL DISCONNECTION/CONNECTION.)
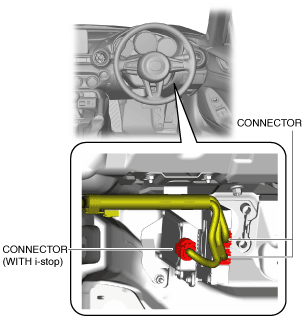
2. Disconnect the connectors.
amxzzw00003328
|
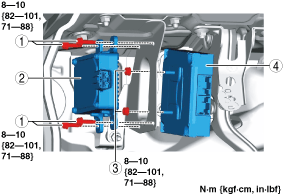
3. Remove in the order indicated in the table.
amxzzw00004465
|
|
1
|
Electric AT oil pump driver control unit installation bolt (With i-stop)
|
|
2
|
Electric AT oil pump driver control unit (With i-stop)
|
|
3
|
TCM installation nut
|
|
4
|
TCM
|
4. Install in the reverse order of removal.
5. Perform the “Initial Learning” (TCM replacement). (See INITIAL LEARNING PROCEDURE [SJ6A-EL].)
R.H.D.
1. Disconnect the negative battery terminal. (See NEGATIVE BATTERY TERMINAL DISCONNECTION/CONNECTION.)
2. Disconnect the connectors.
amxzzw00003330
|
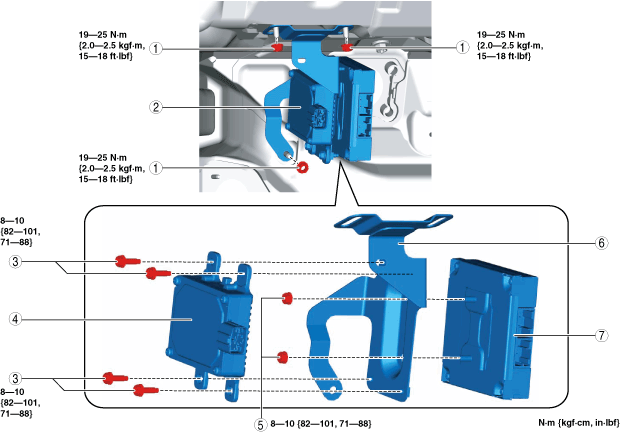
3. Remove in the order indicated in the table.
4. Install in the reverse order of removal.
5. Perform the “Initial Learning” (TCM replacement). (See INITIAL LEARNING PROCEDURE [SJ6A-EL].)
amxzzw00004466
|
|
1
|
TCM component installation nuts
|
|
2
|
TCM component
|
|
3
|
Electric AT oil pump driver control unit installation bolt (With i-stop)
|
|
4
|
Electric AT oil pump driver control unit (With i-stop)
|
|
5
|
TCM installation nuts
|
|
6
|
Bracket
|
|
7
|
TCM
|
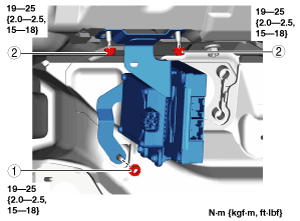
TCM component installation nuts installation note
1. Tighten the TCM component installation nuts in the order shown in the figure.
amxzzw00003332
|