 |
amxzzw00004123
WINDSHIELD GARNISH REMOVAL/INSTALLATION
id091600808700
Removal
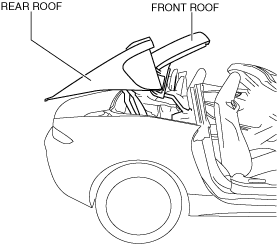
1. Using the retractable hardtop switch, keep the front roof half-open. (retractable hardtop)
amxzzw00004123
|
2. Open the convertible top. (convertible top)
3. Disconnect the negative battery terminal. (See NEGATIVE BATTERY TERMINAL DISCONNECTION/CONNECTION.)
4. Remove the following parts:
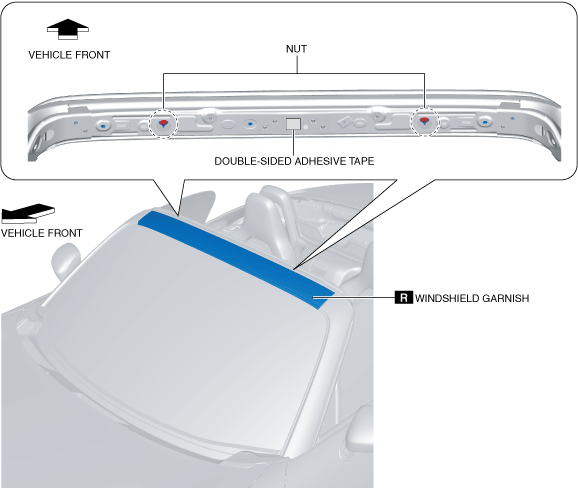
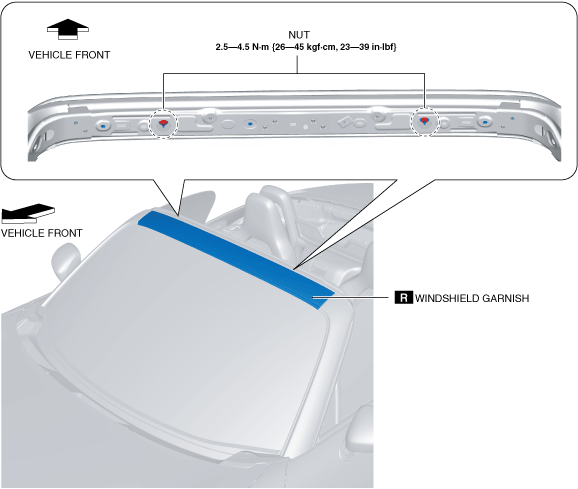
5. Remove the nuts.
amxzzw00005516
|
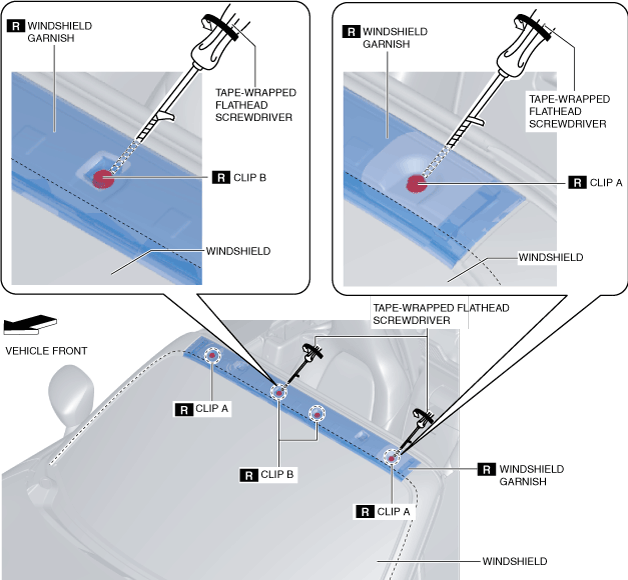
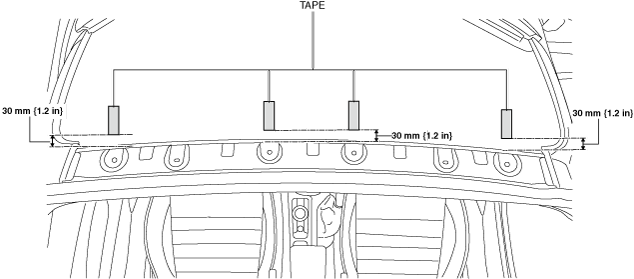
6. Remove the double-sided adhesive tape in the position shown in the figure using a utility knife.
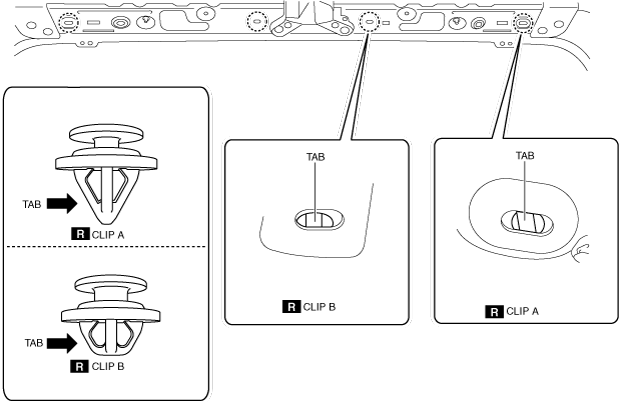
7. Insert a tape-wrapped flathead screwdriver into the position shown in the figure, rotate it in the direction of the arrows and detach windshield garnish clips A and clips B.
amxzzw00004867
|
8. Remove the windshield garnish.
9. Remove the clips from the body. (See Clip Removal Note.)
Clip Removal Note
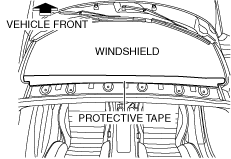
1. Affix the protective tape to the position shown in the figure to prevent scratches and damage.
amxzzw00004868
|
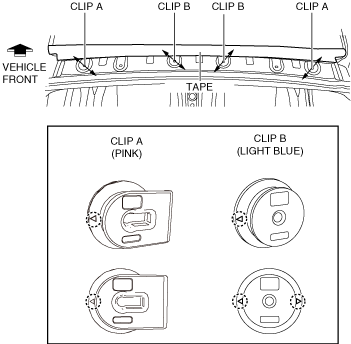
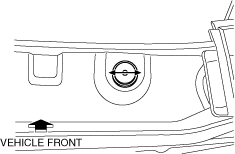
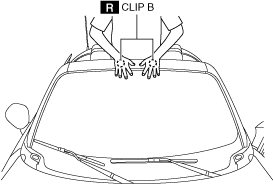
2. Rotate the clips and place the alignment marks in the position shown in the figure.
amxzzw00005517
|
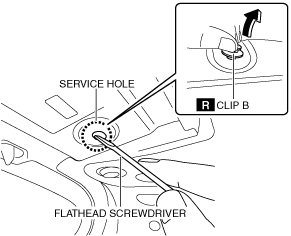
3. Insert a tape-wrapped flathead screwdriver in the position shown in the figure.
amxzzw00004870
|
4. While pressing the tab using a flathead screwdriver, pull the clip B in the direction of arrow shown in the figure.
amxzzw00004871
|
5. Rotate the clips and place the alignment marks in the position shown in the figure.
amxzzw00004872
|
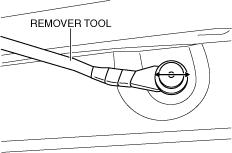
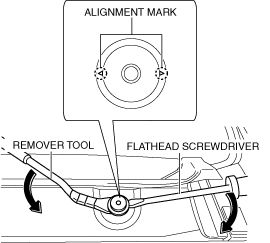
6. Insert a tape-wrapped fastener remover in the position shown in the figure.
amxzzw00004873
|
7. Insert a flathead screwdriver in the position shown in the figure.
amxzzw00004874
|
8. Move the tools in the directions of the arrows shown in the figure and remove the clip.
amxzzw00004875
|
Installation
1. Affix the clips alignment tape to the position shown in the figure.
amxzzw00004876
|
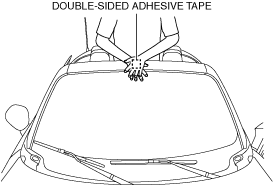
2. Remove any grease or dirt from the double-sided adhesive tape installation surface of the body panel.
3. Peel off the backing from the double-sided adhesive tape.
4. Insert the stud bolts of windshield garnish in the body panel.
5. Press the windshield garnish with the force of 150 N {15.3 kgf, 33.7 lbf} and install the clip B.
amxzzw00004877
|
6. Press the windshield garnish with the force of 50 N {5.1 kgf, 11 lbf}to adhere the double-sided adhesive tape to the body.
amxzzw00005518
|
7. Press the windshield garnish with the force of 150 N {15.3 kgf, 33.7 lbf}and install the clips A.
amxzzw00004879
|
8. Install the nuts.
amxzzw00005519
|
9. Install the following parts:
10. Connect the negative battery terminal. (See NEGATIVE BATTERY TERMINAL DISCONNECTION/CONNECTION.)