 |
amxzzw00003519
INTRUDER SENSOR REMOVAL/INSTALLATION
id091400517200
1. Disconnect the negative battery cable. (See NEGATIVE BATTERY CABLE DISCONNECTION/CONNECTION.)
2. Remove the following parts:
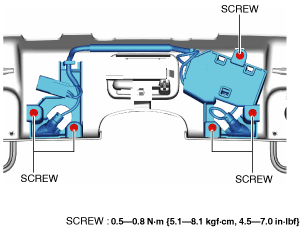
3. Remove the screws.
amxzzw00003519
|
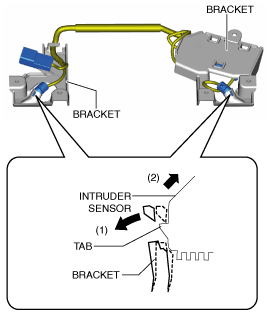
4. While pulling the bracket in the direction of arrow (1) shown in the figure, pull the intruder sensor in the direction of arrow (2) shown in the figure, and detach the intruder sensor tabs from the bracket.
amxzzw00003520
|
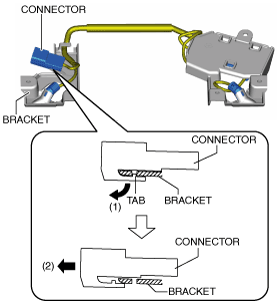
5. Move the tape-wrapped flathead screwdriver in the direction of arrow (1) shown in the figure to press the connector tab, and pull it in the direction of arrow (2) to detach the connector from the bracket.
amxzzw00003521
|
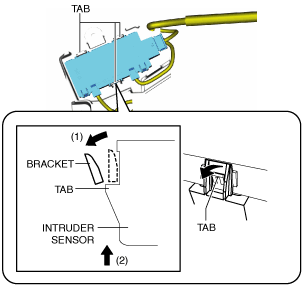
6. While pulling the bracket in the direction of arrow (1) shown in the figure, pull the intruder sensor in the direction of arrow (2) shown in the figure, and detach the intruder sensor tab from the bracket.
amxzzw00003522
|
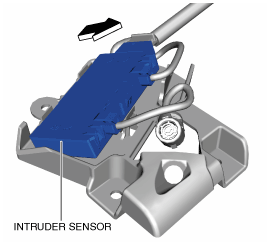
7. Remove the intruder sensor in the direction of the arrow shown in the figure.
amxzzw00003734
|
8. Remove the bracket and intruder sensor.
9. Install in the reverse order of removal.