|
amxzzw00004381
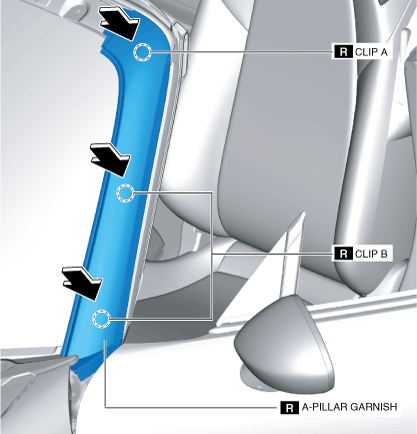
A-PILLAR GARNISH INSTALLATION
id091600453700
1. Remove any grease or dirt from the double-sided adhesive tape installation surface of the body panel.
amxzzw00004381
|
2. Peel off the backing from the double-sided adhesive tape.
3. Install the A-pillar garnish by pressing it with the force of 150 N {15.3 kgf, 33.7 lbf}in the direction of the arrows shown in the figure.
amxzzw00004382
|
4. Install the following parts:
5. Connect the negative battery cable. (See NEGATIVE BATTERY CABLE DISCONNECTION/CONNECTION.)