 |
amxzzw00004592
MICROPHONE REMOVAL/INSTALLATION
id092000801400
1. Disconnect the negative battery cable. (See NEGATIVE BATTERY CABLE DISCONNECTION/CONNECTION.)
2. Remove the following parts:
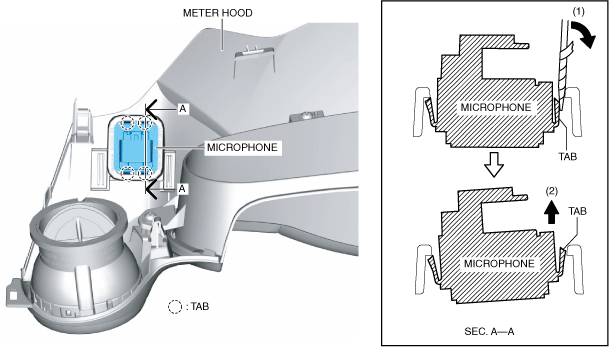
3. Move a tape-wrapped flathead screwdriver in the direction of arrow (1) shown in the figure and pull the microphone in the direction of arrow (2) to detach the microphone tabs from the meter hood.
amxzzw00004592
|
4. Detach all microphone tabs from the meter hood.
5. Remove the microphone.
6. Install in the reverse order of removal.