 |
amxzzw00002998
CAPACITOR (i-ELOOP) REMOVAL/INSTALLATION [i-ELOOP]
id131704006000
Procedure Before i-ELOOP-Related Part Servicing
Cautions On Handling Capacitor (i-ELOOP)
Capacitor (i-ELOOP) Removal/Installation
1. Disconnect the negative battery cable. (See NEGATIVE BATTERY CABLE DISCONNECTION/CONNECTION.)
2. Remove the front mudguard No.2 (LH). (See FRONT MUDGUARD REMOVAL/INSTALLATION.)
3. Disconnect the service plug. (See SERVICE PLUG DISCONNECTION/CONNECTION [i-ELOOP].)
4. Remove the front splash shield No.1 (LH). (See FRONT SPLASH SHIELD No.1 REMOVAL/INSTALLATION.)
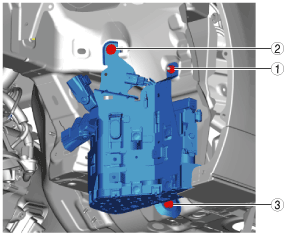
5. Remove in the order indicated in the table.
6. Install in the reverse order of removal.
7. When disposing of the capacitor (i-ELOOP), perform compulsory discharge of the capacitor before disposal. (See CAPACITOR (i-ELOOP) COMPULSORY DISCHARGE [i-ELOOP].)
8. If the capacitor is replaced with a new one, charge the new capacitor. (See CAPACITOR (i-ELOOP) RECHARGING [i-ELOOP].)
amxzzw00002998
|
|
1
|
Capacitor connector, wiring harness
|
|
2
|
Engine wiring harness
|
|
3
|
Battery cable
|
|
4
|
Capacitor (i-ELOOP)
|
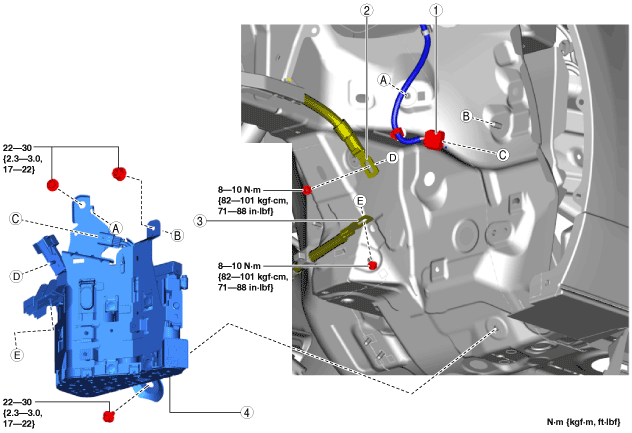
Capacitor (i-ELOOP) Installation Note
1. Set the capacitor (i-ELOOP) to the installation position.
2. Tighten the bolts and nut shown in the order shown in the figure.
ardjjw00005834
|