|
amxzzw00002777
POWER METAL OXIDE SEMICONDUCTOR FIELD EFFECT TRANSISTOR (POWER MOS FET) REMOVAL/INSTALLATION [FULL-AUTO AIR CONDITIONER]
id0740a1800200
L.H.D.
1. Remove the battery cover.
2. Disconnect the negative battery cable. (See BATTERY REMOVAL/INSTALLATION [L8, LF].)
3. Insert a hand from the position shown in the figure to the position where the power MOS FET connector can be felt.
amxzzw00002777
|
4. Disconnect the power MOS FET connector in the direction of the arrow shown in the figure while pressing the tab in the direction of the arrow shown in the figure.
amxzzw00002778
|
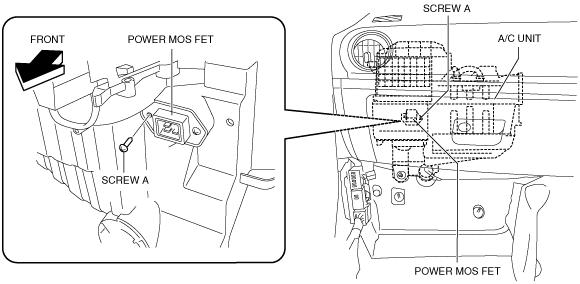
5. Remove screws A.
amxzzw00002779
|
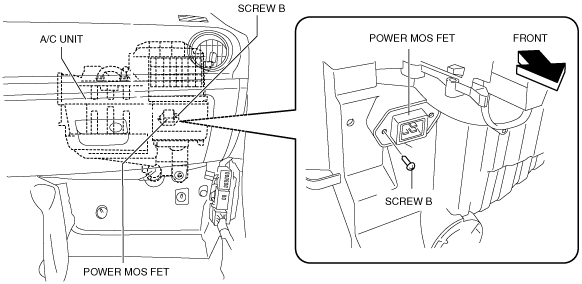
6. Remove screw B.
amxzzw00002780
|
7. Remove the power MOS FET.
amxzzw00002781
|
8. Install in the reverse order of removal.
R.H.D.
1. Remove the battery cover.
2. Disconnect the negative battery cable. (See BATTERY REMOVAL/INSTALLATION [L8, LF].)
3. Remove the scuff plate on the passenger's side. (See SCUFF PLATE REMOVAL/INSTALLATION.)
4. Remove the front side trim on the passenger side. (See FRONT SIDE TRIM REMOVAL/INSTALLATION.)
5. Peel back the floor covering and remove the foot support.
6. Remove the connector securing fastener from the body panel.
amxzzw00002756
|
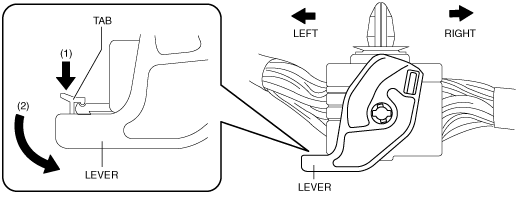
7. Rotate the connector so that the connector lever is positioned in the rearward direction of the vehicle.
8. Move the lever in the direction of arrow (2) with the tab pressed in the direction of arrow (1) shown in the figure, and disconnect the connector from the tab.
amxzzw00002782
|
9. Move the lever to the position shown in the figure.
amxzzw00002758
|
10. Disconnect the connector.
amxzzw00002759
|
11. Set the connector aside so that a hand can be inserted from the position where the connector was installed.
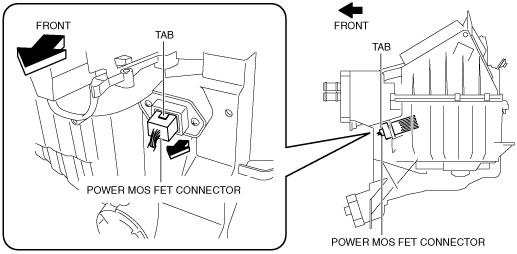
12. Insert a hand from the position shown in the figure to the position where the power MOS FET connector can be felt.
amxzzw00002783
|
13. Disconnect the power MOS FET connector in the direction of the arrow shown in the figure while pressing the tab in the direction of the arrow shown in the figure.
amxzzw00002761
|
14. Remove screws A.
amxzzw00002784
|
15. Remove screw B.
amxzzw00002763
|
16. Remove the power MOS FET.
amxzzw00002785
|
17. Install in the reverse order of removal.