|
amxuuw00000718
DECK PANEL REMOVAL/INSTALLATION
id091600809900
1. Fully open the deck panel.
2. Remove the battery cover.
3. Disconnect the negative battery cable. (See BATTERY REMOVAL/INSTALLATION [L8, LF].)
4. Set the side shelf out of the way. (See SIDE SHELF REMOVAL/INSTALLATION.)
5. Insert a phillips screwdriver with no wear securely into each screw groove and remove the screws.
amxuuw00000718
|
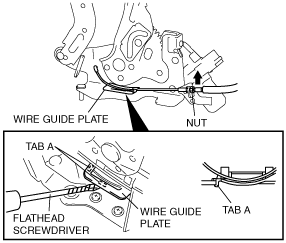
6. Remove the rod from the wire guide.
7. Remove tabs A using a tape-wrapped flathead screwdriver, and then remove the wire guide plate.
amxuuw00000719
|
8. Loosen the nut, then pull the roof hook cable in the direction shown by the arrow and remove it.
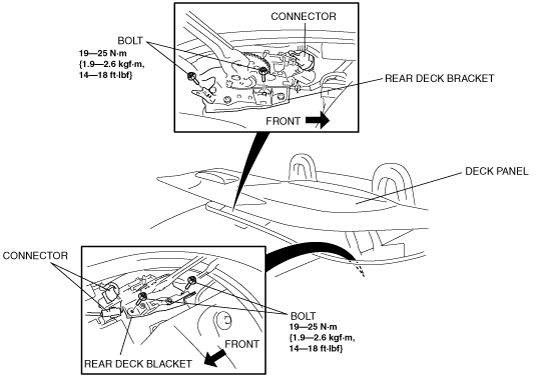
9. Remove the bolts.
amxzzw00002079
|
10. Disconnect the deck panel motor connectors.
11. Disconnect the high-mount brake light connector.
12. Disconnect the deck panel limit switch connector.
13. Remove the deck panel.
14. Install in the reverse order of removal.