 |
am3zzw00001386
FRONT OIL SEAL REPLACEMENT [MZ-CD 1.4 DI Turbo]
id0110b8800800
1. Disconnect the negative battery cable. (See BATTERY REMOVAL/INSTALLATION [MZ-CD 1.4 DI Turbo].)
2. Remove the following parts:
3. Remove the wiring harness and wiring harness bracket.
4. Set the cooler pipe out of the way (With A/C). (See REFRIGERANT LINE REMOVAL/INSTALLATION.)
5. Remove the timing belt. (See TIMING BELT REMOVAL/INSTALLATION [MZ-CD 1.4 DI Turbo].)
6. Remove in the order indicated in the table.
7. Install in the reverse order of removal.
am3zzw00001386
|
|
1
|
Key
|
|
2
|
Front oil seal
(See Front Oil Seal Removal Note.)
|
Front Oil Seal Removal Note
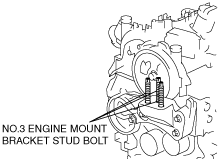
1. Install the No.3 engine mount bracket.
2. Tighten the No. 3 engine mount bracket stud bolts.
am2zzw00003137
|
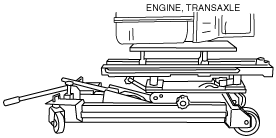
3. Install the No.3 engine mount rubber.
4. Remove the engine jack.
am2zzw00003079
|
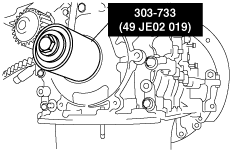
5. Remove the front oil seal using a flathead screwdriver with the tip protected by a rag to prevent crankshaft oil seal damage.
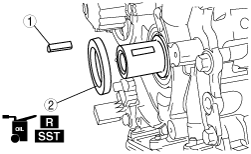
Front Oil Seal Installation Note
1. Apply clean engine oil to a new front oil seal.
2. Install the front oil seal using the SST.
am3zzw00001388
|
3. Secure the engine and the transaxle using an engine jack.
am2zzw00003079
|
4. Remove the No.3 engine mount bracket and No.3 engine mount rubber.