 |
am2zzw00009605
RECEIVER/DRIER REMOVAL/INSTALLATION [SKYACTIV-G 1.3, SKYACTIV-G 1.5]
id0711008014l1
1. Disconnect the negative battery cable. (See NEGATIVE BATTERY CABLE DISCONNECTION/CONNECTION.)
2. Discharge the refrigerant. (See REFRIGERANT RECOVERY.)(See REFRIGERANT CHARGING.)
3. Remove the front bumper. (See FRONT BUMPER REMOVAL.)(See FRONT BUMPER INSTALLATION.)
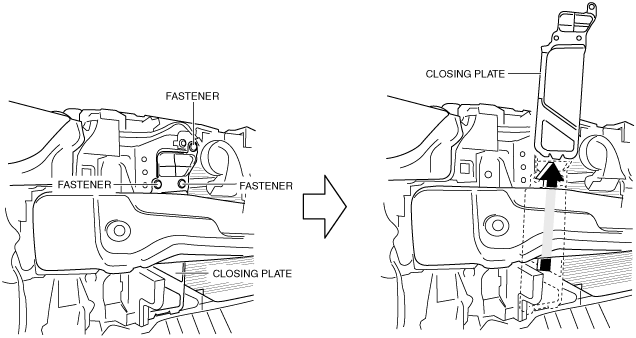
4. Remove the fastener.
am2zzw00009605
|
5. Remove the closing plate.
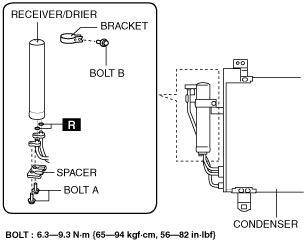
6. Remove bolts A while holding the receiver/drier by hand.
am2zzw00009606
|
7. Remove spacer.
8. Remove bolt B.
9. Remove the bracket.
10. Remove the receiver/drier. Do not allow compressor oil to spill.
11. Install in the reverse order of removal. (See Receiver/drier Installation Note.)
12. Perform the refrigerant system performance test. (See REFRIGERANT SYSTEM PERFORMANCE TEST.)
Receiver/drier Installation Note
1. After replacing the receiver/drier, add compressor oil to the refrigeration cycle.