 |
am2zzw00000405
FRONT DOOR PAD REMOVAL/INSTALLATION
id091100418300
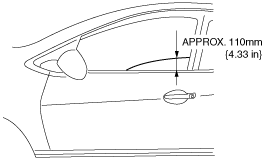
1. To access the glass installation bolt, position the front door glass so that the distance from the top of the front door glass to the upper part of the front beltline molding is approx. 110 mm {4.33 in}.
am2zzw00000405
|
2. Disconnect the negative battery cable.
3. Remove the following parts:
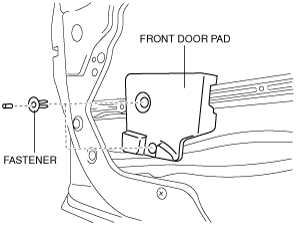
4. Remove the fasteners.
am2zzw00000406
|
5. Remove the front door pad.
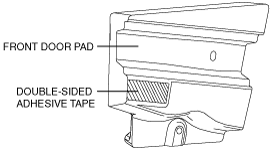
6. Remove the double-sided adhesive tape on the front door pad and body using a utility knife.
7. Install in the reverse order of removal.
am2zzw00000407
|